Fig.1 fig.2 – Sealey SA57 User Manual
Page 2
3.1. Air Supply.
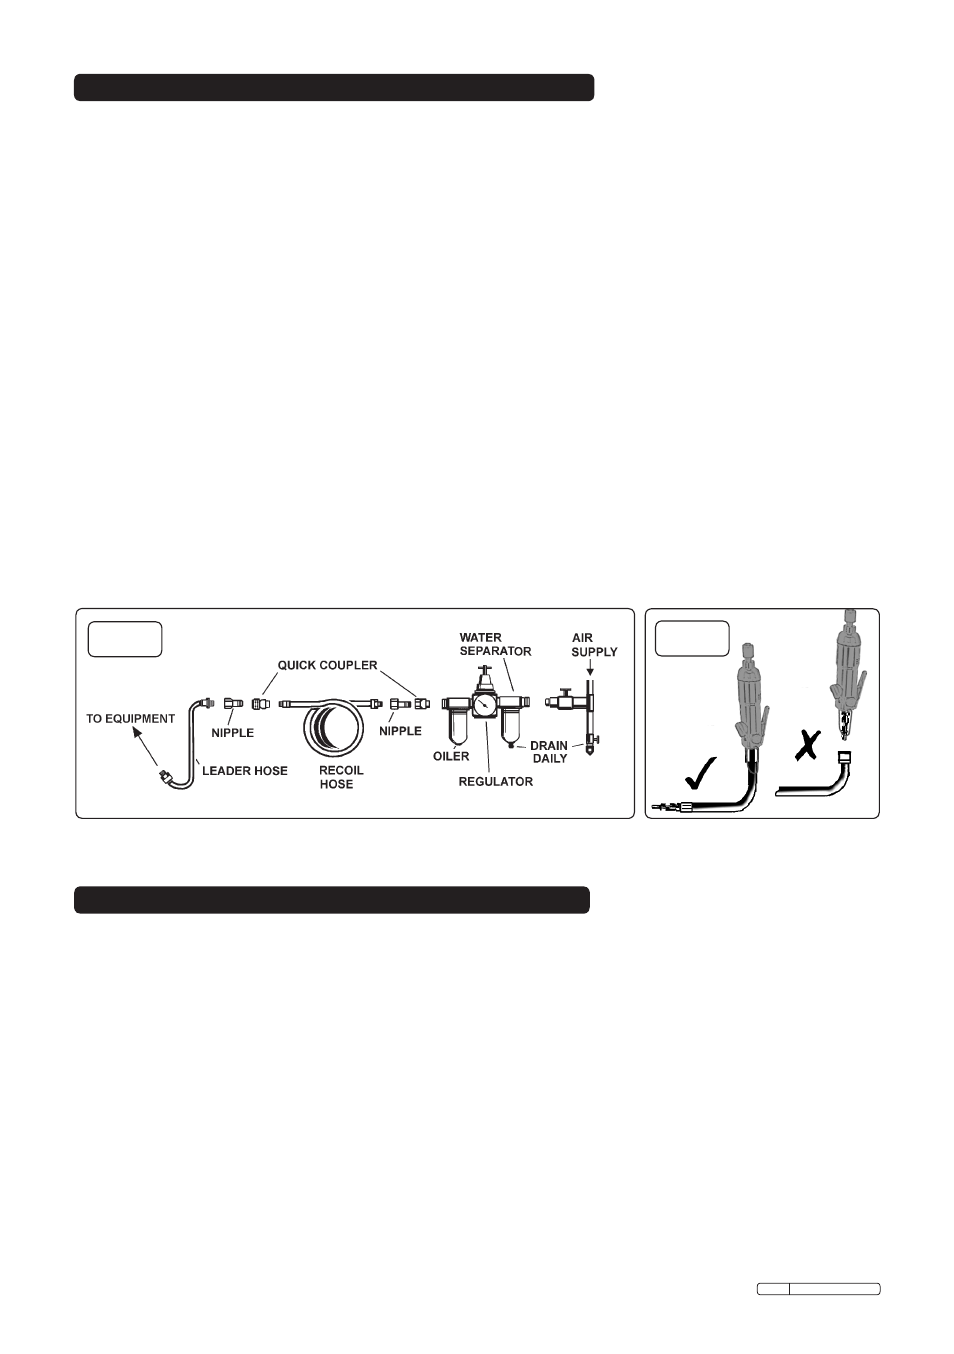
Recommended hook-up procedure is shown in fig .1 .
3 .1 .1 . Ensure tool valve (or trigger) is in the "off" position before connecting to the air supply .
3 .1 .2 . You will require an air pressure of 90psi, and an air flow according to specification .
3 .1 .3 .
WARNING! Ensure the air supply is clean and does not exceed 90psi while operating the
tool . Too high an air pressure and/or unclean air will shorten the product life due to
excessive wear, and may be dangerous causing damage and/or personal injury .
3 .1 .4 . Drain the air tank daily . Water in the air line will damage the tool .
3 .1 .5 . Clean air inlet filter weekly .
3 .1 .6 . Line pressure should be increased to compensate for unusually long air hoses (over 8
meters) . The minimum hose diameter should be 1/4” I .D . and fittings must have the same
inside dimensions .
3 .1 .7 . Keep hose away from heat, oil and sharp edges . Check hose for wear, and make certain
that all connections are secure .
3.2. Couplings.
Vibration may cause failure if a quick change coupling is connected directly to the tool . To
overcome this, connect a leader hose to the tool . A quick change coupling may then be used to
connect the leader hose to the air line recoil hose . See fig .1 & 2 .
3. PREPARING SCREWDRIVER FOR USE
4. OPERATING INSTRUCTIONS
fig.1
fig.2
WARNING! Ensure you read, understand and apply safety instructions before use .
WARNING! Disconnect screwdriver from air supply before changing accessories, servicing
or performing maintenance .
DO NOT allow screwdriver to free run for an extended period of time as this will shorten its
life .
4.1. Pull the chuck collar forward and push driver bit into self locking chuck (fig .3 .A .), release
collar and ensure the bit is secure . To release bit, pull chuck collar forward and pull bit out .
4.2. Connect the screwdriver to the air hose as in Section 3 .
4.3. Check that the screwdriver is set to operate in the required direction . The screwdriver
direction is changed by switching the reverse lever (fig .3 .B) .
4.4. Select from speeds 1, 2 or 3 using rotary switch (fig .3 .C) .
4.5. Depress the trigger to operate the screwdriver .
Original Language Version
SA57 Issue: 2 - 10/11/09