Fig.3, Maintenance, Operating instructions – Sealey S01046 User Manual
Page 3
WARNING! Disconnect sander from air supply before changing accessories, servicing or performing
maintenance. Replace or repair damaged parts. Use genuine parts only. Unauthorised parts may be
dangerous and will invalidate the warranty.
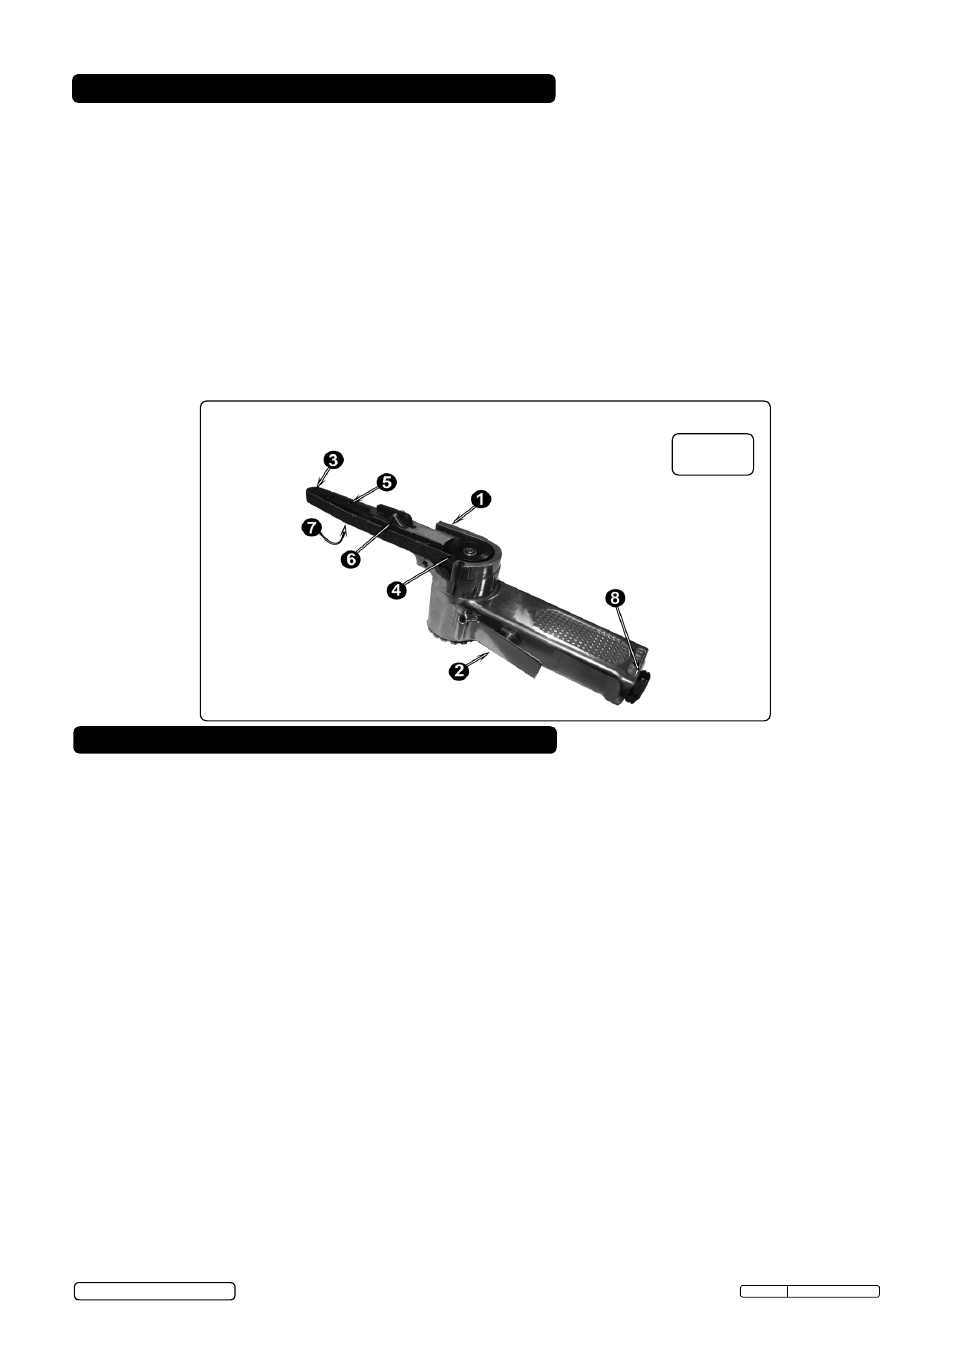
5.1. If the air supply system does not have an oiler lubricate the sander daily with a few drops of a good
grade air tool oil, such as Sealey AtO/500 or AtO/1000, dripped into the air inlet (fig.3.8) before use.
5.2. Clean the sander after use and change belt when required.
5.3. Loss of power or erratic action may be due to the following:
a) Excessive drain on the air supply. Moisture or restriction in the air line. Incorrect size or type of hose
connectors. to remedy, check the air supply and follow instructions in Section 3.
b) Grit or gum deposits in the sander may also reduce performance. If your model has an air filter
(located in the area of the air inlet), remove the filter and clean it. Flush the sander out with gum
solvent oil or an equal mixture of SAE No.10 oil and kerosene. Allow to dry before use.
If you continue to experience problems, contact your local Sealey service agent.
5.4. For a full service contact your local Sealey service agent.
5.5. When not in use, disconnect from air supply, clean and store in a safe, dry, childproof location.
5. MAINTENANCE
Original Language Version
S01046 Issue: 1 - 15/03/13
© Jack Sealey Limited
4. OPERATING INSTRUCTIONS
4.1. Unpack the product and check contents against the parts listed below. If there is anything damaged or
missing contact your supplier immediately.
Contents:
a) S01046 Belt Sander.
b) 3 x Sanding Belt
c) 2 x Hex Key
WARNING! Ensure that you have read and understood the safety instructions in Section 1.
4.2. Loosening clamp bolt (fig.3.1. on the top of sander) allows the angle between the grip and the
belt to be altered to suit the job in hand. After adjustment retighten the clamp bolt.
4.3. Once connected to the air supply the sander is started by squeezing the trigger (2).
4.4. to remove and replace the sanding belt push the idle pulley (3) towards the drive pulley (4) against
spring pressure. the pulley bracket (5) will retract and lock allowing removal/fitting of the belt. When the
new belt is in position release the pulley bracket by pushing in and holding the idle pulley, then press and
hold the tension bar (6) whilst releasing the pressure on the idle pulley.
4.5. the tracking of the belt can be altered by adjusted cross head screw (7).
fig.3
WARNING!– Risk of Hand Arm Vibration Injury.
This tool may cause Hand Arm Vibration Syndromeif its use is not managed adequately.
this tool is subject to the vibration testing section of the Machinery Directive 2006/42/EC.
this tool is to be operated in accordance with these instructions.
This tool has been tested in accordance with: EN ISO 28927- 3: 2009 & BS EN ISO 15744:2008.
Declaration and verification of Vibration Emission figures are in accordance with EN 12096: 1997
Measured vibration emission value (a):
1.1m/s²
Uncertainty value(k):
0.13m/s²
Please note that the application of the tool to a sole specialist task may produce a different average vibration
emission. We recommend that a specific evaluation of the vibration emission is conducted prior to commencing
with a specialist task.