Operation 5. maintenance – Sealey GSA231 User Manual
Page 2
4. opERATIoN
5. MAINTENANCE
fig.2
4.1 Air Supply
recommended hook-up procedure is shown in fig.2 and fig.3.
4.1.1 ensure Air drill trigger is in the "off" position (fig.1) before connecting to the air supply or changing the drill bit.
4.1.2 You will require an air pressure of 90psi, and an air flow according to specification.
WARNING! ensure the air supply is clean and does not exceed 90psi while operating the tool. too high an air pressure and unclean
air will shorten the product life due to excessive wear, and may be dangerous causing damage and/or personal injury.
4.1.3 drain the air tank daily. Water in the air line will damage the tool.
4.1.4 clean the air inlet filter weekly.
4.1.5 line pressure should be increased to compensate for unusually long air hoses (over 8 metres). the minimum hose diameter should be
1/4” I.d. and fittings must have the same inside dimensions.
4.1.6 Keep the hose away from heat, oil and sharp edges. check the hose for wear, and make certain that all connections are secure.
4.2. Couplings.
Vibration may cause failure if a quick change coupling is connected directly to the air drill. to overcome this, connect a leader hose `
to the air drill (sealey ref. AH2r or AH2r/38). A quick change coupling may then be used to connect the leader hose to the air line
recoil hose. see fig.2 & fig.3.
WARNING! Ensure that you read, understand and apply the safety instructions in Section 1.
4.3. Setup
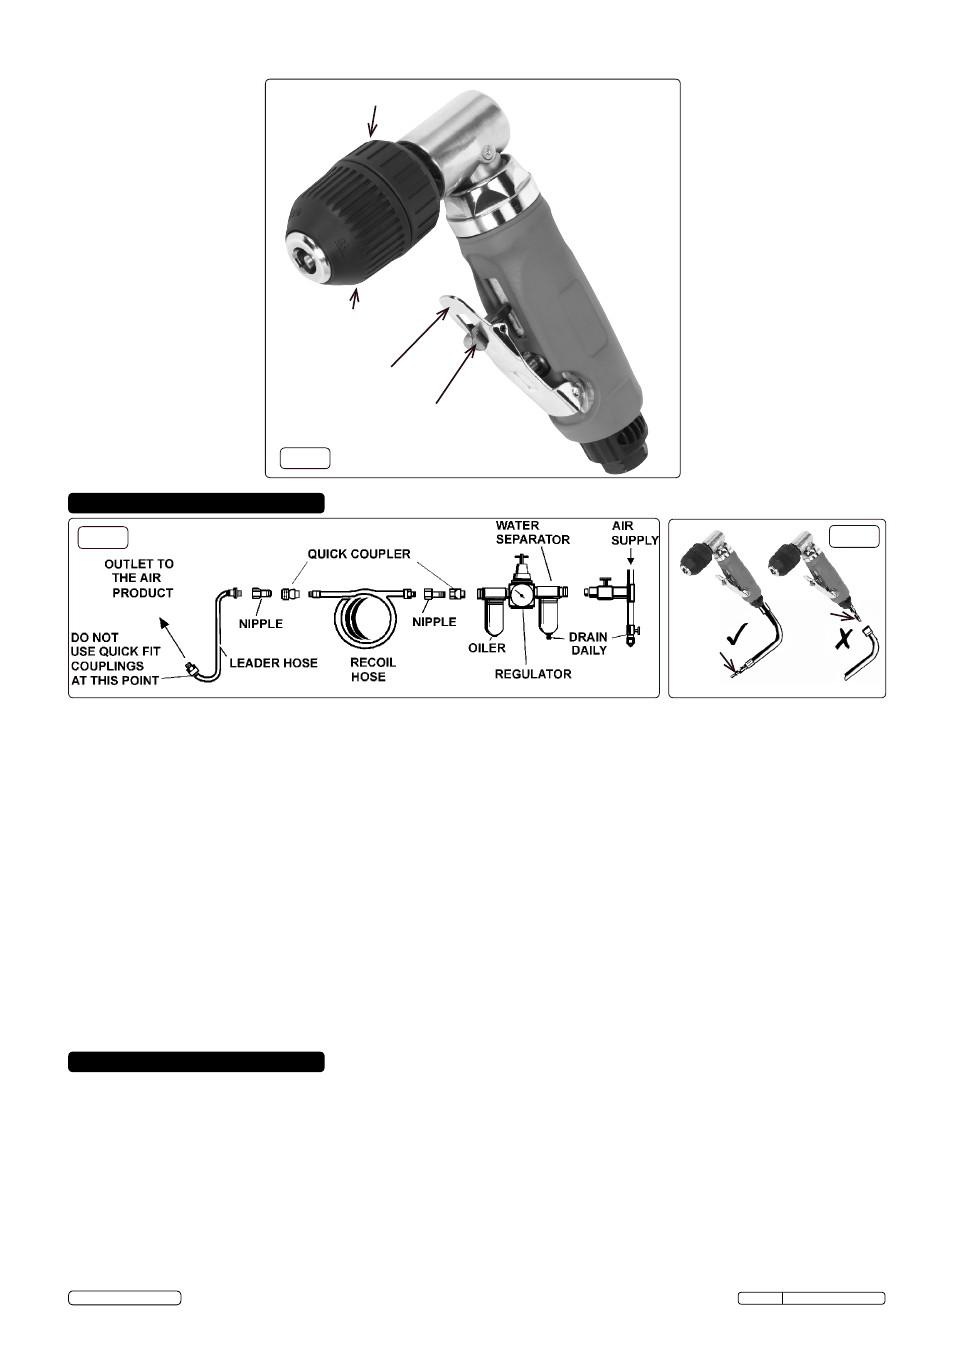
4.3.1. unpack the product and check the contents, see fig.1.
4.3.2. Grip and turn the chuck anticlockwise as indicated in fig.1 to open the jaws; insert the drill bit full depth. Grip and turn the chuck
clockwise to close the 3 jaw chuck and clamp the drill bit.
4.3.3. connect the drill to the air hose as described in fig.2 and fig.3.
4.3.4. Push the safety catch in fig.1 forward and depress the throttle lever to operate the drill.
WARNING! disconnect from the air supply before servicing or performing maintenance. replace damaged parts. Use genuine parts
only. Unauthorised parts may be dangerous and will invalidate the warranty.
5.1 unless the air supply system includes an oiler, lubricate the air drill daily with a few drops of air tool oil, dripped into the air inlet
before use [sealey part no’s. Ato500s (500ml) or Ato1000s (1 litre)].
5.2 loss of power or erratic action may be due to the following:
a) excessive drain on the air line. moisture or restriction in the air line. Incorrect size or type of hose connectors. to remedy, check
the air supply and follow instructions in section 4.
b) Grit or gum deposits in the sander may also reduce performance. Your model has an air strainer (located in the area of the air
inlet), remove the strainer and clean it. Flush the airway out with gum solvent oil or an equal mixture of sAe no 10 oil and kerosene.
Allow to dry before use. If you continue to experience problems, contact your local sealey service agent.
5.3 For a full service, contact your local sealey service agent.
5.4 When not in use, disconnect from the air supply, clean the with a brush or dry cloth. Wipe clean the body with a moist cloth and mild
detergent. store all in a safe, dry, childproof location.
fig.1
Bayonet
Bayonet
fig.3
throttle lever
safety catch
Grip this section
turn this section
to open/close jaws
GsA231 Issue 1 - 05/11/14
Original Language Version
© Jack sealey limited