Epson RX600 User Manual
Page 64
64
Replacing Ink Cartridges
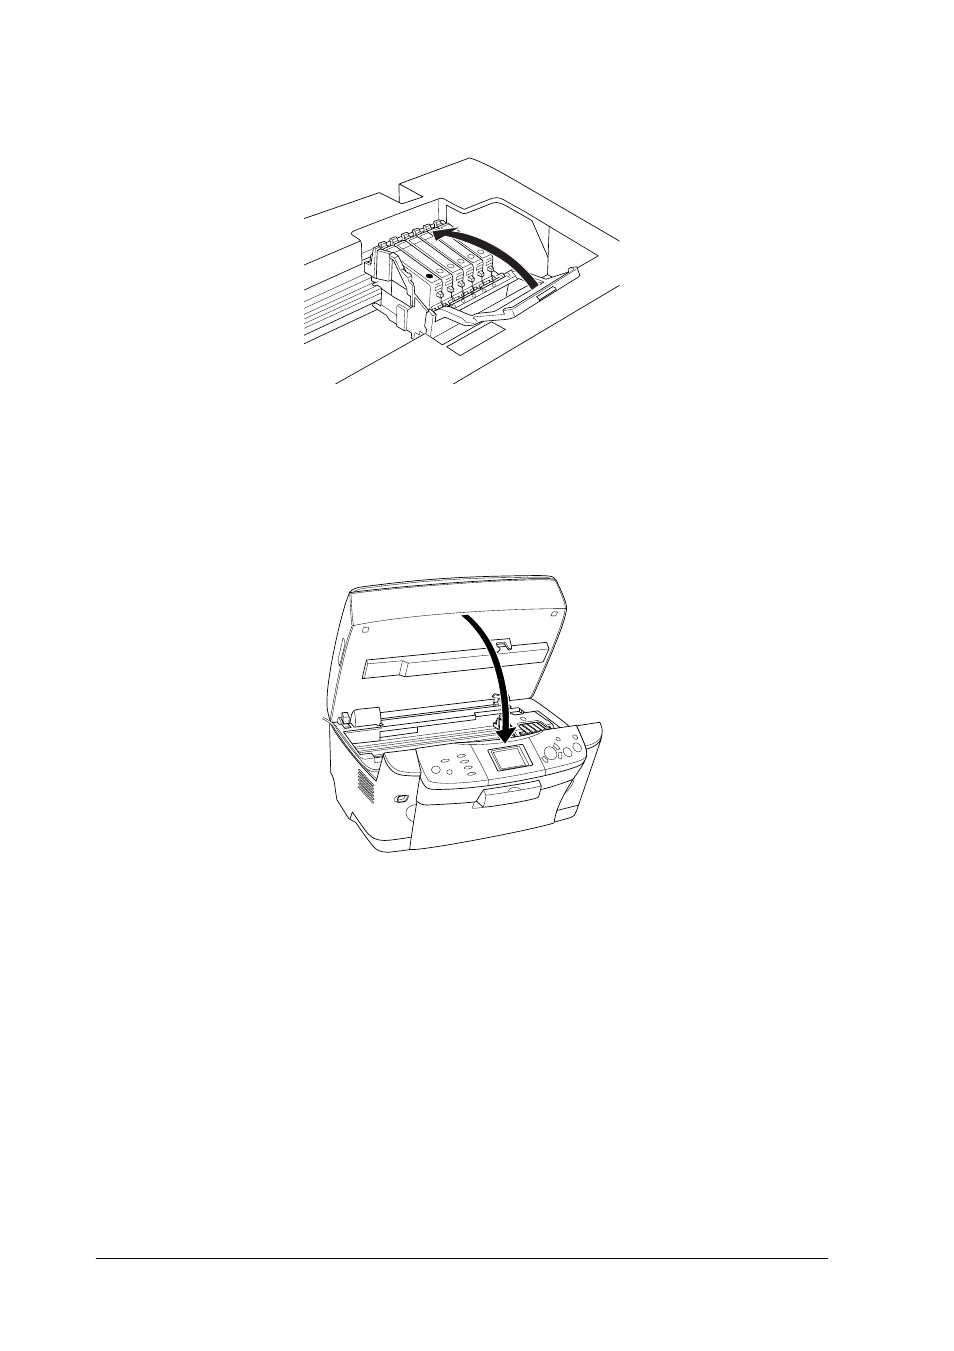
7.
Close the cartridge cover.
Note:
If you find it difficult to close the cartridge cover, see step 6 to make sure
the ink cartridge has been installed correctly.
8.
Close the scanner unit.
The print head moves to its home position, and ink charging begins.
9.
When Ink cartridge replacement completed appears on the LCD
panel, press the OK button.
c
Caution:
Never turn off this product while ink charging in progress;
Otherwise, this will cause incomplete charging of the ink.
Note:
If you install a used ink cartridge with ink level already low, it may become
empty right after the replacement. In this case, replace the ink cartridge
with a new one.
See also other documents in the category Epson Printers:
- Stylus Pro 7800 (11 pages)
- Stylus Pro 4000 (49 pages)
- Stylus Photo R300 (2 pages)
- Stylus Pro 7000 (147 pages)
- AcuLaser C3000 (316 pages)
- Stylus Pro 7900 (24 pages)
- Stylus Pro 4450 (21 pages)
- 1000 (272 pages)
- T034120 (4 pages)
- T580300 (4 pages)
- 300 (91 pages)
- B 510DN (190 pages)
- B 510DN (218 pages)
- Stylus NX510 (8 pages)
- Stylus Photo RX580 (95 pages)
- T549300 (4 pages)
- AculaserCX11NF (5 pages)
- B 500DN (168 pages)
- 480SXU (24 pages)
- 4500 (317 pages)
- STYLUS RX500 (99 pages)
- 2100 (13 pages)
- Stylus NX215 (2 pages)
- T098320 (4 pages)
- T041020 (4 pages)
- R210 (8 pages)
- All-In-One Stylus Photo RX600 (164 pages)
- 777I (53 pages)
- T033120 (4 pages)
- Stylus CX7000F (8 pages)
- 60 (113 pages)
- T034220 (4 pages)
- WorkForce 40 Series (36 pages)
- T054220 (4 pages)
- Stylus CX3200 (11 pages)
- Stylus CX7800 (18 pages)
- T060220 (4 pages)
- 2500 (180 pages)
- AcuLaser CX11N (32 pages)
- AcuLaser CX11N (4 pages)
- 2000P (16 pages)
- T606600 (4 pages)
- Stylus CX6000 (18 pages)
- FS-4000DN (2 pages)
- MSDS T544700 (4 pages)