7 time code applications, 1 stand-alone viper-venom configuration – Grass Valley DCR 4000 User Manual
Page 17
v4.0
DCR 4000 User’s Guide | Installation
1-11
1.7
Time code applications
1.7.1
Stand-alone Viper-Venom configuration
Only one Viper plus Venom is being used. A real time clock is available inside the Venom. This
clock is used to create the SMPTE time code. The clock can be adjusted in the menu TIME &
DATE on the LCD screen.
1.7.2
Multiple Viper-Venom configuration with single Lockit box
In this configuration, more than one Viper-Venom combination is used. In this case, the
method mentioned above is not accurate enough. An external master clock is needed to
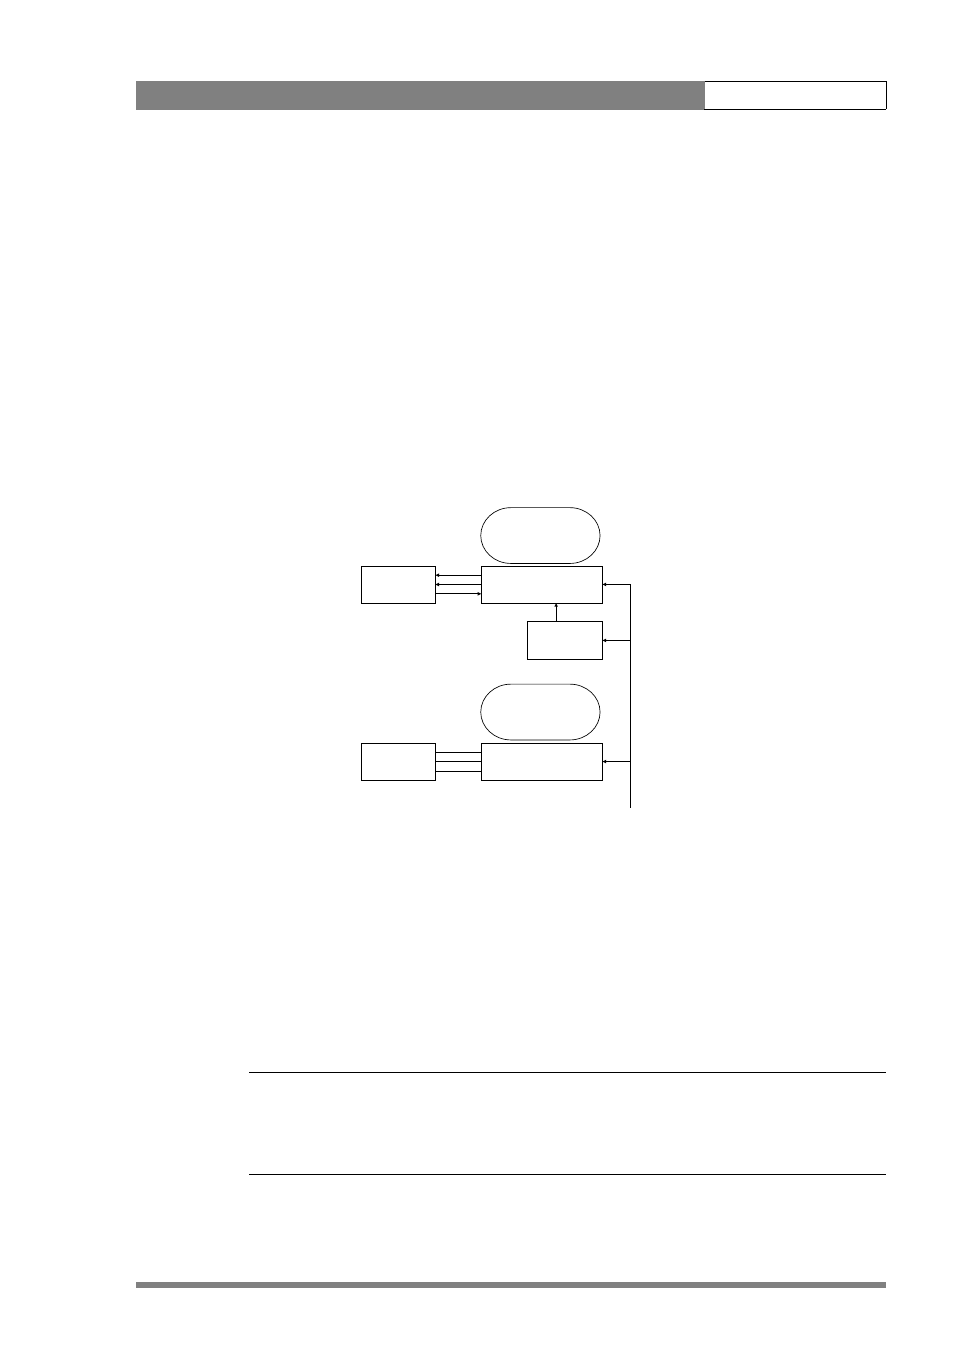
synchronize the time codes of the Venom recorders. The diagram below shows the
mechanism that is available:
A Lockit box is connected to the first camera system containing a Viper and a Venom recorder.
Both the Lockit box and the Venom docking plate receive a genlock signal on their reference
input. The Lockit box outputs the time code (according to SMPTE 266M standard) to the
Venom via a connector on the docking plate. In this way the Venom takes over the time code
of the Lockit box.
The LTC input is removed and connected to the docking plate of the next camera system and
this one takes over the time code of the Lockit box. The Venoms in system 1 and system 2 are
now running with the same time code. In this way the time code can be synchronized in a
multiple camera environment.
☞
Note
The time code is lost if the Flashpak is switched off. It needs to be jammed again after being
switched on. Refer to chapter 2.1.2 to find more information about the external time code
status.
VENOM
Docking Kit
Lockit
VIPER 1
Docking Kit
VIPER 2
Gen-lock
LTC in
Power
Gen-lock
2xHD-SDI
VENOM