2 assembling the docking kit – Grass Valley DCR 4000 User Manual
Page 13
v4.0
DCR 4000 User’s Guide | Installation
1-7
1.5.2
Assembling the Docking Kit
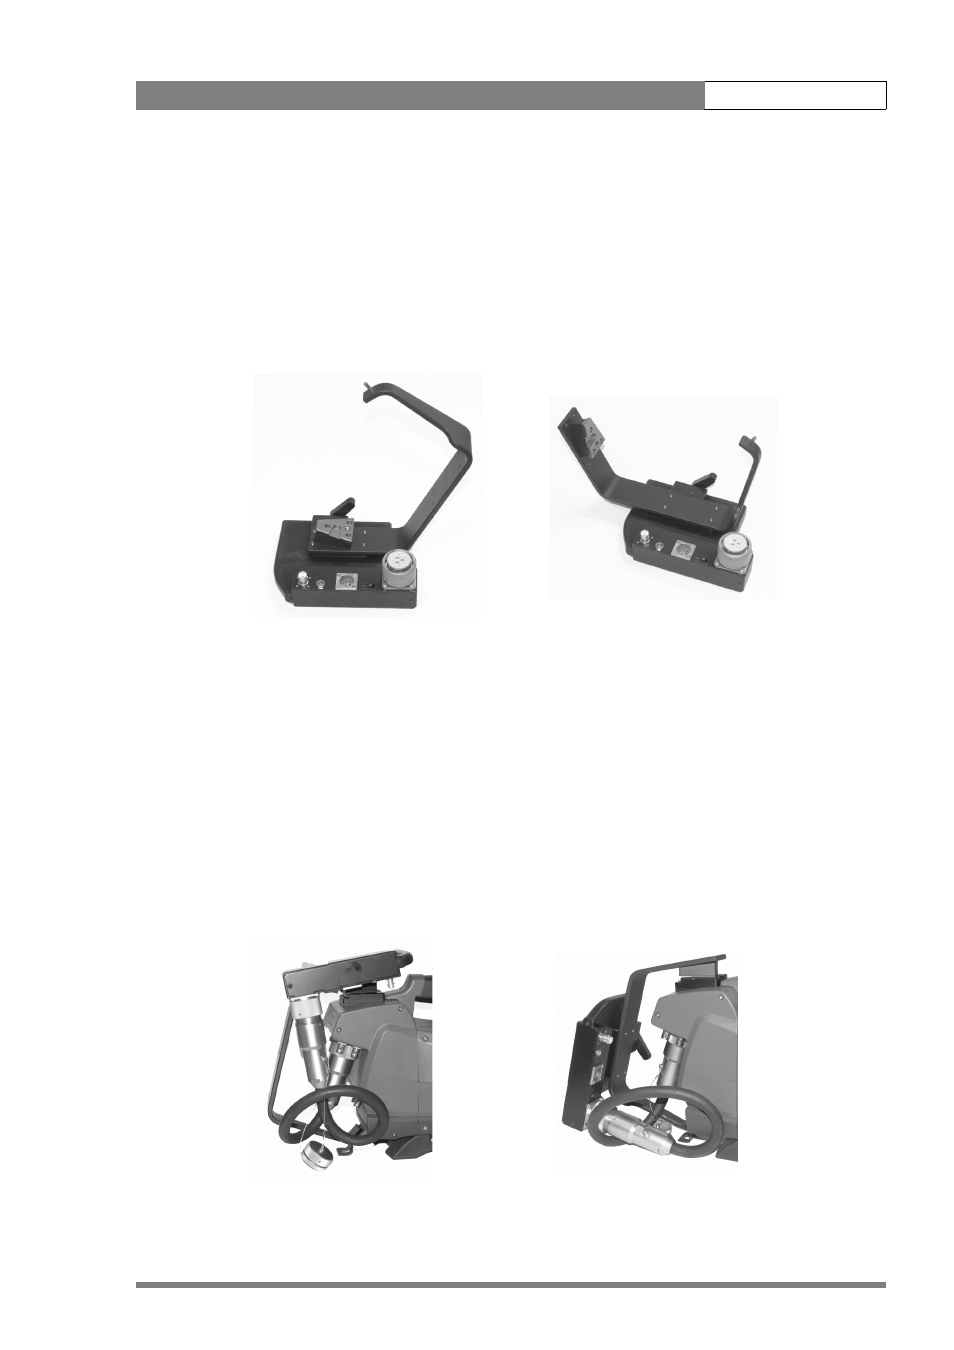
The Docking Plate can be mounted on the Mounting Frame in either of two positions. It is
fixed in place using the four screws supplied.
To mount the Venom on top of the Viper, the Docking Plate is fixed using the four holes on the
Mounting Frame nearest the V-Block. If you wish to mount the Venom behind the camera,
then the Docking Plate is fixed using the four holes at the rear of the Mounting Frame. Check
the orientation of the plate relative to the camera position. The Multicore connector must be
towards the rear or base of the mounting frame.
Connect the cable to the camera before attaching the Mounting Frame to the camera. Insert
the connector fully, aligning the red dots on both parts, and turn the locking ring to firmly hold
it in place.
Attach the Mounting Frame to the camera by first inserting the locating pin in the hole on the
camera mounting foot, then push the V-plate firmly forward into the camera's V-block until the
locking bar clicks into place.
Connect the multicore cable to the connector on the Docking Plate. The red dots must be
aligned and the cable pushed fully into the connector.
To correctly align the cable it is necessary to twist the cable so that it forms a loop. This
ensures that the cable does not have too sharp a corner and does not put strain on the
connectors. The following pictures show how the cable is routed in each case.
Top mounting position
Rear mounting position