Exporting a dashboards, Importing a dashboard, Exporting a dashboards importing a dashboard – Grass Valley iTX SmartClient v.2.6 System Administrator Guide User Manual
Page 43
39
iTX SmartClient
System Administrator Guide
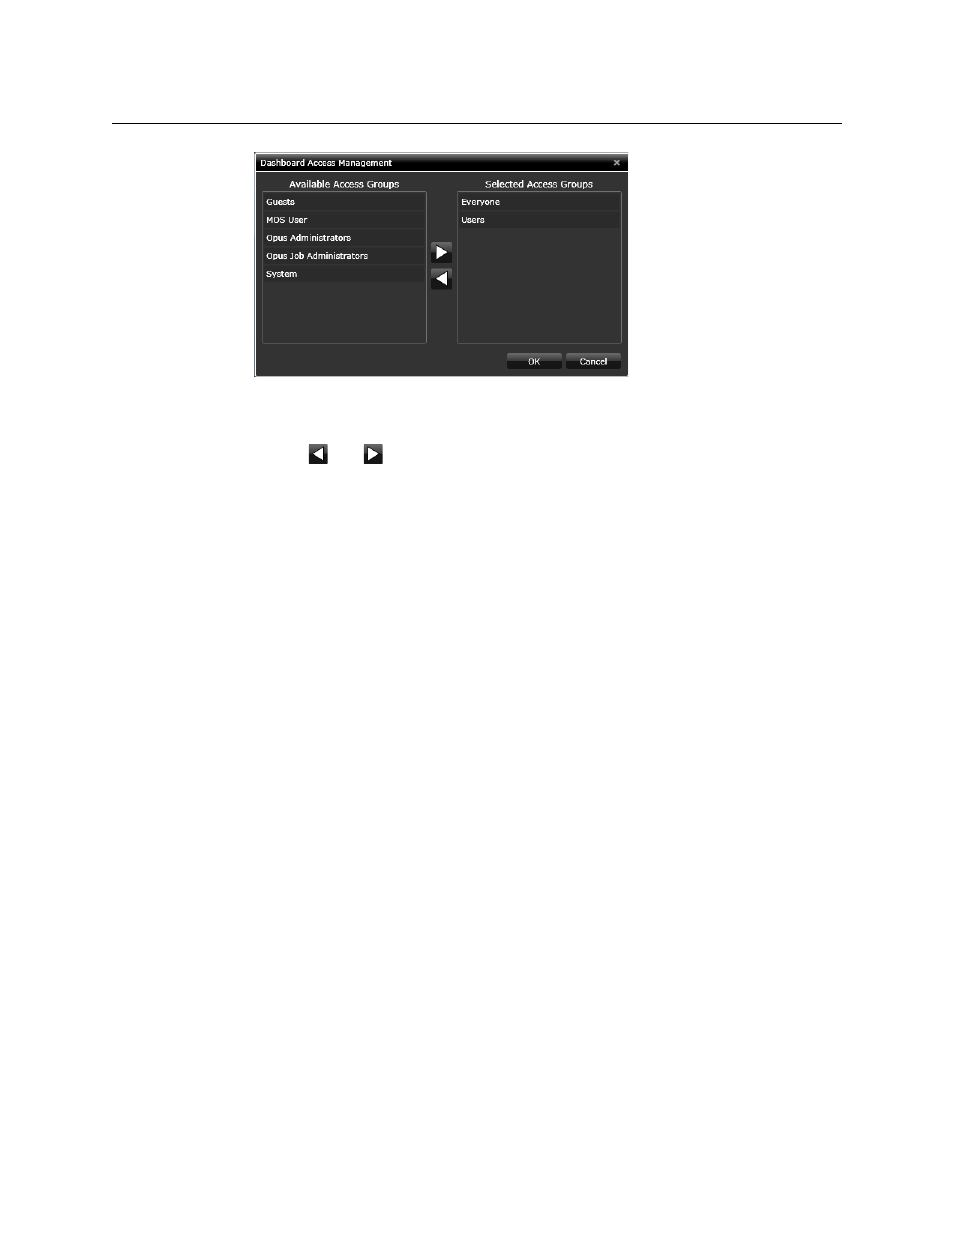
The Dashboard Access Management pop-up dialog is divided into two sections. On the
left side is a list of all available access groups. On the right side is a list of selected access
groups assigned to the currently loaded Dashboard.
4 Use the
and
buttons to move groups of users between the Available Access
Groups and Selected Access Groups columns. Those in the Selected Access Groups
columns will be able to access the current dashboard.
5 Click OK to confirm your selections and close the Dashboard Access Management
dialog.
Exporting a dashboards
Dashboards can be exported for use in another, unconnected SmartClient system or to use
as a back up. When exported, dashboards are saved as XML-based
.scdb
files.
To export your current dashboard:
1 Right-click in a blank part of the desktop to load the Dashboard Management menu
pop-up.
2 Select Export Dashboard. A standard Windows Explorer dialog opens.
3 Browse to the location you wish to save the
.scdb
file to and enter a filename.
4 Click Save.
Importing a dashboard
You can import dashboards that have been exported as
.scdb
files. The Dashboard you are
importing will immediately replace your current dashboard, so you need to make sure that
any unsaved changes to your current Dashboard are saved prior to importing a new one.
To import a Dashboard:
1 Right-click in a blank part of the desktop to load the Dashboard Management menu
pop-up.
2 Select Import Dashboard. A standard Windows Explorer dialog opens.
3 Browse to the location of the
.scdb
file you require and click Open. The dashboard will
be imported to your SmartClient.
4 Right-click in a blank area of the Dashboard and select Save Dashboard.