Module placement in the geckoflex frame, Rear module installation – Grass Valley 8949MDA-CFR v.1.0.X User Manual
Page 11
8949MDA-CFR and 8949MDA-SFR Instruction Manual
11
Installation
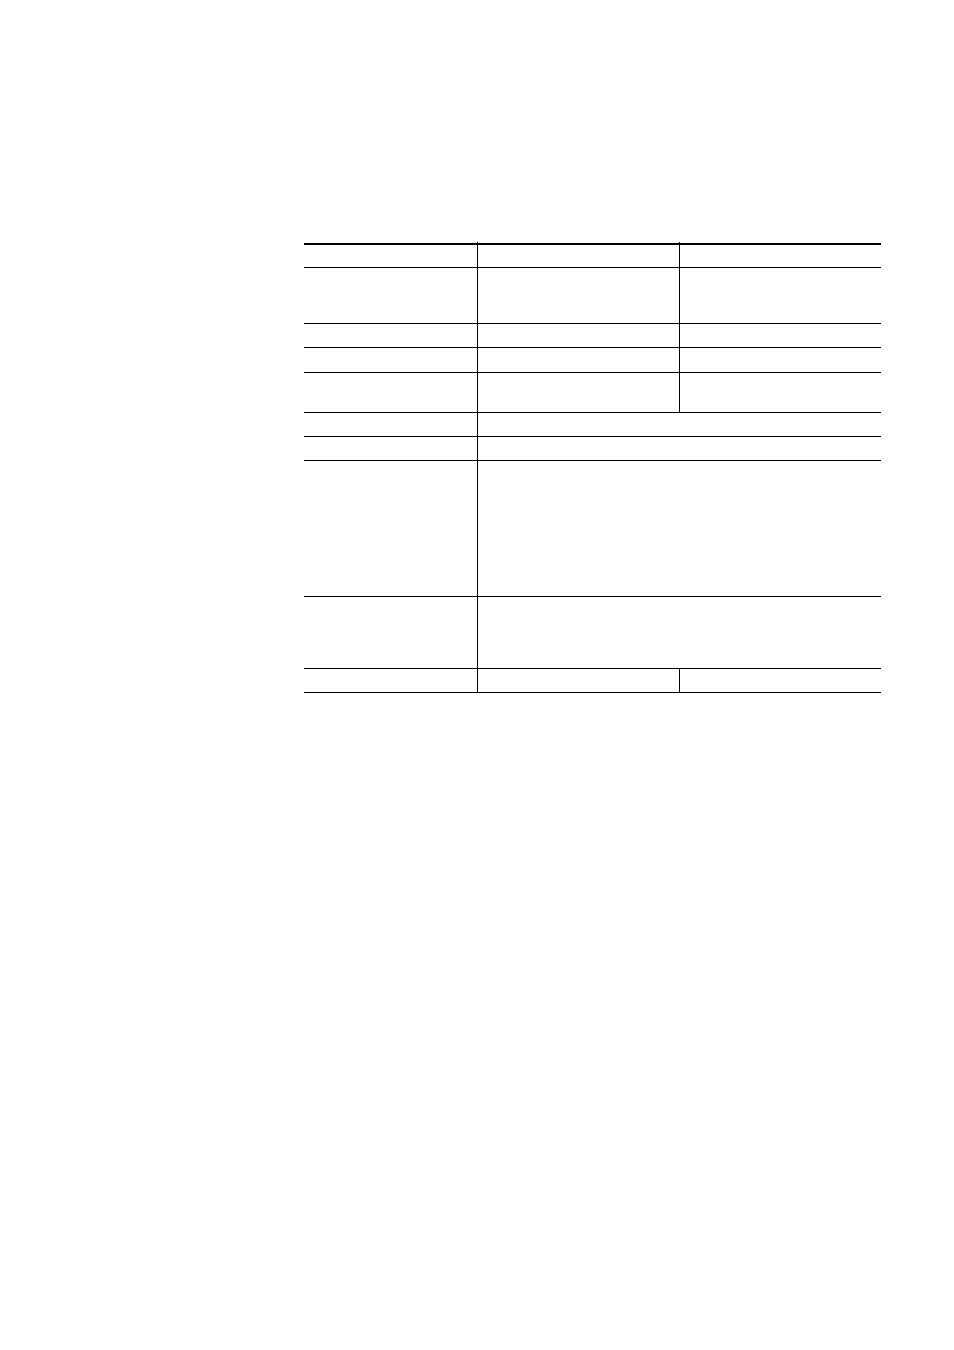
gives the parameter to be set with the onboard switches of the 8949MDA
modules.
Module Placement in the GeckoFlex Frame
There are ten rear and front slot locations in the 2 RU frame to accommodate either
analog or digital modules. The 8949MDA-CFR or 8949MDA-SFR module can be
plugged into any one of the GeckoFlex frame slots.
Note
As the module can be changed when the GeckoFlex is powered on,
before removing the cover, please put an anti-static bracelet tied to a
metal part of the frame.
Rear Module Installation
Note
Never completely remove the screws which maintain the retainer strips.
To install a rear module into the frame, follow these steps:
1.
Unscrew the blank rear adapter cover without removing the screws, see
2.
Remove the two retainer strips and the blank rear adapter cover using a
needlenose plier.
Table 2. Switch S1 and S2 Positions
Position
0
1
CONFIG MODE
Local mode: the other switches must
be manually positioned
Remote mode: the other parameters
wil be positioned by the web pages
via the NetConfig application
FACTORY MODE
OFF
For maintenance only
TEST MODE
OFF
For maintenance only
TX OPT MODE
OFF
ON (enables the transmission through
the fiber optic submodule)
16X9 I 4X3
UNUSED
SIDE MARKERS
UNUSED
FORMAT
Selection of the incoming format:
0000 = AUTO
0001 = 1080I/50
0010 = 1080I/59.94
0011 = 720p/50
0100 = 720p/59.94
0101 = 480i/59.94
0110 = 576i/50
INPUT SEL
coax in
optic 1
optic 2
Selection of the input connectors:
00
01
10
COMPOSITE SETUP
OFF
ON