Iii - a, Ssembly and, Nstallation – SP Controls SmartPanel User Manual
Page 57: Mart, Anel, Ssembly
SmartPanel Configuration and Installation Guide
Page 53
© 2002-8 SP Controls, Inc. 930 Linden Avenue South San Francisco CA 94080
w
ww.spcontrols.com
P
ART
III - A
SSEMBLY AND
I
NSTALLATION
This section details the assembly and installation of the SmartPanel.
S
MART
P
ANEL
A
SSEMBLY
Inserting Legends
Legends identify the source
devices selected by the
Panel selection buttons. A
bag of Legends identifying
common source devices was
included with your Panel
(see Table 1).
Blank Legends are included
so you can make your own,
should you find not a
preprinted Legend for one of
your source devices.
The font used on the
included labels was 14 pt
TrueType™ Impact.
Note: The Panel should not
be powered during this
step!
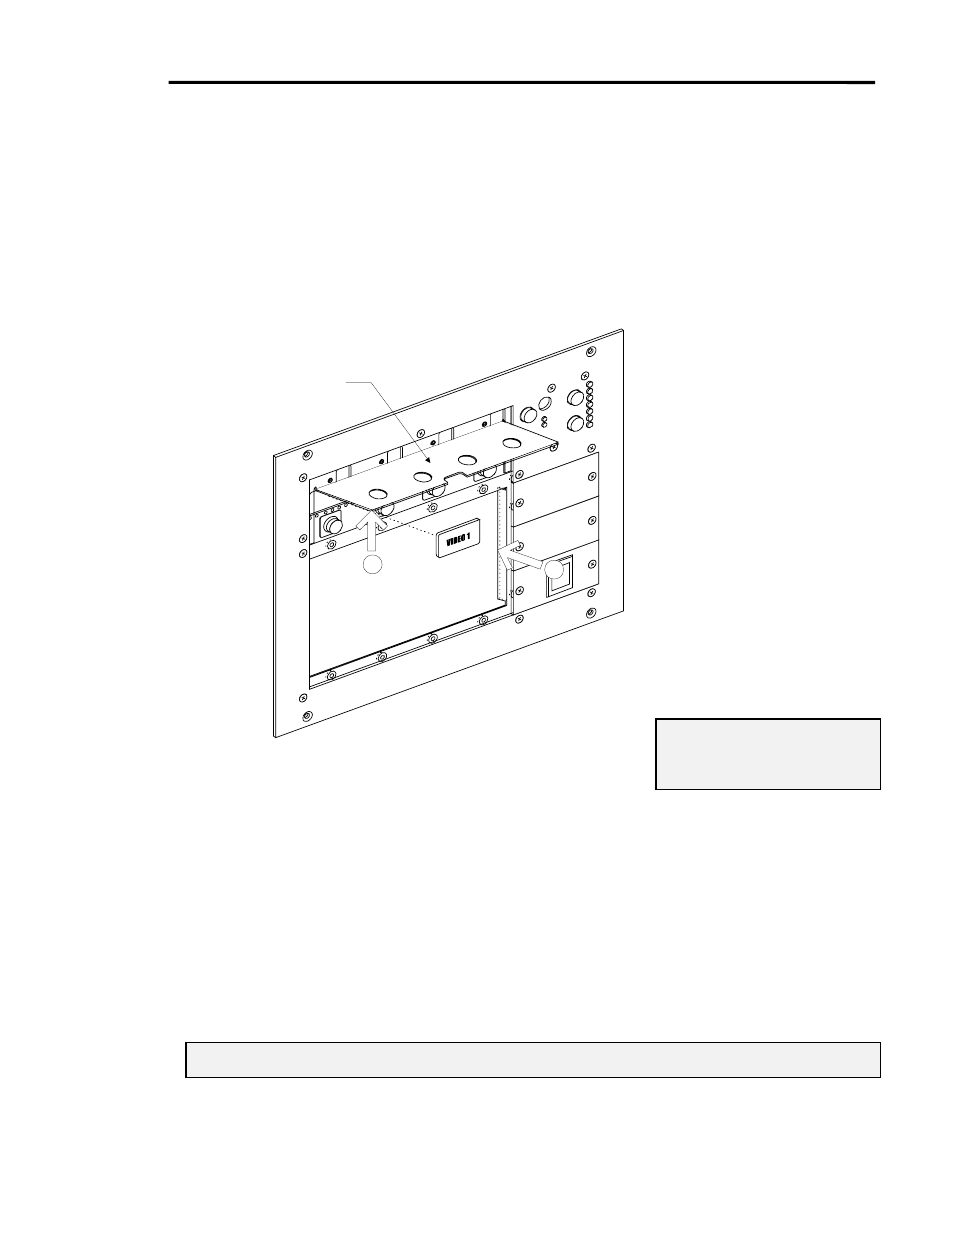
It is easiest to insert Legends with the Panel lying flat on a table. Before beginning, remove the
protective film from each Legend to be inserted.
1.
Taking care not to bend it too sharply, lift the clear plastic window. If you bend the plastic too
far, it may develop a crease.
2. Slide each Legend into its slot. Make sure it is correctly oriented!
3. If you are using any blank Modules, remove the rubber button where the blank is to go;
otherwise, you will not be able to screw it down properly.
Note: You may find it easiest to remove the four selection buttons while inserting the Legends.
1
2
Clear legend window
Figure 23: Inserting Legends. Do
not bend sharply!