Specifying a com port – SP Controls SmartPanel User Manual
Page 11
SmartPanel Configuration and Installation Guide
Page 7
© 2002-8 SP Controls, Inc. 930 Linden Avenue South San Francisco CA 94080
w
ww.spcontrols.com
CA
UT
IO
N
"I
NDO
O
R
US
E
ONLY
"
POWER
RELAYS
PROJECTOR CONTROL
CONFIGURATION
PORT
RS232
IR/SERIAL
PWR
ON
MAINT.
PWR
ON
MOM.
PWR
OFF
MOM.
1A
1B
3A
3B
2A
2B
4A
4B
6A
6B
5A
5B
7A
7B
SELECTION
(EXT. SWITCHER CTRL)
4
3
2
1
RX
GN
D
CT
S
RT
S
TX
+
12V
GN
D
GN
D
+
12V
DC
500mA MAX. CURRENT
AUDIO FOLLOW VIDEO
SWITCHER EXPANSION
ACCESSORY
BUS
IR
/SER
SEN
SE
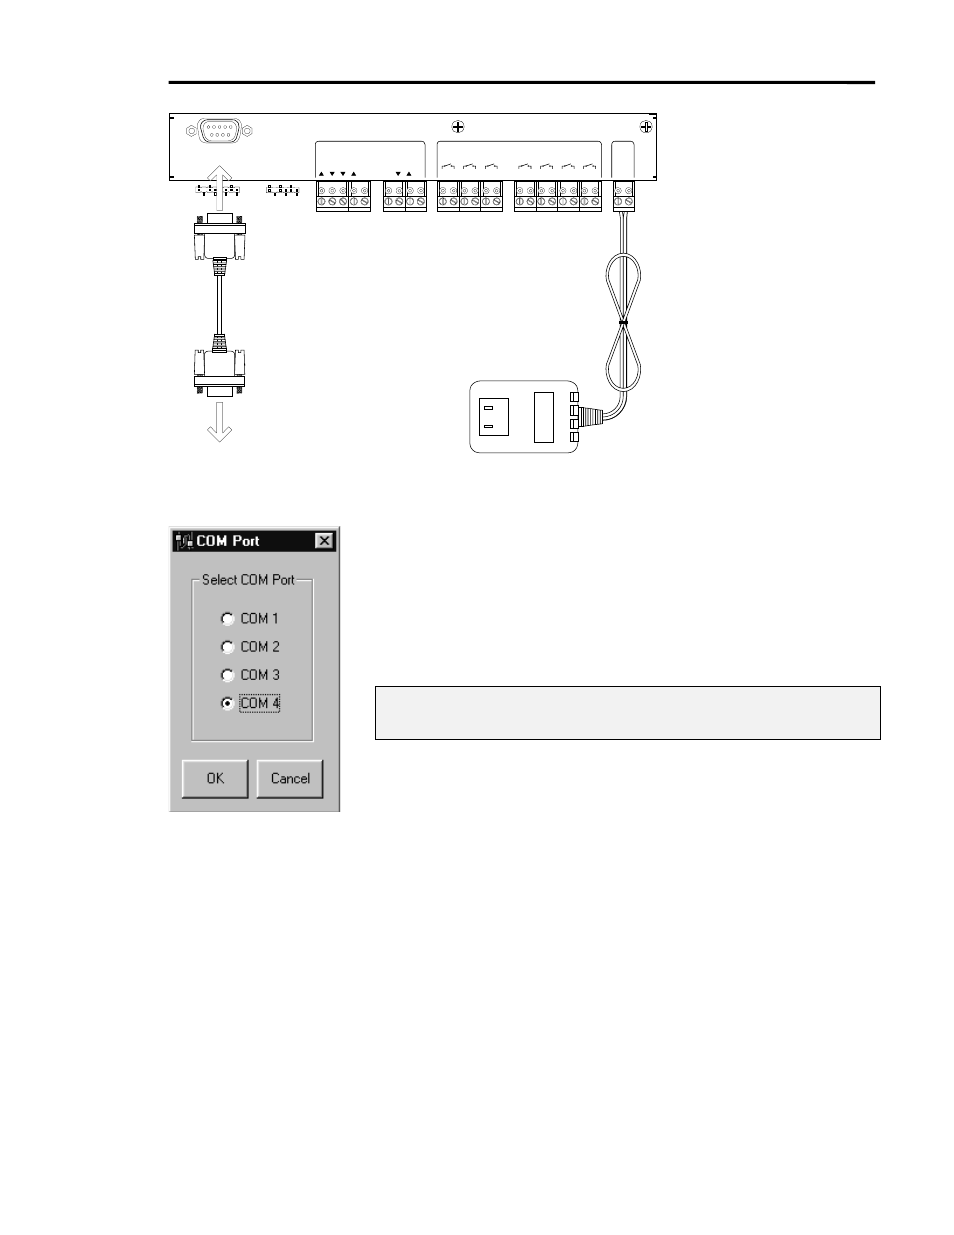
To Com Port
on PC
RS-232 Cable
(DB9 Male to Female - straight through)
not included
12VDC Regulated Power Supply
included
Figure 3: Connecting the SmartPanel to your computer
Specifying a Com Port
Before configuring the SmartPanel you must specify the Com Port
you are using to connect to it.
When you run the Configuration Utility for the first time the dialog
shown in Figure 4 will appear. Select the Com Port you are using and
press OK.
Note: The dialog does not allow you to select a Com Port that is
disabled or being used by another program.
The Utility remembers the port selected and uses it in subsequent
sessions. If you later attach to the Panel through a different port,
change the active port with the Configuration Utility’s
Communications pulldown.
After a Com Port is selected, the Utility should appear as shown in
Figure 5.
Figure 4: Selecting
the Com Port