Installation – Montigo RX200 User Manual
Page 5
Installation
Page 5
XT0016 - 092214
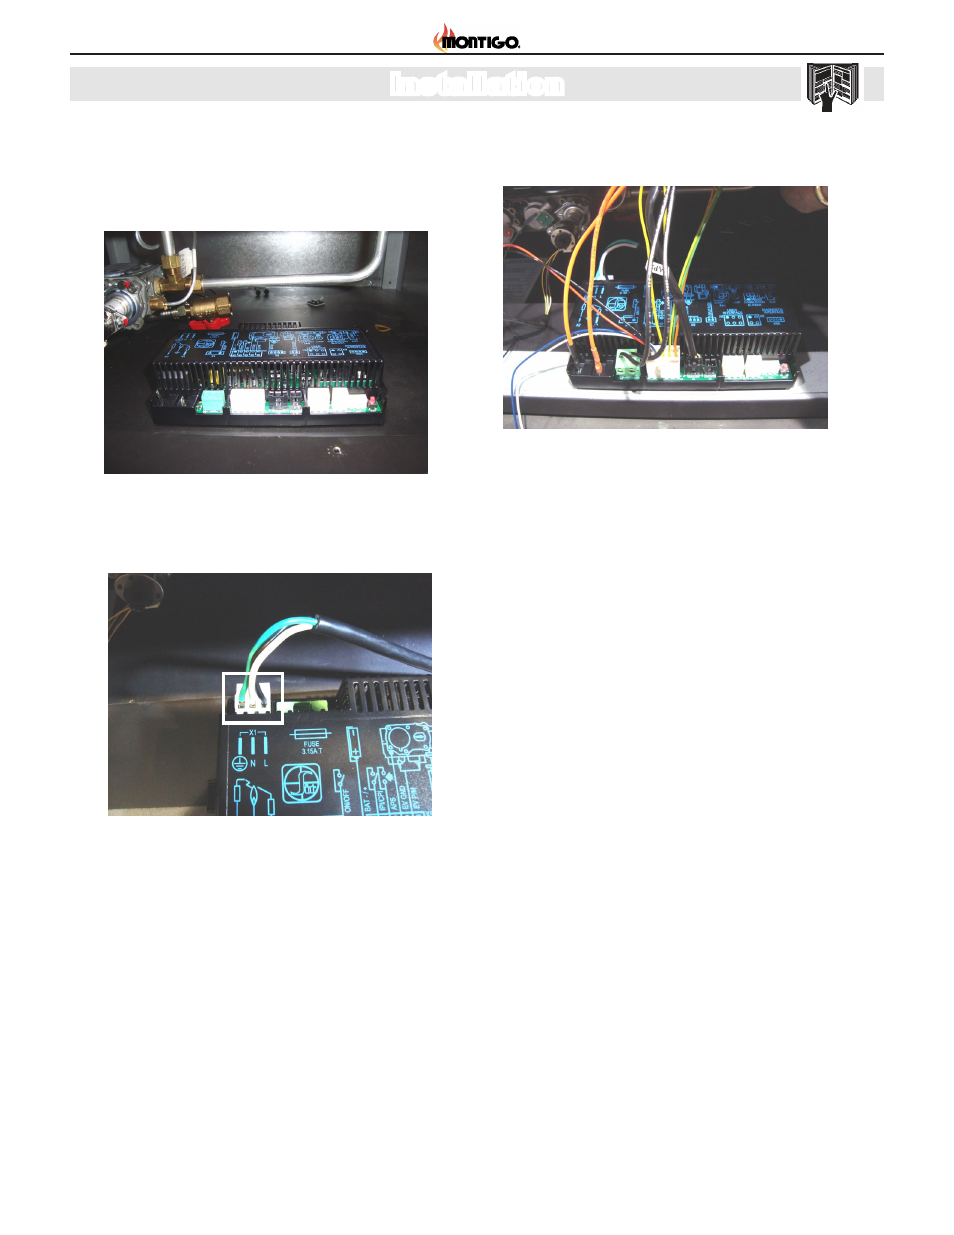
C. Control Module Installation:
1. Position the new control module on the fireplace floor ( the red
switch "SW1" must be towards the front of the fireplace).
2. Connect the Power Plug to X1
Figure 14
New Control Module
3. Connect the Spark and sensor wires to X2 and X3
4. Connect the Manual ON/OFF switch to X4
5. Connect the Valve Harness to X5
6. Connect the Stepper motor harness to X6
7. Attach the Control module to the bottom of the
firebox using the velcro strips supplied.
Figure 15
X1 plug on control module
Figure 16
X2 > X6 plugs on control module
See also other documents in the category Montigo For Home:
- H36PVN (40 pages)
- H42VO (22 pages)
- L38DF (40 pages)
- L42DF (40 pages)
- HL34DF (42 pages)
- P42DF (34 pages)
- R820 (44 pages)
- P52DF (34 pages)
- Flush Face (DF) Door Removal (1 page)
- Flush Face (DF) (14 pages)
- B38DV (26 pages)
- L52DF-ST (34 pages)
- HL38DF ST (38 pages)
- HL42DF ST (36 pages)
- RP620 (48 pages)
- HL38SVO-ST (20 pages)
- HP38DF-CLCR (38 pages)
- HP38DF PFC (38 pages)
- HP38DF PRC (38 pages)
- R620-ST (38 pages)
- DHS (22 pages)
- R324-ST (22 pages)
- 34FID Traditional (70 pages)
- 1001-A (6 pages)
- 34FID - Linear (64 pages)
- 1001 TH-A (9 pages)
- PF2RK (4 pages)
- RX100 (6 pages)
- H42 (2 pages)
- RX82 (12 pages)
- HFK-Series Cross-Flow Blower (2 pages)
- P-Series Fireplace Surround (2 pages)
- RX88 (20 pages)
- HFK50R (2 pages)
- RFK1080 (2 pages)
- HFK50 (4 pages)
- IOSK3 (2 pages)
- IOSK4 (2 pages)
- IOSK5 (2 pages)
- IOSK6 (2 pages)
- RFK3004 (4 pages)
- RFK3004R (4 pages)
- EPVRW (6 pages)
- EPVRR (6 pages)