Preparations for recording using digital signals, 16 english, Other functions – Marantz PS-17 User Manual
Page 26
16
ENGLISH
Example 1:
Digital recording onto an MD from CD:DIG.4 while playing and
listening to a DVD using the DVD:DIG.5 input
(The digital signals have already been connected as in the
connection example.)
1.
Press the function button (DVD) to select DVD. In this example,
DIG.5 has already been set to DVD.
2.
Proceed with the steps for "Preparations for recording using
digital signals," and select DIG.4.
The COPY indicator now lights.
3.
Set the digital input for the MD player, and set the player to a
recording standby status (such as synchro REC).
For further details, refer to the MD player's User Guide.
4.
Play the disc in the CD player.
Recording now starts.
OTHER FUNCTIONS
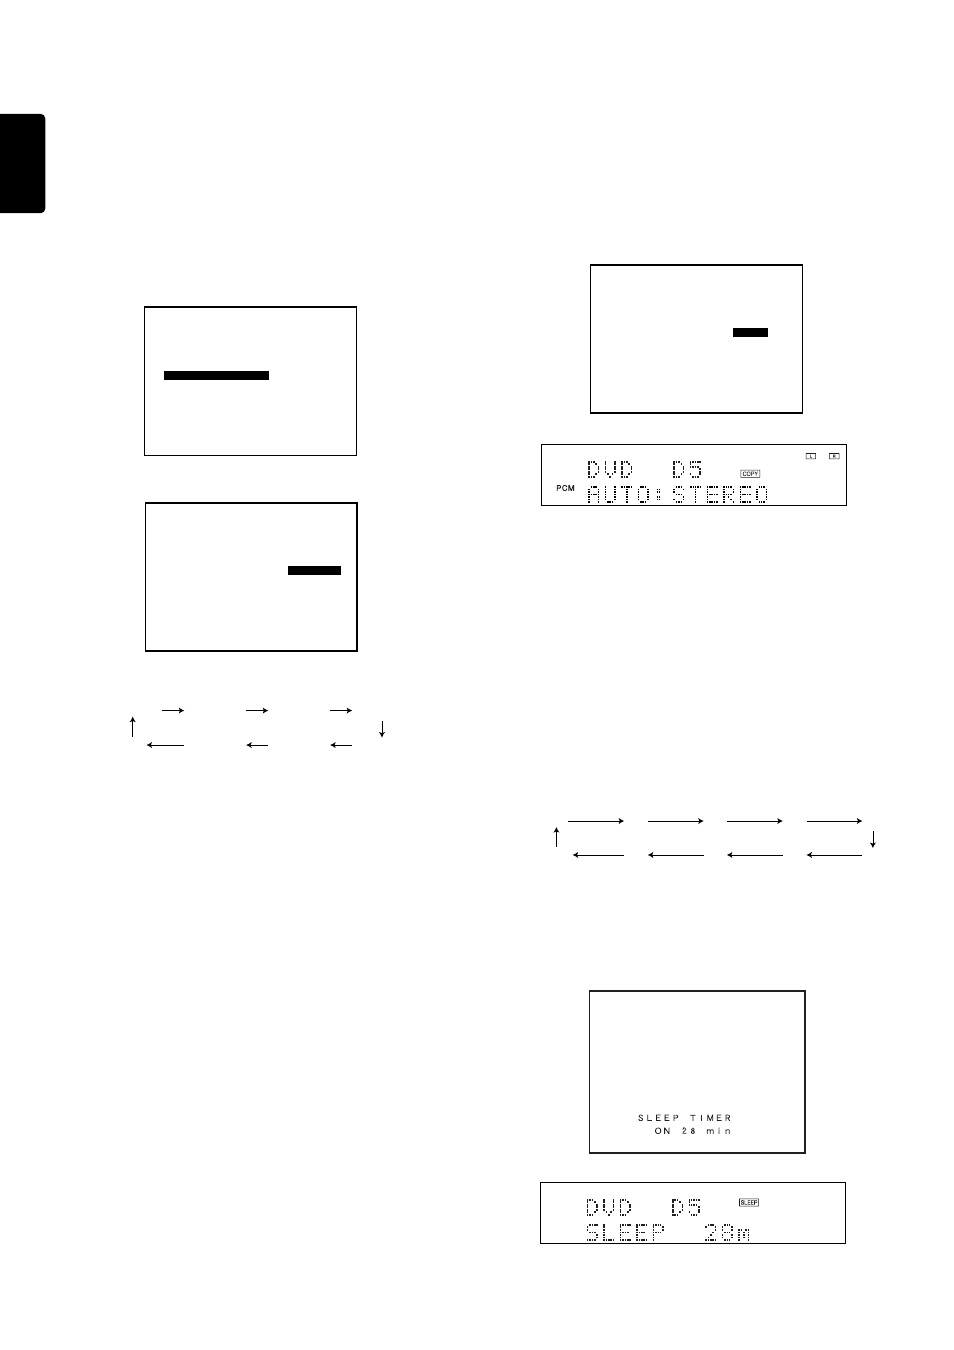
SETTING THE SLEEP TIMER (ONLY REMOTE
CONTROL UNIT)
Set the sleep timer while the power is turned on.
1.
Turn the power ON and press the
SLEEP
button
⁄7 in the AMP
MODE.
2.
Press the
SLEEP
button
⁄7 the number of times to set the desired
sleep time.
Each press of the
SLEEP
button
⁄7 changes the display in the
following order:
“SLEEP” stops blinking and lights steadily.
While the sleep timer is activated, the remaining time can be
displayed for approx. 2 seconds by pressing the
SLEEP
button.
To cancel the sleep timer, press the
SLEEP
button
⁄7 and then press
the
CLEAR
button.
10
20
30
40
50
OFF
90
80
70
60
S Y S T E M
S E T U P
1 / 2
M A I N
I N
S W
:
C O U P L E D
6 C H -
I N P U T
:
6 c h
D I G I T A L
O U T
:
D I G 4
O S D
I N F O
:
E N A B L E
S . P . C .
:
D I S A B L E
R E T U R N
N E X T
E X I T
PREPARATIONS FOR RECORDING USING
DIGITAL SIGNALS
Select the following settings on the OSD MAIN MENU before using
the unit's digital copy function.
1.
Press the
AMP
button on the remote control unit to set the remote
control unit to the amplifier mode.
2.
Press the remote control unit's
<
,
>
,
^
,
v
cursor button or the
OK
button.
3.
Press the
<
or
>
cursor button to select the SYSTEM SETUP item
on the OSD MAIN MENU, and press the
OK
button to enter the
selection.
4.
Press the
^
or
v
cursor button to move to the DIGITAL OUT item.
5.
Press the
<
or
>
cursor button to select the output status.
n The status changes in the following sequence:
n When
SOURCE
is selected, the input signals from the
component selected by the function button are output. The
selected input will not be output unless the digital signal input
has been set.
n It is recommended that
OFF
be selected as the setting if no
component has been connected to the
DIGITAL OUT
jacks.
6.
Press the
OK
button to return to the regular display.
S Y S T E M
S E T U P
1 / 2
M A I N
I N
S W
:
C O U P L E D
6 C H -
I N P U T
:
6 c h
D I G I T A L
O U T
:
S O U R C E
O S D
I N F O
:
E N A B L E
S . P . C .
:
D I S A B L E
R E T U R N
N E X T
E X I T
O S D
M A I N
M E N U
S U R R O U N D
M O D E
C H A N N E L
L E V E L
S P E A K R
S E T U P
E X I T
S Y S T E M
S E T U P
SOURCE
DIGITAL 1
DIGITAL 2
DIGITAL 3
OFF
DIGITAL 6
DIGITAL 5
DIGITAL 4