Kemppi Protig 501L User Manual
Page 9
PROMIG 501, PROMIG 511/0537 – 9
© KEMPPI OY
2
1
5
3
4 6
2
1
6
4
5 7
3
6
2
6
4
5 7
3
1
4
2
3 5
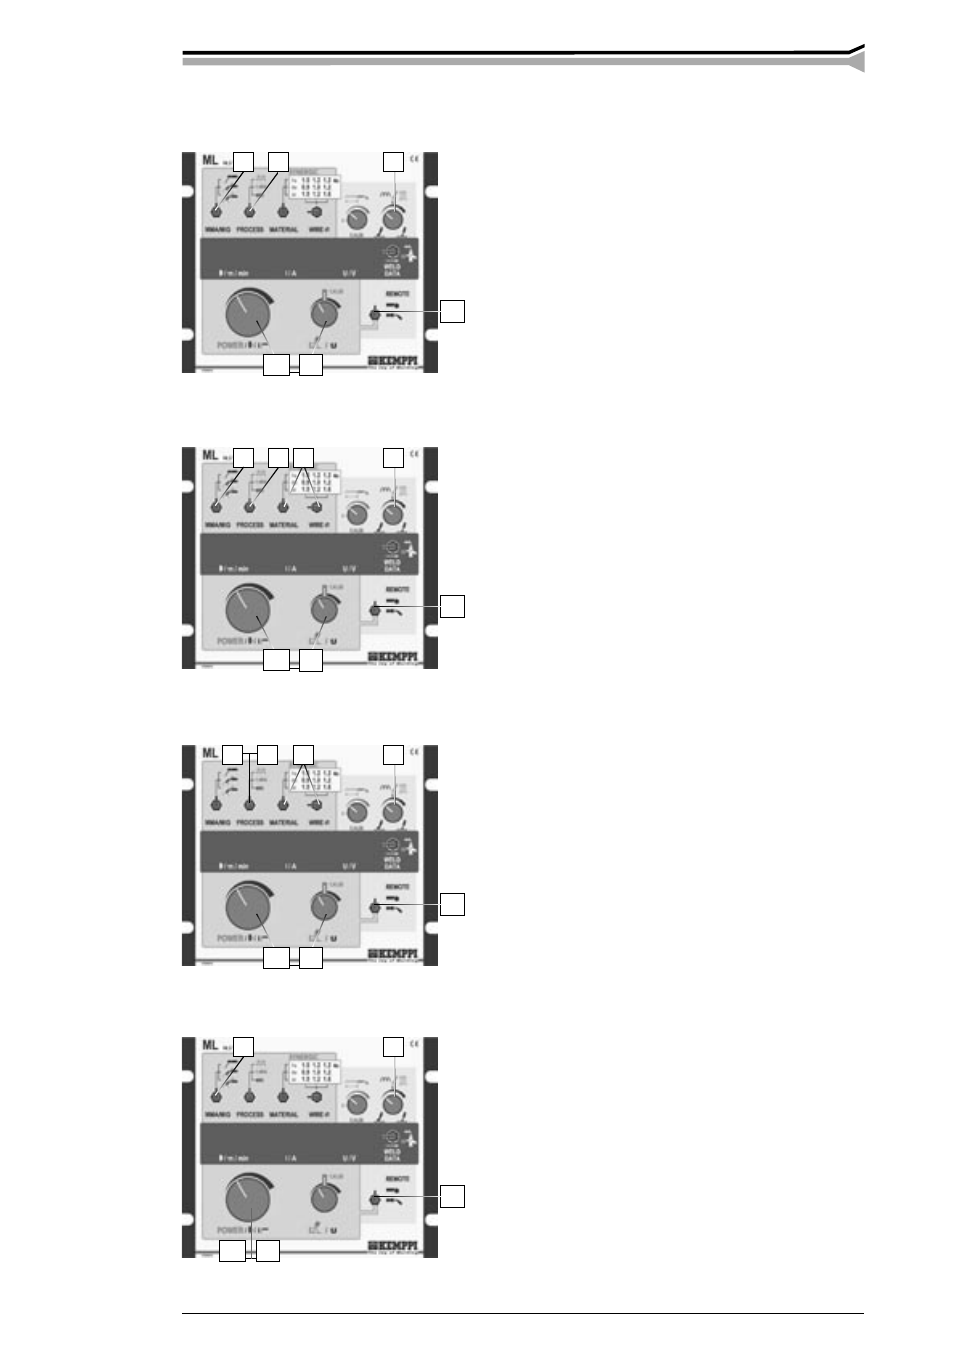
1.2.4. Quick guide for operation of ML panel
MIG welding with independent adjustments for wire feed and voltage
1. Select with selecting switch for method MIG two-
sequence procedure or MIG four-sequence procedure
2. Select with SYNERGIC mode switch the position MIG
3. Select the control mode: local control, remote control or
gun control
4. Adjust required set values for wire feed speed and
voltage. Values are shown in displays
5. Set welding dynamics at zero position or at required
position
6. Weld and adjust wire feed speed and voltage when
needed
SYNERGIC MIG welding
1. Select with selecting switch for method MIG two-
sequence procedure or MIG four-sequence procedure
2. Select with SYNERGIC mode switch the position 1-MIG
3. Set selecting switches for material and diameter
corresponding to filler wire used by you
4. Select the control mode: local control, remote control or
gun control
5. Adjust the required power with the potentiometer and
the arc length with the potentiometer. Values are shown
in displays
6. Set welding dynamics on zero or required position
7. Weld and adjust welding power and arc length when
needed
SYNERGIC PULSED MIG welding
1. Select with selecting switch for method MIG two-
sequence procedure or MIG four-sequence procedure
2. Select with SYNERGIC mode switch the position
3. Set selecting switches for material and diameter
corresponding to filler wire used by you
4. Select the control mode: local control, remote control
or gun control
5. Adjust the required power with the -potentiometer and
the arc length with the -potentiometer. Values are
shown in displays
6. Set welding dynamics on zero or required position
7. Weld and adjust welding power and arc length when needed.
MMA welding
1. Select MMA welding with selecting switch for method
2. Select the control mode: local control, remote control
or gun control
3. Adjust required MMA current. Values are shown in
displays
4. Set welding dynamics on position zero or on
required position
5. Weld and adjust MMA current when needed