Harken 944 Halyard restrainer User Manual
Page 2
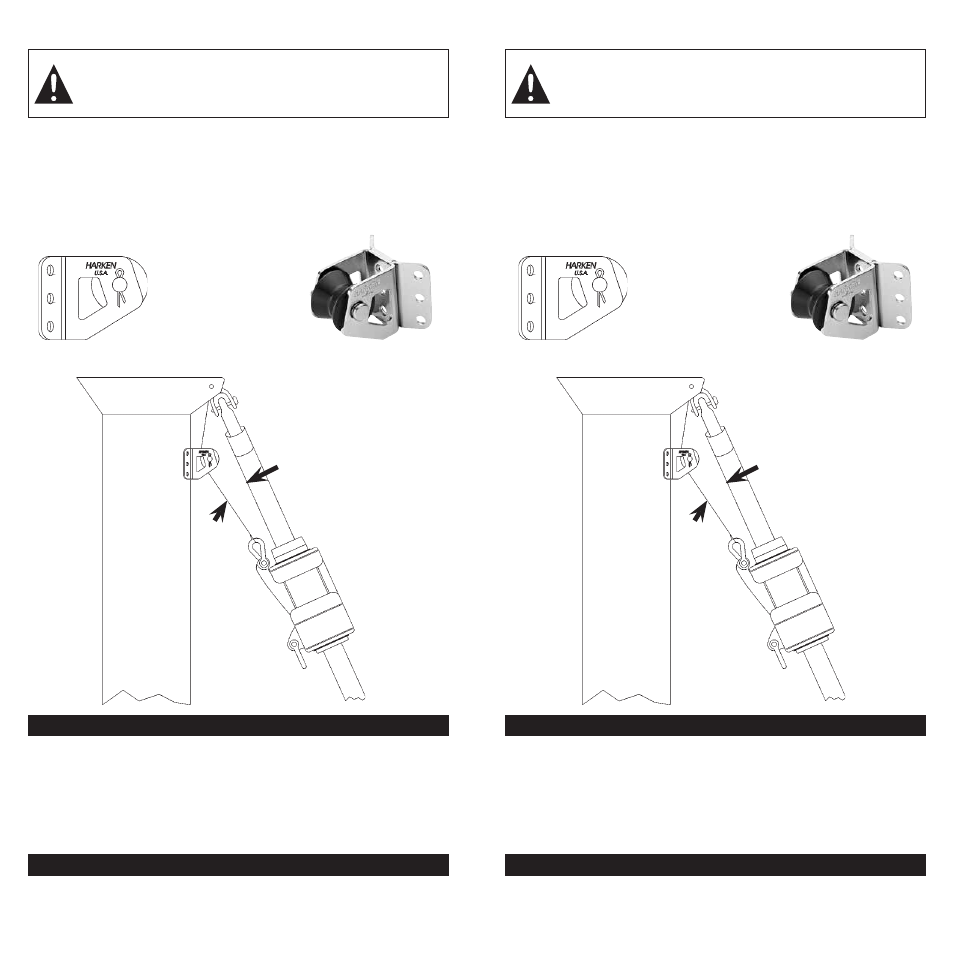
Angle between
halyard and
headstay must
be 7 to 10°
Printed in USA. 4410 04/14
4. Mark position of holes and drill.
This End Up
Install so
“HARKEN”
is up.
Harken equipment requires minimal maintenance, but some is required to give the best
service and to comply with Harken's limited warranty.
It is important to keep equipment clean by frequently flushing with fresh water. In
corrosive atmospheres, stainless parts may show discoloration around holes, rivets and
screws. This is not serious and may be removed with a fine abrasive.
With the exception of winches, do not use grease unless specifically recommended in
the instruction sheets.
Maintenance
For additional safety, maintenance and warranty information see www.harken.com/
manuals or the Harken
®
catalog.
Warranty
WARNING! Drilling or fastening into mast may snag halyards
holding the installer aloft seriously reducing strength. Limit drill
depth and avoid fasteners protruding into mast where they may
interfere with halyards.
5. Ease halyard. Install fasteners in all six holes.
6. Tension halyard and test furling system. Do not over-tension halyard
or system will be difficult to furl.
7. If a shorter-hoist sail is used, install a pendant between sail and
halyard swivel so halyard swivel is at same height as tallest sail.