Harken 1981 Crossover Block User Manual
Page 2
Printed
in
USA 4039 06/14
Install Block
Harken equipment requires minimal maintenance, but some is required to give the best
service and to comply with Harken's limited warranty.
Periodically inspect all fasteners to make sure they are secure. Tighten using thread-
locking solution or replace lock nuts. Make sure mounting structure is sound and repair
as necessary.
It is important to keep equipment clean by frequently flushing with fresh water. In
corrosive atmospheres, stainless parts may show discoloration around holes, rivets,
and screws. This is not serious and may be removed with a fine abrasive.
With the exception of winches, do not use grease unless specifically recommended in
the instruction sheets.
IMPORTANT! Exposure to some teak cleaners and other caustic solutions can
result in discoloration of part and is not covered under the Harken warranty.
Maintenance and Inspection
For additional safety, maintenance, and warranty information see www.harken.com/
manuals or the Harken catalog.
Warranty
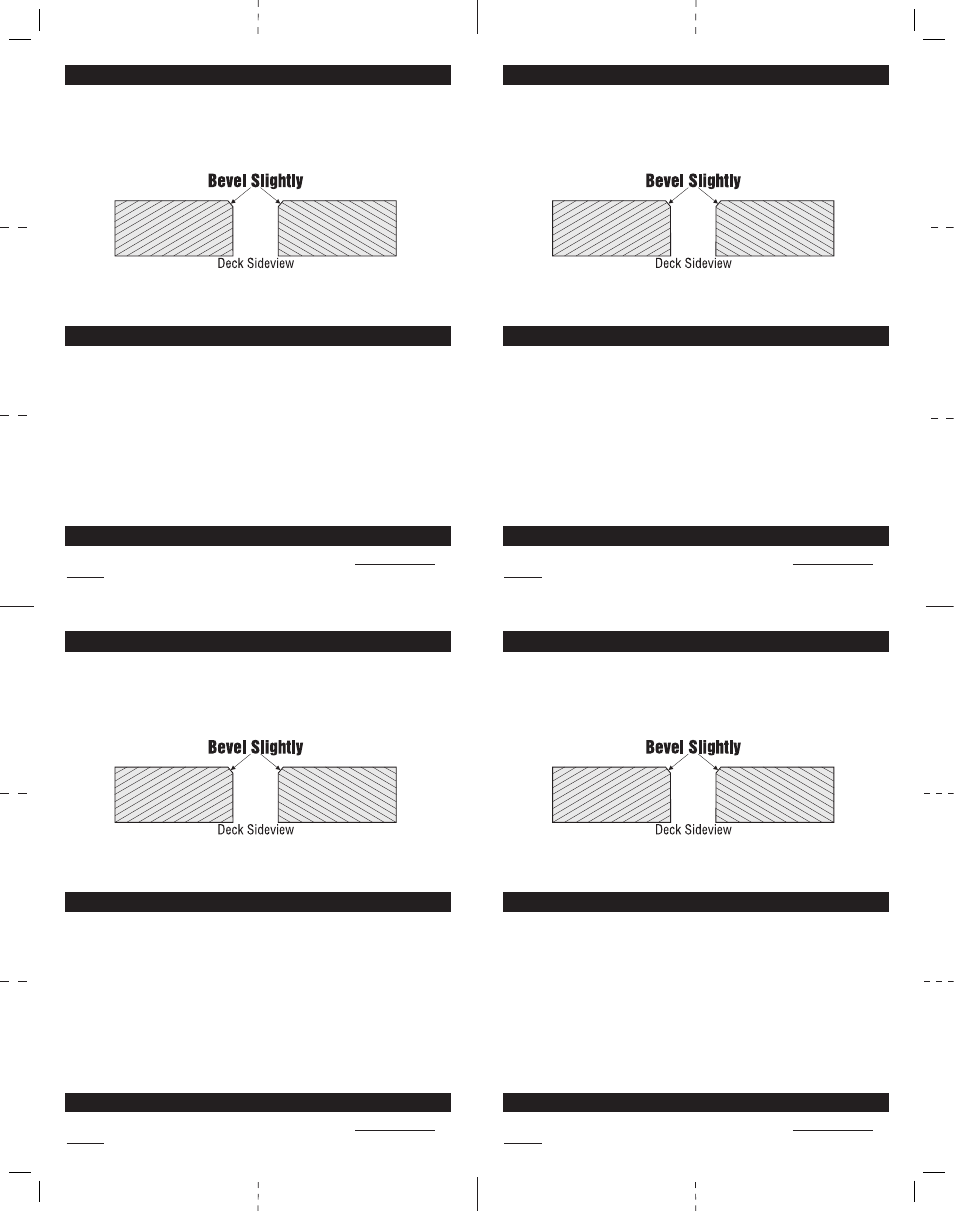
Install block using sealant in hole. Also apply sealant to circular groove on
underside of base. Use Blue Loctite
®
adhesive (provided) on threads.
Drill hole to install: 1984: 25.4 mm (1");
1981: 35 mm (1
3
/
8
").
Coat inside of hole with epoxy or resin to prevent moisture absorption in core or
between laminates. Let cure before installation.
Tip: Put slight bevel at top of hole to allow sealant to mass around upper part
of hole.
Loctite is a registered trademark of Henkel AG & Company KGaA.
Printed
in
USA 4039 06/14
Install Block
Harken equipment requires minimal maintenance, but some is required to give the best
service and to comply with Harken's limited warranty.
Periodically inspect all fasteners to make sure they are secure. Tighten using thread-
locking solution or replace lock nuts. Make sure mounting structure is sound and repair
as necessary.
It is important to keep equipment clean by frequently flushing with fresh water. In
corrosive atmospheres, stainless parts may show discoloration around holes, rivets,
and screws. This is not serious and may be removed with a fine abrasive.
With the exception of winches, do not use grease unless specifically recommended in
the instruction sheets.
IMPORTANT! Exposure to some teak cleaners and other caustic solutions can
result in discoloration of part and is not covered under the Harken warranty.
Maintenance and Inspection
For additional safety, maintenance, and warranty information see www.harken.com/
manuals or the Harken catalog.
Warranty
Install block using sealant in hole. Also apply sealant to circular groove on
underside of base. Use Blue Loctite
®
adhesive (provided) on threads.
Drill hole to install: 1984: 25.4 mm (1");
1981: 35 mm (1
3
/
8
").
Coat inside of hole with epoxy or resin to prevent moisture absorption in core or
between laminates. Let cure before installation.
Tip: Put slight bevel at top of hole to allow sealant to mass around upper part
of hole.
Loctite is a registered trademark of Henkel AG & Company KGaA.