3 calibration – Guralp Systems Scream User Manual
Page 91
User guide
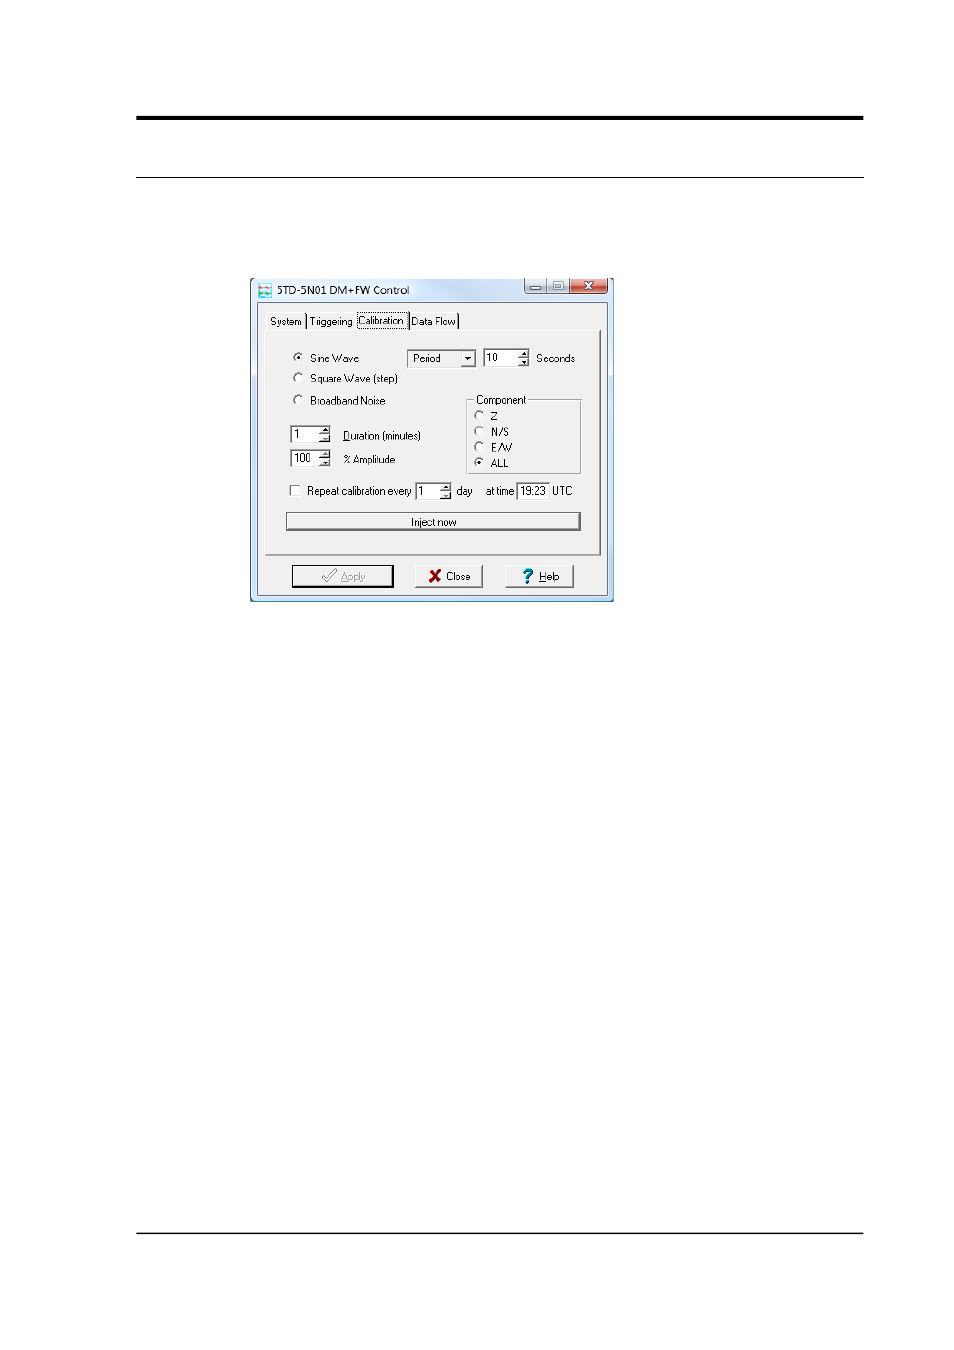
8.3 Calibration
You can check that your instrumentation is correctly calibrated by
injecting known signals into the sensor's feedback loop. The
Calibration pane allows you to do this once the sensors are installed.
Each channel can be calibrated separately. For most triaxial digital
instruments, each channel calibrates the corresponding axis of the
instrument; simply select one of the Z, N/S and E/W check-boxes to
calibrate that axis. Alternatively, click ALL to calibrate all channels
simultaneously.
Some instruments have only one calibration input, which is applied to
all three components: if you have one of these instruments, you should
select Z to calibrate the sensor.
The Duration box tells the digitiser how long to maintain the
calibration signal before disconnecting. This avoids the system being
inadvertently left in calibration mode. The default is two minutes. If
you change this setting, it will revert to the default value after one
calibration invocation.
All Güralp digitisers can produce either sine-wave or square-wave
(step) calibration signals; newer models can also carry out broadband
noise calibration. The Sine wave calibration signal always starts and
stops on the zero crossing. The frequency or period is specified by the
boxes at the top right. Only integers between 1 and 10 may be
specified for either frequency or period, so to generate a 0.5 Hz signal
you should select Period and set the time to 2 (seconds). Likewise, if
you require a 0.25 second period you should select Frequency and set
January 2014
91