5 network configuration, 4 schedule configuration – Q-See QSEE H264 User Manual
Page 28
54
55
PICTURE 4-19
PICTURE 4-20
PICTURE 4-21
PICTURE 4-22
4.4 SCHEDULE CONFIGURATION
Your DVR is configured to record whenever motion is detected. If this is your desired setting
then you will not need to make any changes. However, you may configure each channel to
record at specific times based on time of day, motion detection or other sensor input. There
are three tabs;
Schedule, Motion and Sensor
Schedule Tab
The schedule for automatic recording can be set either of two ways.
1. By highlighting individual hours for specific
days by using the pencil tool in the upper
right of the window. The adjacent eraser
tool removes the highlighting in a block.
Double click on either the pencil or eraser
tool to turn them off. Settings can be
copied and applied to any or all of the
channels and to any other day.
2. Blocks of time to be recorded can also
be set up by double clicking on a field
adjacent to a day. Multiple schedules can
be created and saved with start and stop
times down to the minute. These can then
be applied to multiple days and cameras.
Schedules made in one mode can be altered
in another mode.
Motion Tab
Motion detected during the highlighted hours will cause the DVR to start recording. Setup is
similar to that used in
Schedule above. The default mode is for 24/7.
Sensor Tab
This enables the DVR to record based on input from other sensors connected to the DVR. Like
motion detection, it is default scheduled to be able to record at any time. It is also configured
in the same manner as explained under
Schedule.
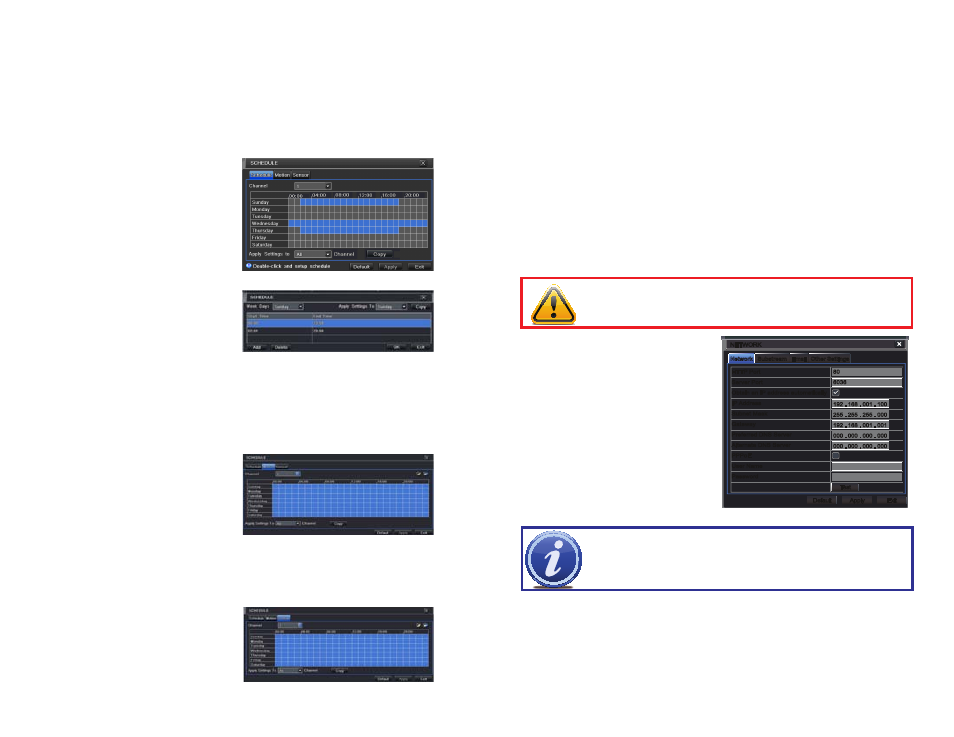
4.5 NETWORK CONFIGURATION
The
Network Configuration window is used to control how your DVR works in a networked
environment. This section offers a brief overview of how to set up your DVR so that it can be
remotely monitored from another computer on your network, over the Internet or from mobile
wireless devices. Full, in-depth instructions on the functions and settings available in this
window are presented in the Remote Monitoring Guide which is on the disk that came with
your system or which can be downloaded from our website at www.Q-See.com/Support.
The four tabs in this window are
Network, Sub-Stream, Email and Other Settings. If you
will only be monitoring the DVR from another computer on your network, you will only need to
use the first three tabs.
It is important that your DVR is connected to your network router and that the router is
powered on before proceeding.
This window displays the information on the DVR’s local network and Internet addresses
which will allow you to access the DVR on a network. As discussed in the Remote Monitoring
Guide, you will use the local network address to access your system from the same wireless
or intranet network that the DVR is connected to. When you are outside of that area, you will
use the Internet address shown (see below) or the DDNS address that you will set up.
Network
Network
Substream
Substream
Other Settings
Other Settings
NETWORK
NETWORK
Default
Default
Apply
Apply
Exit
Exit
Test
Test
HTTP Port
Server Port
Obtain an IP address automatically
IP Address
Subnet Mask
Gateway
Preferred DNS Server
Alternate DNS Server
PPPoE
User Name
Password
HTTP Port
Server Port
Obtain an IP address automatically
IP Address
Subnet Mask
Gateway
Preferred DNS Server
Alternate DNS Server
PPPoE
User Name
Password
80
6036
192 . 168 . 001 . 100
255 . 255 . 255 . 000
192 . 168 . 001 . 001
000 . 000 . 000 . 000
000 . 000 . 000 . 000
80
6036
192 . 168 . 001 . 100
255 . 255 . 255 . 000
192 . 168 . 001 . 001
000 . 000 . 000 . 000
000 . 000 . 000 . 000
PICTURE 4-23
Network Tab
HTTP Port – This is the port the DVR will
use to communicate through the
router. When accessing the DVR
remotely from the Internet, you will
need to enter your network’s remote
IP address (obtained in the next step)
in the address bar of an Internet
Explorer window. For example:
http://88.116.0.25
Obtain IP Address Automatically – Clicking this box will obtain the IP address, subnet mask,
and gateway IP from the router.
PPPOE – Selecting this enables Point-to-Point Protocol over Ethernet (PPPoE) which allows
you to directly connect your DVR to the Internet through your modem. Do not use this
unless you are connected to a modem instead of a router. Contact your ISP for your
account information including user name and password. The TEST button will verify
that your information is correct.
NOTE! The default value is 80. If port 80 is already occupied by another device
on the network, then another port will need to be selected. Choose another
number in the same range; 81-89. In this case, you will have to add the port to
the IP address when entering it into the Internet Explorer window. For example,
if the port is now 82, then you will need to enter http://88.116.0.25:82
IMPORTANT!
The majority of routers available on the market since 2008 have
Universal Plug and Play (UPnP) capability, which allows the DVR to connect
automatically to the network. Consult the Quick Networking Poster or the
Remote Monitoring Guide before changing Network settings.