Assembling and installing the back brace – DH Satellite 60 Heavy Duty Polar/Powered Dec User Manual
Page 15
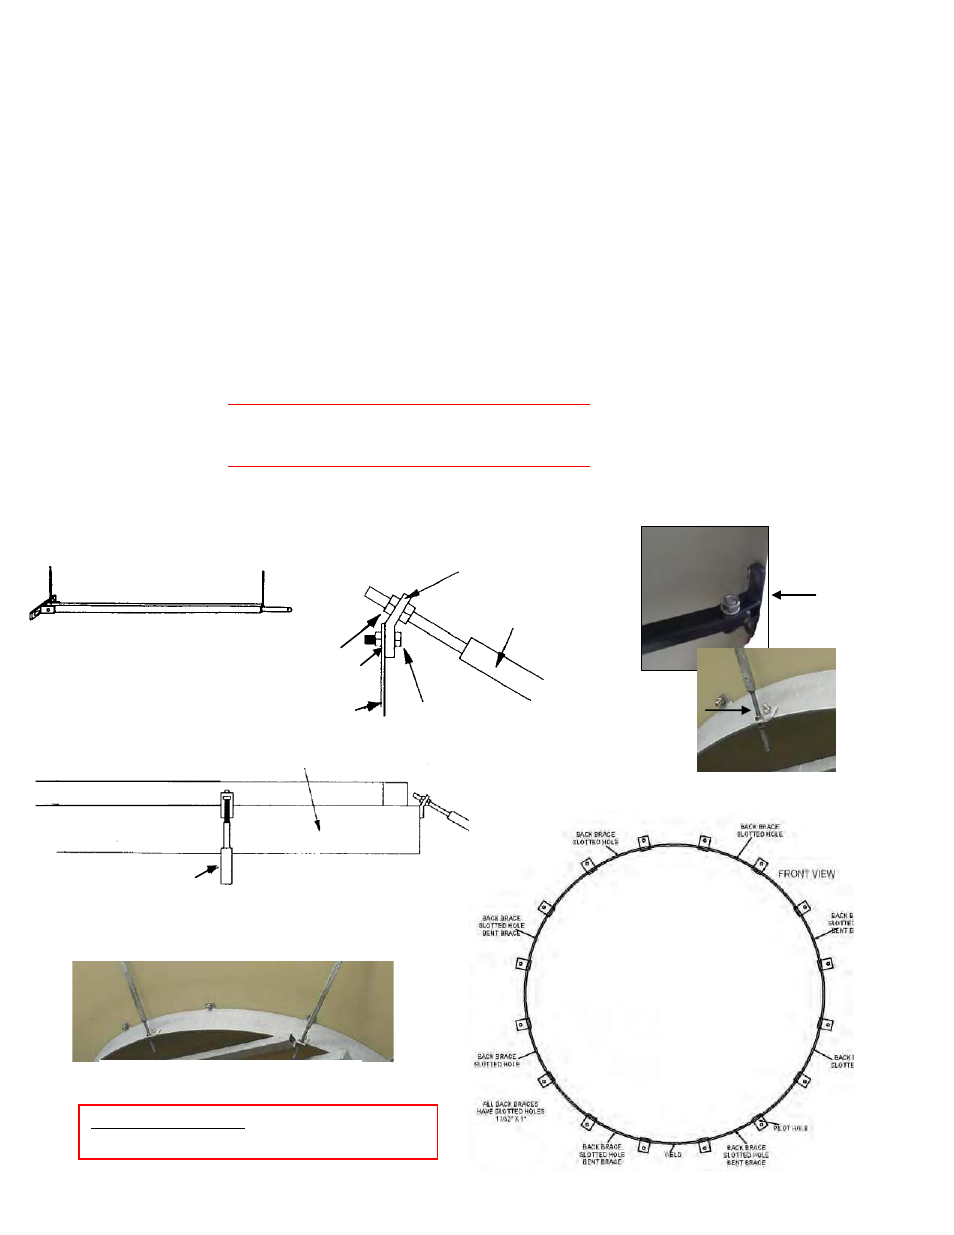
ASSEMBLING AND INSTALLING THE BACK BRACE
There are eight holes around the rear of the 60” ring to accept the braces. First install the bent tabs to the ring.
(See figures #7 and #8). The bent tabs are a piece of steel bent in the middle, approximately 1 1/2” x 3” long with two
1/2” holes; you will find these in the bolt bag. Fasten the tabs with 1/2” x 1 1/2" bolts to the 60” ring; now thread one
1/2” nut about 2/3 of the way down on the 1/2” rod end of the brace. Slip the rod end through the bent tab and install
another 1/2” nut. Only tighten these finger tight. Now go to the edge of the dish and place the two 1/4” x 3/4” bolts
through the dish and into the end of the brace clip and tighten with 1/4” nuts. Repeat this on all eight braces on the
3.7M, 3.8M, 3.9M, 4.2M, 4.5M and 5.0M Antenna.
Dish Size Focal Length
Tube Length
10’ (3.0m) 36” f/l
None
11’ (3.3m)
36” f/l
40”
Discontinued
12’ (3.7m) 57.6” f/l 45”
12’ 5” (3.8m)
57.6” f/l 47”
12’ 9” (3.9m)
36” f/l
50”
Discontinued
14’ (4.2m) 36” f/l
55 1/2”
14’9” (4.5m)
36” f/l
62 1/2”
16’ (5.0m) 36” f/l
68 1/2”
The following is a list of the different back braces for the different size antennas. Check this chart to be sure
you have the right length braces. Listed is tube length only and does not include the bracket or the bolt in this
measurement. Refer to figure #9.
Brace Clip At
Antenna Lip
Brace Tab Threaded At Ring
Back Brace To Clip
Page 11
60” Ring
Standard Brace
3” x 3” Tube
Figure #7
Figure #9
TUBE LENGTH ONLY
Bent Tab
Back Brace
1/2” x 1 1/2” Bolt
60” Ring
Figure #8
1/2” Nut
*FROM THE BACK VIEW
Pilot hole 2 tabs to the left from weld on the ring.