Scoreboard mounting using spacers – Daktronics BA-1518 Generation IV Multi-Section Outdoor LED Scoreboard User Manual
Page 56
Review the illustrations of the mounting hardware in Drawing A-44412, and then
follow this procedure for each section:
1. Using the
3
/
8
" bolts, loosely attach the inner and outer mounting clamps to
the rear flanges of the scoreboard’s horizontal frame members. Measure the
beam spacing and position the clamps to fit on either side of the beams.
2. Insert a
1
/
2
" square nut into each mounting clamp. From the rear, screw a
threaded rod into each of the nuts, as shown in Figure 4.
3. Position the scoreboard in front of the beams with the threaded rods
extending from the rear of the clamps, straddling the beams. Raise the
scoreboard section to the desired height.
4. Slide clamping angles over the ends of the rods and loosely install the
washers and nuts.
5. Make final adjustments in the positioning of the scoreboard. Tighten the
3
/
8
"
bolts in the mounting clamps.
6. Make sure that the threaded rods are perpendicular to the scoreboard and
tighten all of the
1
/
2
" nuts.
7. Model BA-3718-11 requires the use of mounting straps. Refer to Drawing
A-114415 for installation instructions.
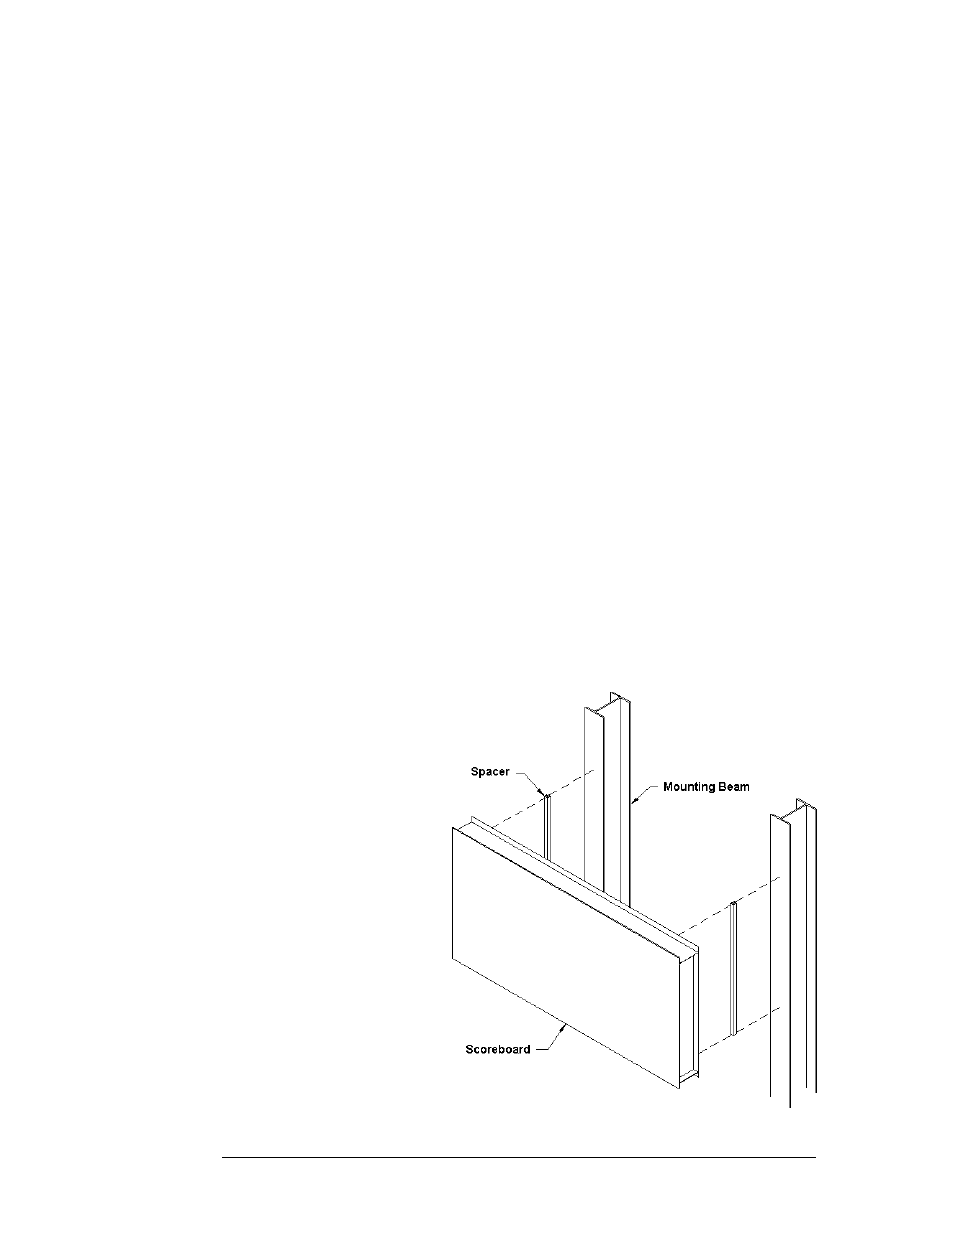
Scoreboard Mounting Using Spacers
Reference Drawing:
Scoreboard Mtg; Scoreboard with Spacers ................ Drawing A-182909
Many Daktronics
customers add
message centers or
advertising panels
to the top or bottom
of their
scoreboards, and in
some cases the
depth of the add-on
component may not
match the depth of
the scoreboard.
(Scoreboards in this
series are typically
6" or 11" deep.)
Figure 5: Mounting with Spacers
To create a uniform
appearance for the
overall display,
Daktronics
recommends using
spacers behind the
scoreboard so that
the front face of the
6-6 Mechanical
Installation
- BA-1524 Generation IV Multi-Section Outdoor LED Scoreboard BA-2006 Generation IV Multi-Section Outdoor LED Scoreboard BA-2007 Generation IV Multi-Section Outdoor LED Scoreboard BA-2012 Generation IV Multi-Section Outdoor LED Scoreboard BA-2013 Generation IV Multi-Section Outdoor LED Scoreboard BA-2020 Generation IV Multi-Section Outdoor LED Scoreboard BA-3718 Generation IV Multi-Section Outdoor LED Scoreboard BA-3724 Generation IV Multi-Section Outdoor LED Scoreboard FB-1424 Generation IV Multi-Section Outdoor LED Scoreboard FB-1430 Generation IV Multi-Section Outdoor LED Scoreboard FB-1524 Generation IV Multi-Section Outdoor LED Scoreboard FB-1530 Generation IV Multi-Section Outdoor LED Scoreboard FB-1624 Generation IV Multi-Section Outdoor LED Scoreboard FB-1630 Generation IV Multi-Section Outdoor LED Scoreboard FB-1630L Generation IV Multi-Section Outdoor LED Scoreboard FB-1730 Generation IV Multi-Section Outdoor LED Scoreboard FB-1830 Generation IV Multi-Section Outdoor LED Scoreboard MS-2020 Generation IV Multi-Section Outdoor LED Scoreboard MS-2009 Generation IV Multi-Section Outdoor LED Scoreboard SO-1830L Generation IV Multi-Section Outdoor LED Scoreboard SO-2011 Generation IV Multi-Section Outdoor LED Scoreboard SO-1930 Generation IV Multi-Section Outdoor LED Scoreboard FB-2007 Generation IV Multi-Section Outdoor LED Scoreboard SO-1830 Generation IV Multi-Section Outdoor LED Scoreboard FB-2004 Generation IV Multi-Section Outdoor LED Scoreboard SO-1624 Generation IV Multi-Section Outdoor LED Scoreboard FB-2003 Generation IV Multi-Section Outdoor LED Scoreboard SO-1424 Generation IV Multi-Section Outdoor LED Scoreboard FB-2002 Generation IV Multi-Section Outdoor LED Scoreboard FB-2001 Generation IV Multi-Section Outdoor LED Scoreboard MS-2918 Generation IV Multi-Section Outdoor LED Scoreboard SO-2030 Generation IV Multi-Section Outdoor LED Scoreboard FB-1830L Generation IV Multi-Section Outdoor LED Scoreboard MS-2118 Generation IV Multi-Section Outdoor LED Scoreboard SO-2014 Generation IV Multi-Section Outdoor LED Scoreboard