Cloud Electronics VTX-WM1 User Manual
Page 9
VTX-WM1 Installation Guide v1.2
9
5. Enter a suitable name for the installation
in the
Site Name field (e.g., name of the
customer and/or building or location, etc.)
6. Use of a password is recommended as it
will prevent unauthorised access to the
network configuration pages - monitoring
of amplifier performance and settings is
always possible. Enter a password in the
Site Password field. A password may
be up to 64 characters in length and will
be case sensitive.
7. If the network has a SMTP mail server,
you may set the VTX-WM1 to send email
alerts. Clicking Setup next to the Email
Target field opens the Email Configuration
page. Enter the email address To (Target
Email), From (Sender Address), Server IP
Address and Port.
8. Click
Apply to close the dialogue box.
9. Click
Apply (on the Config page) to
confirm the data entered.
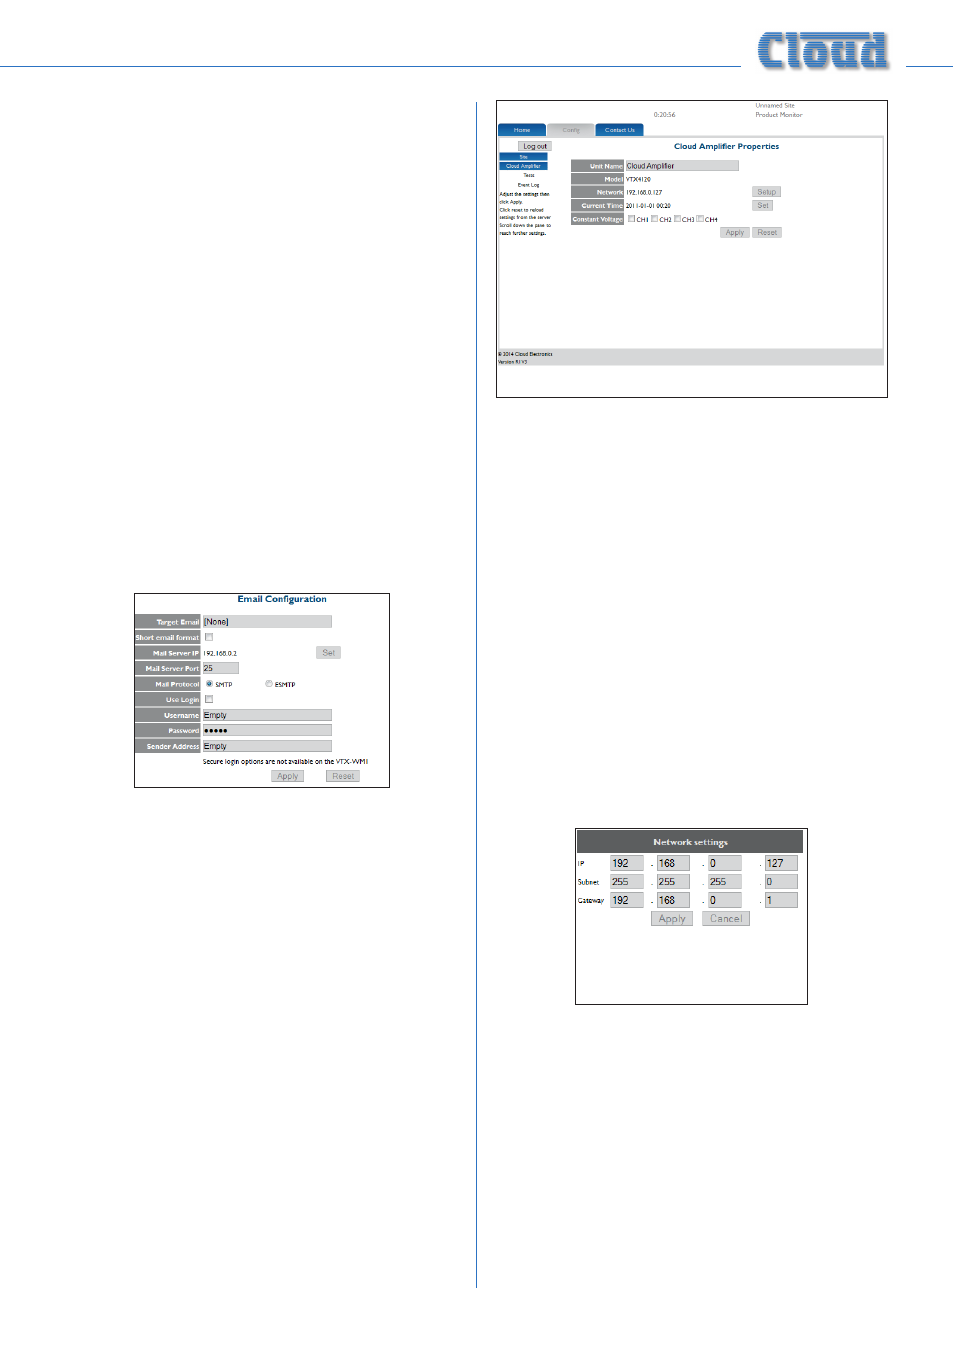
Click the blue
Cloud Amplifier
button in the left-hand pane. This opens
the
Amplifier Properties page:
10. The first field,
Unit Name, permits
the amplifier itself to be named. This
is extremely useful with large systems
employing multiple amplifiers. The name
may, for example, be the area of the
building where the speakers that the
amplifier is driving are located. (The Unit
Name may be up to 100 characters in
length, but note it will be truncated to 16
characters for the amplifier button label.)
11. If the amplifier is to have an IP address
other than the default, click the
Setup
button adjacent to the network
field, which will open the
Network
settings dialogue box:
12. Enter the IP address for the amplifier, the
corresponding subnet mask and gateway
IP for the network in the numeric fields.
We strongly recommend that you keep
a careful record of all IP addresses used,
and also write the address in the IP space
on the VTX-WM1’s rear panel (or print a
label for this purpose).