Maintenance – Beisler 2112-4 User Manual
Page 48
- C 48 -
Short Seam Automat 2112-4 Working Instructions
Beisler Automated Sewing Equipment
C.5
Maintenance
C.5.4 Repairs
Clamp transport belt replacement:
1. Disconnect machine from power supply system.
2. Slide clamp to left until it reaches stop position.
3. Fig. 8: Remove retaining screws
3 from drive roller
cover
2and remove cover.
4. Remove two retaining screws from slide roller cover
8 and remove cover 9.
5. Loosen two belt lock screws
4 and release belt ten-
sion
7.
6. Loosen lock nuts
6 of set screws 5 and rotate two
set screws backward.
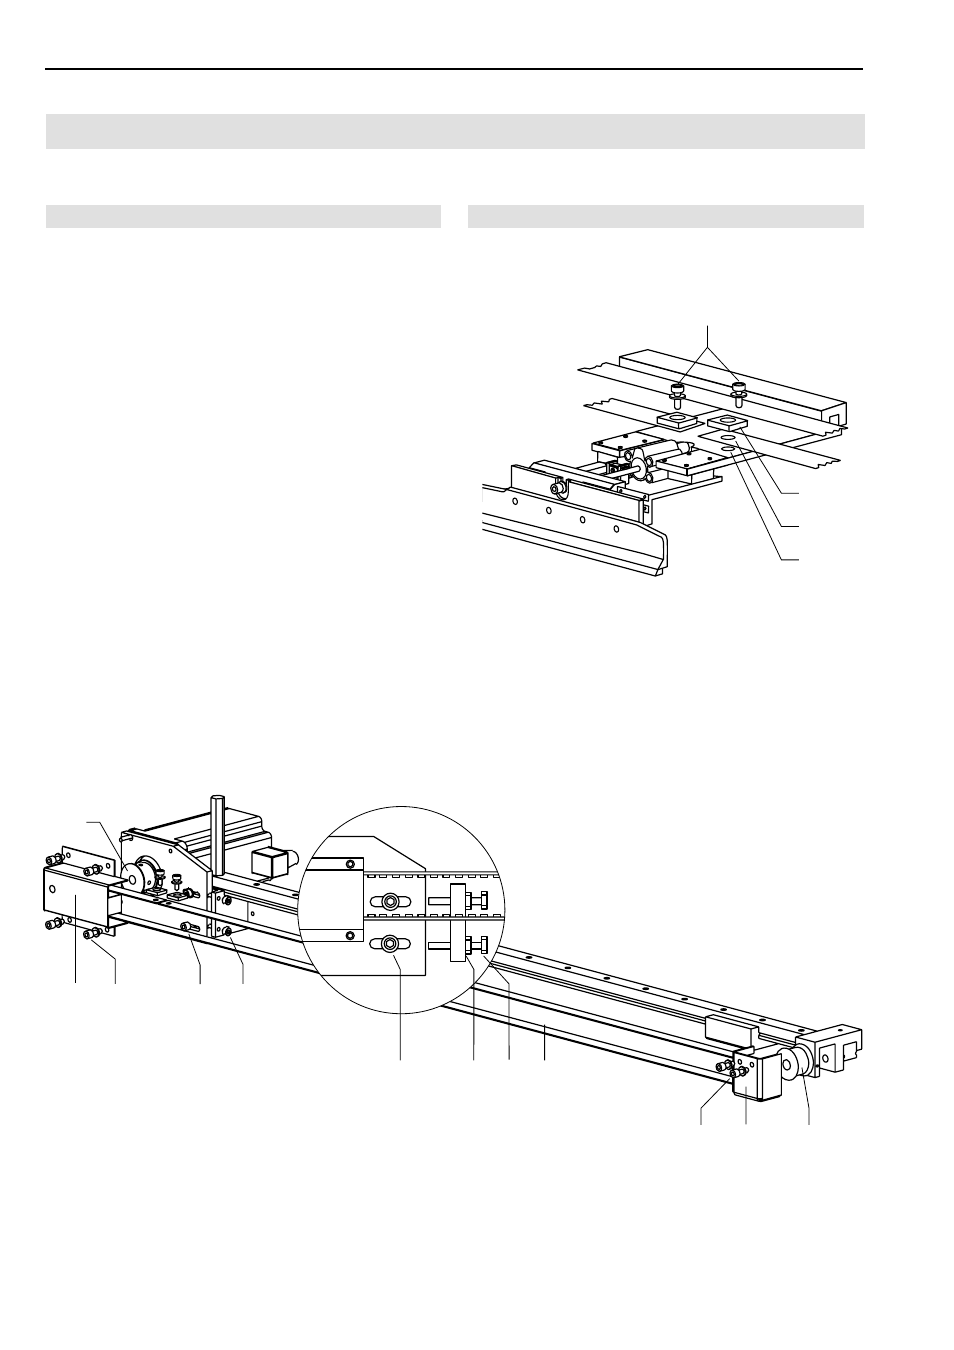
7. Fig. 7: Remove two connecting screws
1 from main
clamp pedestal. Remove belt.
8. Fig. 8: Install new belt to drive roller
1 and to guide
roller
a.
9. Fig. 7: The ends of the belt
3 are fitted with holes.
Position the two ends of the belt with the belt clamp
2
exactly over the holes on the pedestal
4 and secu-
re them using screws.
Fig. 8
Fig. 7/8
Fig. 7
1
4
3
2
8 9
a
2
1
3
5
7
4
4
6 5
10.Fig. 8: Tension belt by tightening two set screws 5
until the belt can be depressed approx 10 mm with
distinct counterpressure at the middle of the trans-
port rail.
Tighten lock nuts 6 and lock screws 4.
11.Install the two covers
2 and 9.