Adjusting the black mark/die cut sensor, Printing – Avery Dennison Monarch 9416 XL Quick Reference User Manual
Page 15
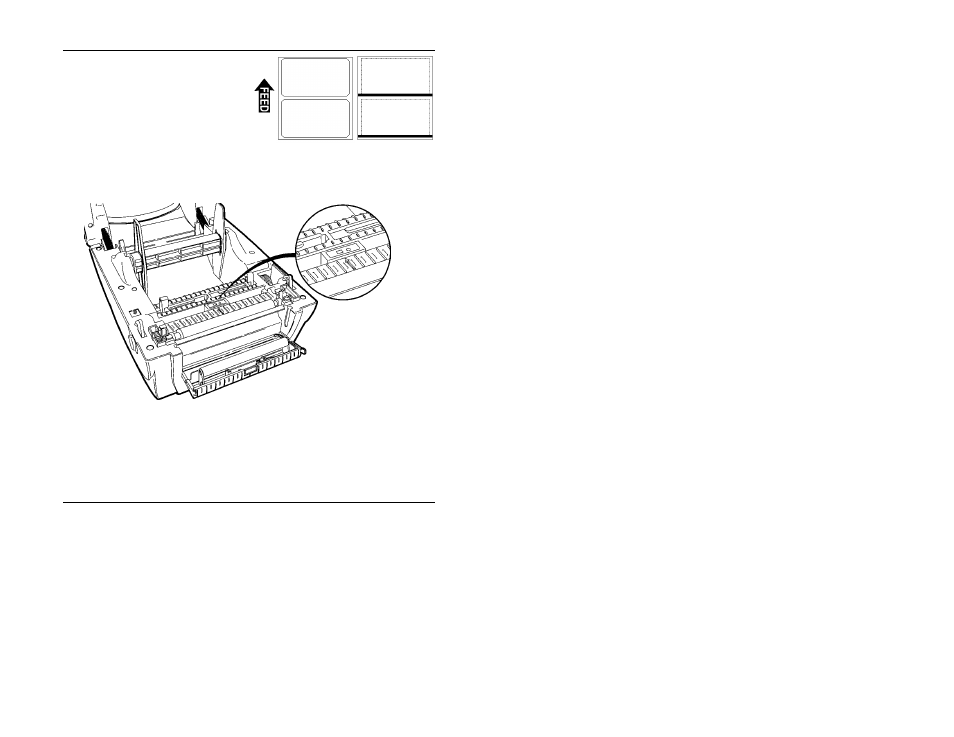
Adjusting the Black Mark/Die Cut Sensor
The printer has a black mark/die
cut sensor, which it uses to
sense and properly calibrate
supplies. Black mark supply
has sense marks (black marks)
on the back of them. Die cut supply
does not have any black marks.
Die Cut
Black Mark
For die cut supplies, make sure the sensor is in the detented position
and the middle of the square lens lines up with the arrow inside the
printer.
Sensor set for
Die Cut Supplies
For black mark supplies, if necessary, move the sensor to the left or
right, depending on where the black marks are on the supplies. The
black marks on the supply should cover the square lens inside the
sensor.
Printing
Before you print, make sure the printer is connected to the host with
a communication cable. The communication values at the printer
must match those at the host.
The printer's default communication values are 9600 Baud, no parity,
8-bit data frame, 1 stop bit, and DTR flow control (9600, N, 8, 1,
DTR).
1. Turn on the printer.
2. Download a format and a batch. Refer to the Packet Reference
Manual for information on downloading print jobs. The printer
prints the labels, either in peel mode or in non-peel mode.
3. Remove the printed labels.
15