Ip module, Commlink confi guration – Auto-Zone Control Systems IP Module Kit Installation Guide for the IP Module Kit Used with CommLink IV & 5 (Version 01N) User Manual
Page 13
IP MODULE
13
Technical Guide
CommLink Confi guration
Computer IP Address Set-up for
Windows
®
XP, Vista, 7, or 8
In order for the CommLink to communicate properly, you must
set the IP address of the CommLink and computer to be within
the same netmask. The following instructions explain how to
change your computer’s IP address.
1.) Click
; then click
.
2.) Double-click
(XP),
work & Sharing Center>
(Vista), or
net>
(7), The Network Connections Window or Network
& Sharing Center Window will appear (XP or Vista). Win-
dows 7 & 8 users, click
<
Network and Sharing Center>
for the
Network & Sharing Center Window
.
NOTE:
If any wireless connections are listed, disable
them by right-clicking the connection and
selecting
.
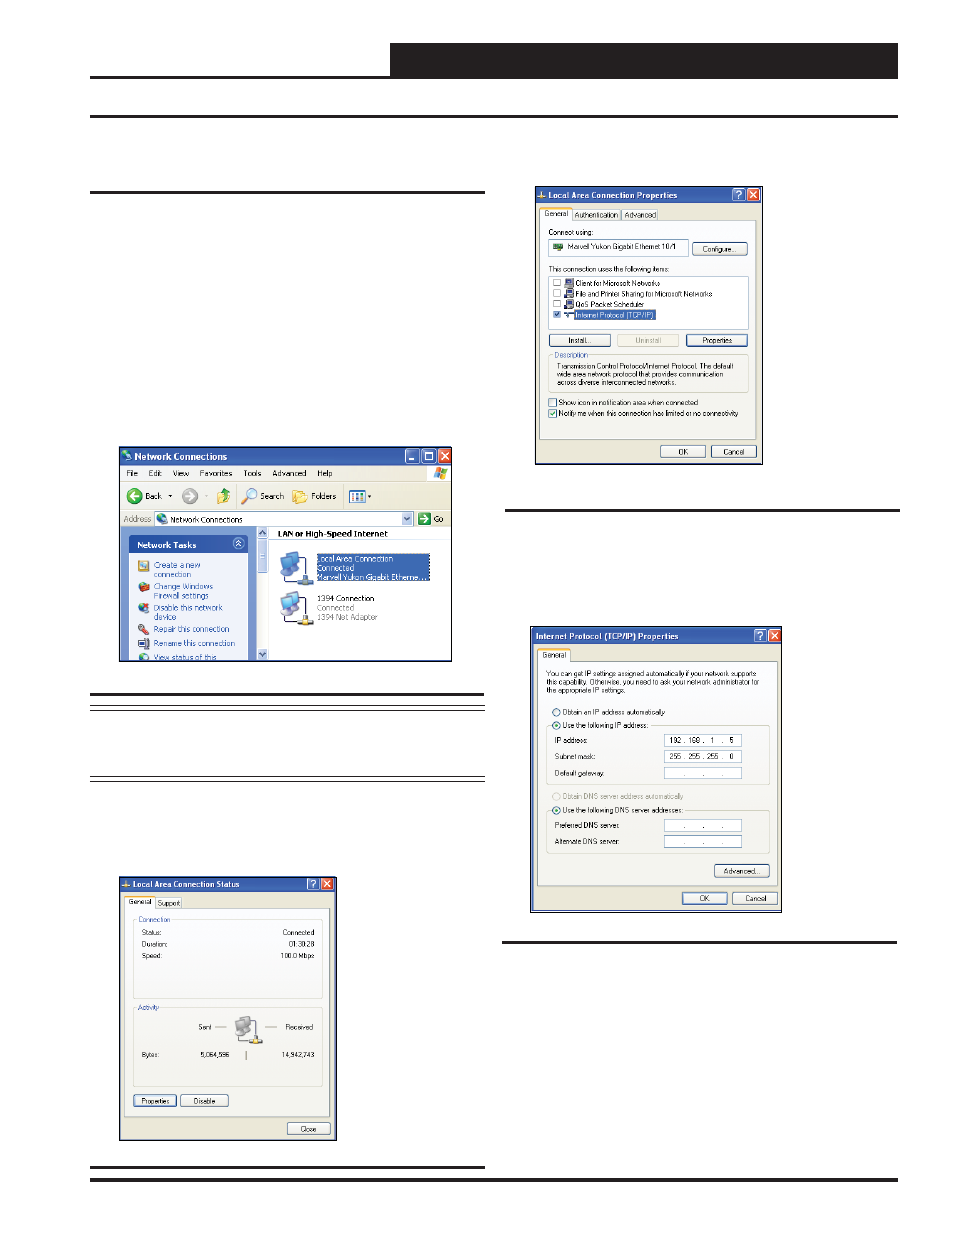
3.) In the Network Connections Window, select the
Local Area Connections entry. (In Vista, fi nd the left
panel and click on Manage Network Connections.) The
Local Area Connection Status Window will appear.
Figure 10: Network Connections Window
4.)
Click
the
button. The Local Area Con-
nection Properties Window will appear.
5). In the Connection Items List Box, be sure the Internet
Protocol (TCP/IP) is checked (Figure 12). (In Vista, this
will be TCP/IP v.4.) Click Internet Protocol (TCP/IP v.4)
to highlight it and then click
. The Internet
Protocol Properties Window will appear.
6). Type in the following information:
a.) Make the IP address 192.168.1.5
b.) Make the Subnet mask 255.255.255.0
c.) Blank out the Default gateway setting (leave
the setting blank as shown in Figure 13).
d.) Blank out the Preferred DNS server setting and
the Alternate DNS server setting (see Figure 13).
7.) Select
until all of the above windows are
closed. You may have to reboot the computer before the
new values are valid.
Figure 11: Local Area Connection Status Window
Figure 12: Local Area Connection Properties
Window
Figure 13: Internet Protocol Properties Window