Overview, Step by step guide, Setting your screen resolution – Auto-Zone Control Systems Prism 2 Graphical Interface Technical Guide (Version 01J) User Manual
Page 4: Terms and conventions, Step by step guide map, Prism 2 technical guide 4
OVERVIEW
Prism 2 Technical Guide
4
Step By Step Guide
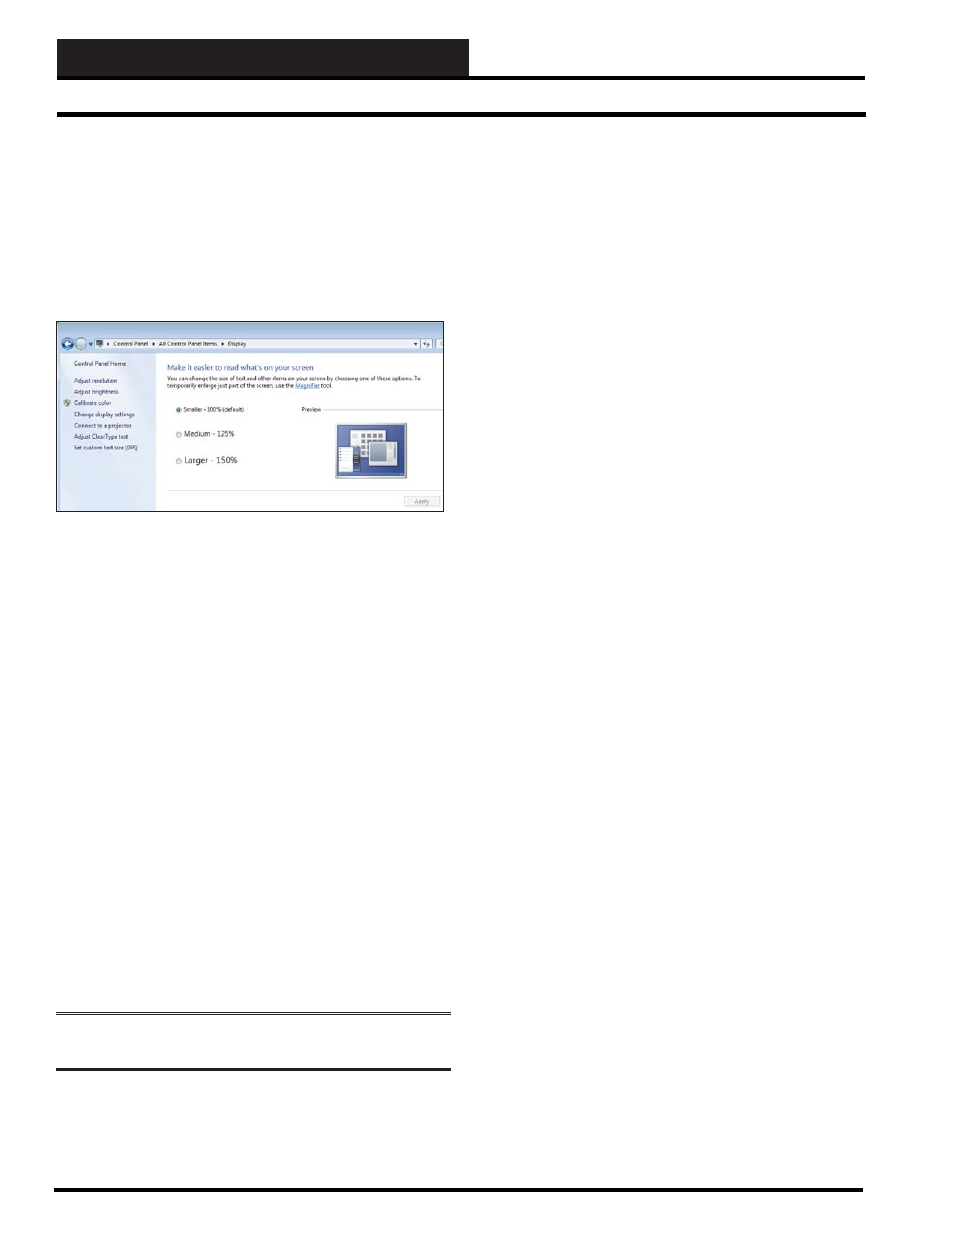
Setting Your Screen Resolution
In order for Prism graphics to display properly on your computer
screen, your screen resolution must be set to the default which
is small font. If it appears that your graphics are not aligning
properly, verify your system’s font size as follows (directions are
for Windows 8):
Click on
,
,
. The following
screen will appear:
Select the radio button for “Smaller - 100% (default)” and click
. You will need to Logoff your computer for the changes
to take affect.
Terms and Conventions
Commands are italicized. For example, the instructions will tell
you to press keys that are found on the keyboard, click or select
buttons and keys that are found on the screens, and enter or type
text.
User input is boldface and enclosed in quotation marks. For
example, you would type the numbers 9288 when the directions
tell you to type “
9288
.”
All keys, buttons, and menu items that perform a function and
are found on screens or the keyboard are boldface and enclosed
with brackets. For example: press the
key;
click
Passcodes>
.
Main menus and fi eld names are capitalized and in boldface. For
example, “Type a number in the Number fi eld.” “You can access
that information from the
Communications Menu
.”
Screen and window names will always be capitalized and italicized.
For example, “The Search for Units Dialog Box will appear.”
NOTE:
You MUST press the
key after data entry in
order for the Prism program to accept and save your entry.
Step By Step Guide Map
In order to operate Prism 2 effectively, you should read this entire
guide. This guide will lead you through each step in confi guring
Prism 2—from entering passcodes to searching and selecting units
for troubleshooting. Below is a quick overview of each step.
Step 1:
Installing Prism 2—
This section explains how to install
the Prism 2 software, initiate communications, navigate the
program, and enter and edit passcodes.
Step 2:
Setting Up Job Sites—
This section provides instructions
for setting up each job site’s name, port, or IP address, CommLink
type and confi guration, alarm notifi cation, and custom screen
designation.
Step 3: Confi guring Prism 2—
This section describes how to have
Prism 2 automatically restart after a power failure and broadcast
time to all controllers. It also explains how to set up the main screen
display picture.
Step 4: Setting Up Communications—
This section explains
how to establish communications via modem connection and TCP/
IP connection through your CommLink.
Step 5: Searching for Installed Units—
This sections explains
how to perform a unit search per job-site.
Step 6: Selecting and Renaming Loops and Units—
This
section explains how to select and rename loops and units.
Step 7: Confi guring Units—
This section describes how to
confi gure controller setpoints, schedules, and overrides. It also
explains how to confi gure units while off-line.
Step 8: Confi guring Unit Alarms—
This section explains how to
individualize alarm settings for each controller.
Step 9: Polling For Alarms—
This section explains how to view,
acknowledge, print, and delete alarms.
Step 10: Logging and Printing—
This section explains how to
load, view, and print trendlogs from individual controllers.
Step 11: Tenant Override Logging—
This section explains how
to poll controllers for tenant override logging.
Step 12: Creating Custom Screens—
This section explains how
to create Custom Screens containing text, images, and live data.
Appendices—
The appendices include examples of status and
setpoint screens, instructions for DEMOMODE and instructions
for setting up alarm polling for the System Manager Touch Screen.
Index—
The index provides page numbers for easy reference to
quickly fi nd the information you need.
Revised 12/01/14