Step 2: job-site set-up, Step 2: setting up job sites, Job-site set-up – Auto-Zone Control Systems Prism 2 Graphical Interface Technical Guide (Version 01J) User Manual
Page 10
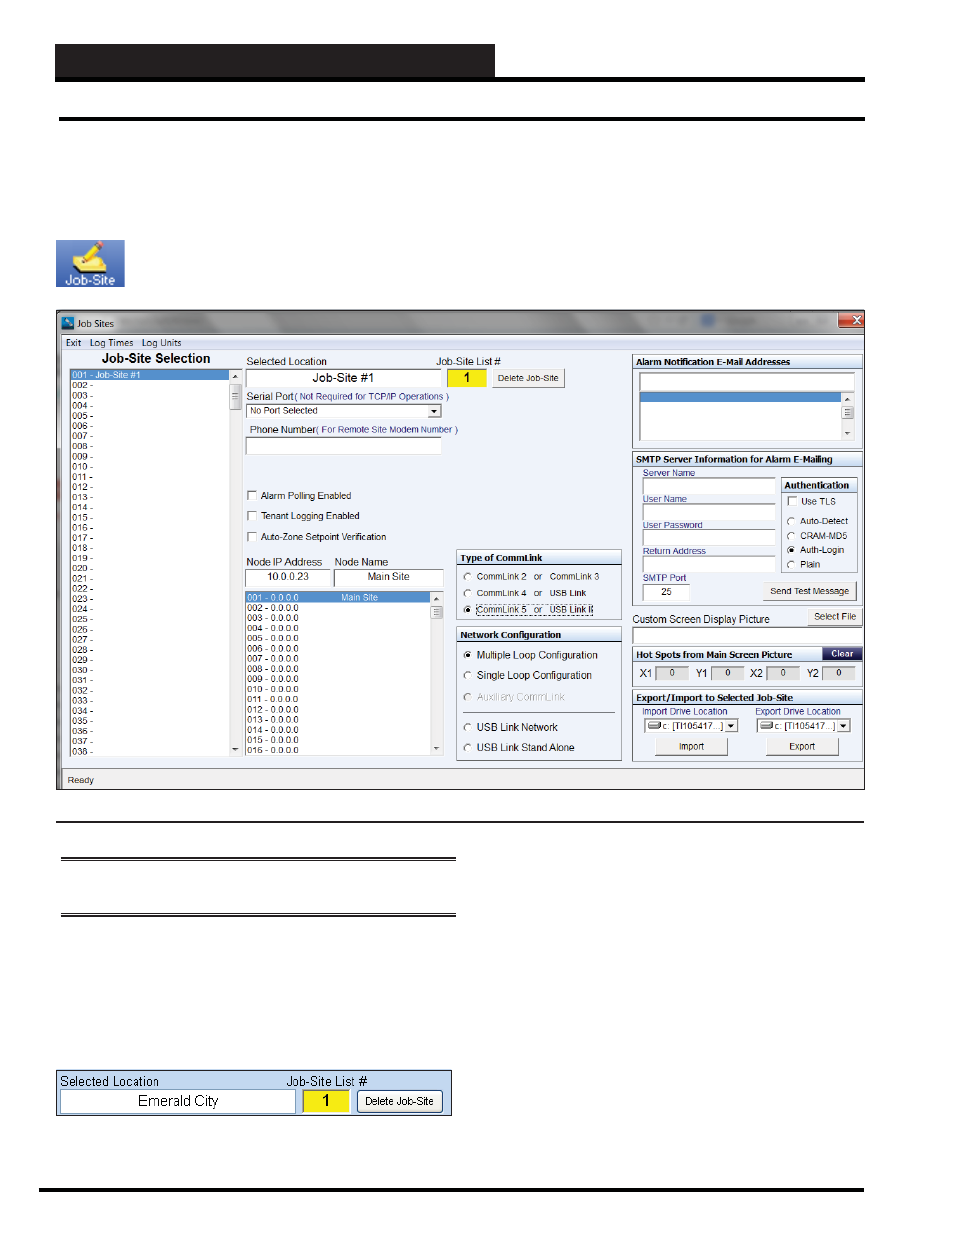
STEP 2: JOB-SITE SET-UP
Prism 2 Technical Guide
10
Step 2: Setting Up Job Sites
The second step in the Prism 2 Setup procedure is to program the
specifi c job-site access settings and desired initial displays for each
location.
Click on the
< Job-Site>
button located on the Top
Toolbar of the Prism 2 Main Screen. The Job Sites
Window will appear. (Figure 2)
NOTE:
You must confi gure each of the fi elds in this window for
every one of your job sites.
Job-Site Name:
When you fi rst open the Job Sites Window, the Job-Site Selection
Window will be empty. Click on an empty location. The Job-Site
List # will display the number you have selected. In the Selected
Location fi eld, type a name for your job-site and press
.
Figure 2: Job-Sites Window
Serial Port:
TCP/IP
—
If you are using TCP/IP communications, leave the
Serial Port field set at “No Port Selected” which is the default.
Serial or USB
—
If Prism 2 will be connecting directly to a
CommLink through the Serial or USB Port, select the port that you
have connected your CommLink to and enter 0.0.0.0 for the Node
IP Address. COM Port #9 is the maximum port number supported
by Prism, so if your USB port is #10 or higher, you will need to
manually force the port to a lower port number using the Device
Manager found in your Windows
®
Control Panel. This procedure
is documented in WattMaster’s CommLink IV and CommLink 5
Technical Guides.
Job-Site Set-Up
Revised 9/25/13