TabletKiosk Sahara NetSlate a230T User Manual
Page 77
62
Chapter 06: Upgrading Your Sahara NetSlate
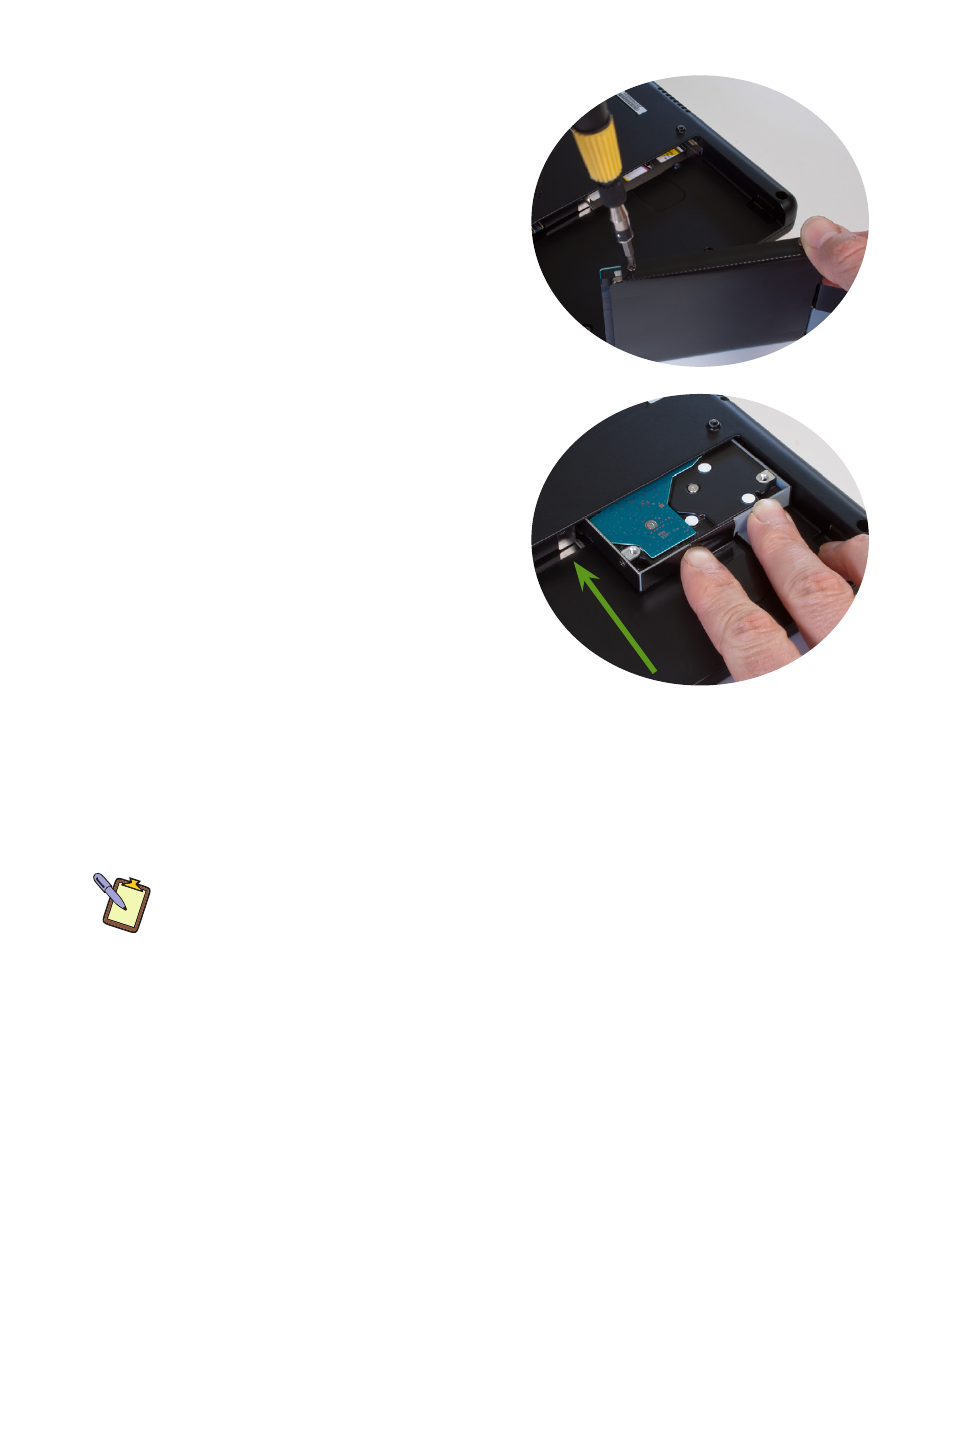
4. Unscrew the existing drive
from its cage and replace
it with the new HDD. Once
you have secured the new
drive into the cage with the
screws, slide it back into
the HDD compartment. Be
careful when sliding the drive
back in to not force it. If you
are properly aligned with the
compartment, it should slide
back in very smoothly.
5. Replace the screw into the
metal tab that holds the drive
cage in place. You’ll know
the drive is in properly as the
screw holes should align up
properly. Don’t worry about
getting the screw in really
tight. You just want to make sure that the screw is securely in
enough that the battery can safely pass over it.
6. After the HDD is securely inserted, you can insert the battery
back into the battery compartment.
NOTE: Remember, if you are installing a brand new drive and are plan-
ning to restore your system using the Windows XP System Restore disc
that came with your Sahara NetSlate, you will need to partition the
drive before attempting to restore or the procedure will fail. (See the
section entitled Recovering Your System Using the System Restore DVD in
the Troubleshooting chapter.)