Step 4: powering on the sahara netslate – TabletKiosk Sahara NetSlate a230T User Manual
Page 19
4
Chapter 01: Getting Started
Step 3: Connecting Applicable Peripherals and Networking Cables
If you would like to use any external peripheral with the tablet
(i.e. USB mouse, USB keyboard, etc.) or are planning to connect
to the Internet and/or a corporate LAN using a wired connection
(requires optional docking cradle) as opposed to wirelessly,
connect the external peripheral now. See the chapter entitled
Touring Your Sahara NetSlate, to identify which ports to use.
IMPORTANT: When you power on the tablet for the first time, you
will need to have an external USB keyboard connected in order to
complete the Windows XP Professional installation routine.
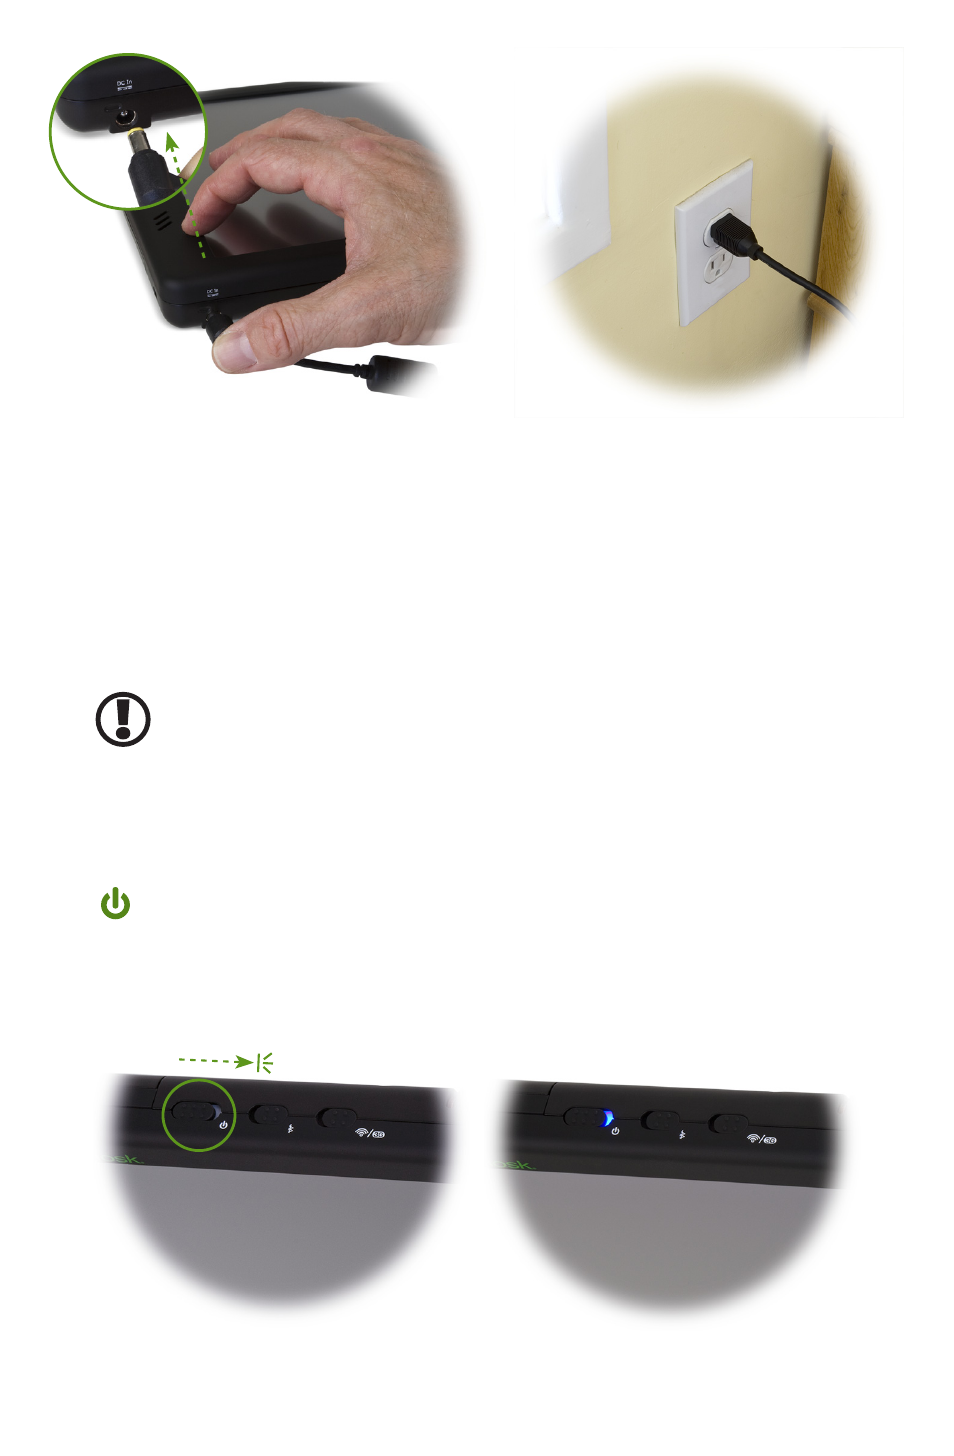
Step 4: Powering on the Sahara NetSlate
Locate the three power switches on the top on the tablet. The
switch is the computer’s main power toggle. Slide it to the
right and hold it there until it emits a blue glow (approximately
1-2 seconds) and then release it. The Sahara NetSlate will now
boot up.
Plugging into an external
power source.
Powering on the Sahara NetSlate
Slide and hold the toggle switch until it lights up blue