TabletKiosk Sahara NetSlate a230T User Manual
Page 53
38
Chapter 04: Using Your Sahara NetSlate with Windows XP
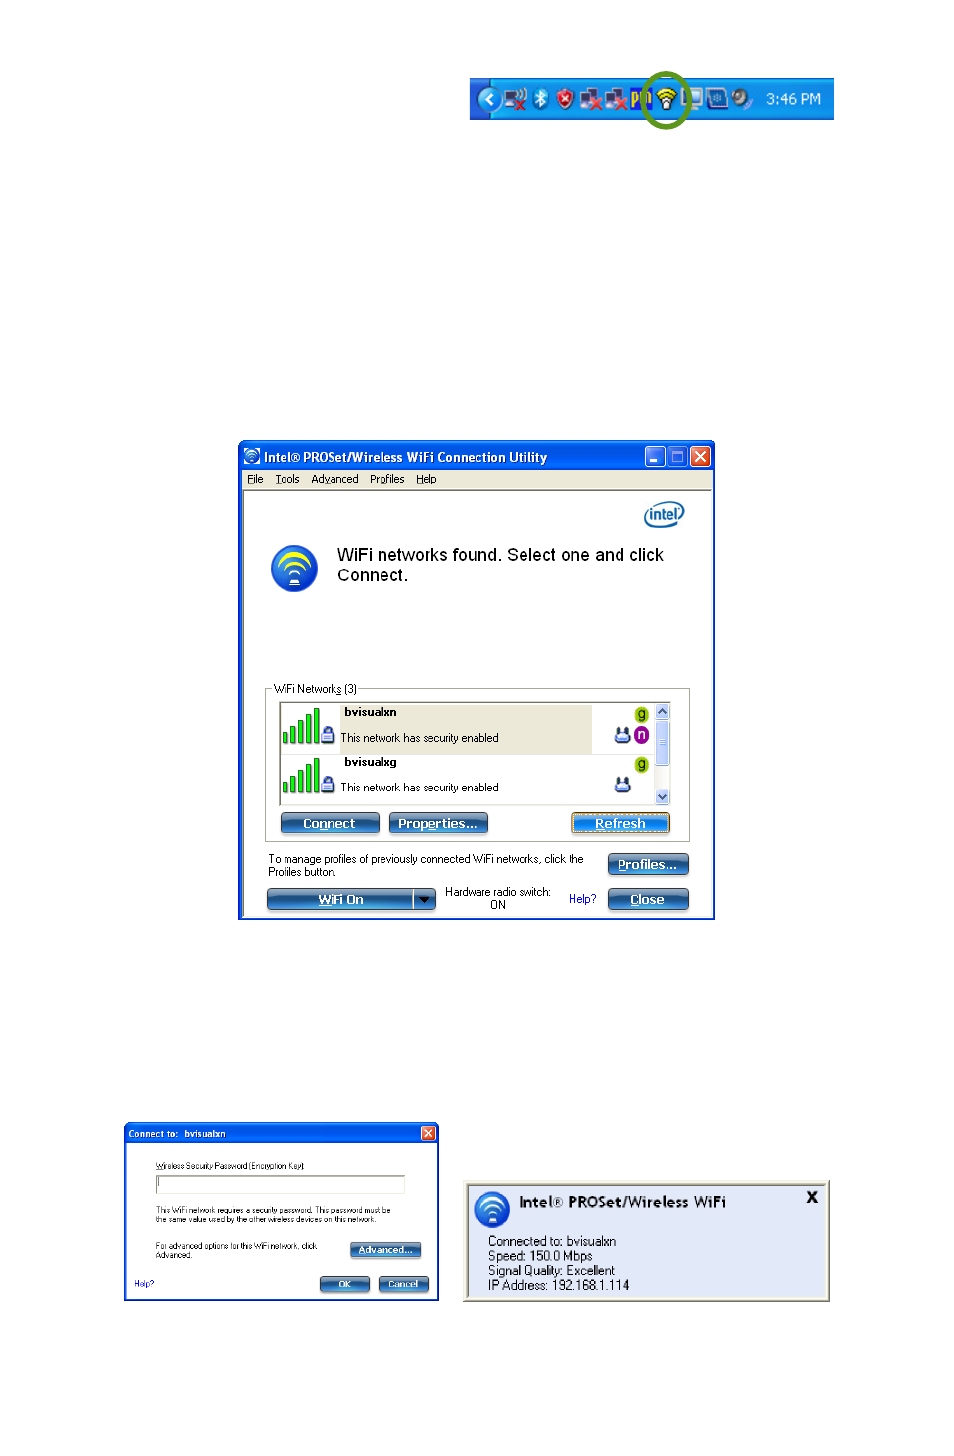
2. In the System Tray, tap on
the Intel PROSet icon and
choose “Configure WiFi”
from the pop-up menu
that appears.
3. When the Intel® PROSet/Wireless WiFi Connection Utility
opens, choose the network from the list that you wish to
connect to and tap the “Connect” button. If no wireless
networks appear after a few moments, tap on the “Refresh”
button located just below the list.
4. If the wireless network you are attempting to connect to is
security-enabled, you will see a dialog box requesting either
a network key or, if the wireless network supports WiFi
Protected Setup (WPS), a PIN.
After successfully connecting to the
network, this pop-up should appear
above the System Tray icon.
Tap on the Intel PROSet Wireless icon to
open a menu that will let you choose to
configure your WiFi connection.