Usage with mac and windows operating systems – CRU Forensic RTX User Manual
Page 7
WiebeTech
F o r e n s i c R T X 4 1 0 - 3 Q J U s e r M a n u a l ( A 9 - 4 1 0 - 0 0 0 4 ) R E V 1 . 0
- 7 -
NOTE: To connect RTX410-3QJ to a
USB 2.0 host, you must use a USB 2.0 cable.
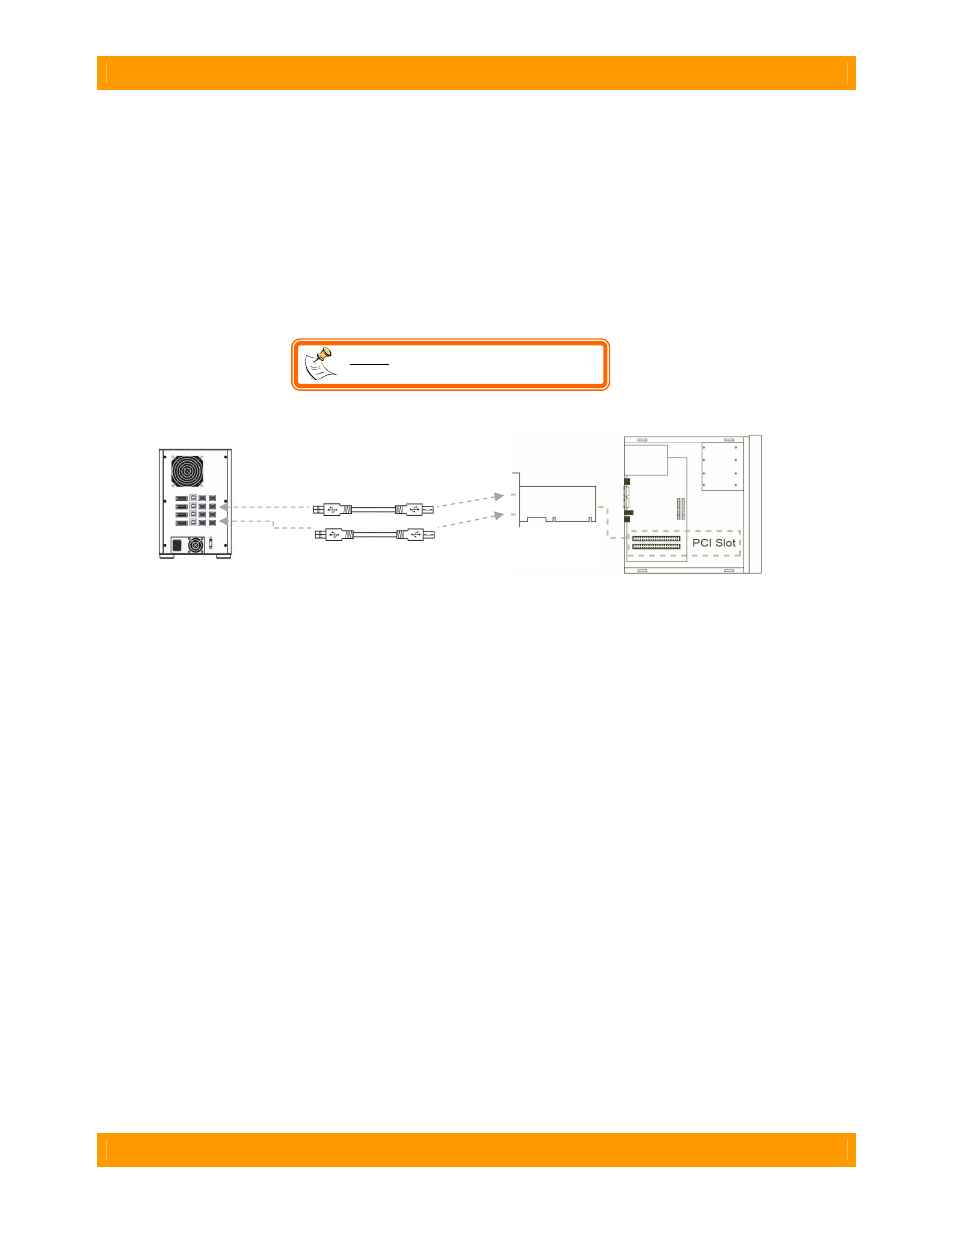
2.4 Connecting and Powering Forensic RTX410-3QJ
Plug in the data cables and power cord. The Forensic RTX410-QJ connects to your computer through
FireWire, eSATA or USB. Each drive has its own dedicated connection for maximum data speeds. Plug
one end of each cable to the back of the unit. Insert the other end into an open port on the computer.
Connect the power cord to the rear of RTX. Plug the other end to a grounded electrical outlet.
Your product is now ready to use! Turn on the power switch on the back of the unit. If your target drives
are already formatted, you can begin using them right away. Otherwise you can format them at this time
to prepare them for usage with your computer. For obvious reasons, drives in the write-blocked bays
cannot be formatted.
2.6 Daisy Chaining
If daisy-chaining, join all four bays together using three FireWire cables. Connect a fourth FireWire cable
to one of the remaining open FireWire ports on the back of the Forensic RTX. Plug the other end of that
cable into an open FireWire port on the computer. Be sure to label your drives in such a way that you’ll
know which one you’re accessing on the computer.
3. Usage with Mac and Windows Operating Systems
3.1 Usage with Mac OS X
3.1.1 Compatibility
Forensic RTX does not require drivers for operation under Mac OS X. However, if you install a host card
specifically to work with this product, that card may require drivers. See your card’s User Manual for
drivers and instructions.
3.1.2 Formatting a drive
To format, use Mac OS X’s Disk Utility (found in the applications folder).
a) Click on the drive in the window to the left (see picture below).
b) Click the Erase tab in the window to the right (see picture below).
c) Select the format type. Most users prefer Mac OS Extended with Journaling (HFS+), which is required
for compatibility with Time Machine (OS 10.5 or newer). If you need to use your drive with both Mac and
Windows computers, select MS-DOS File System instead.
d) Enter a name for the new volume and then click “Erase” to start the process.
FireWire cables