Using usb writeblocker, 1 usb writeblocker host connections, 2 accessing a drive/device with usb writeblocker – CRU USB WriteBlocker User Manual
Page 4
CRU-WiebeTech
U S B W r i t e B l o c k e r U s e r M a n u a l ( A 9 - 0 0 0 - 0 0 1 8 ) R E V 1 . 0
- 4 -
2. Using USB WriteBlocker
2.1 USB WriteBlocker Host Connections
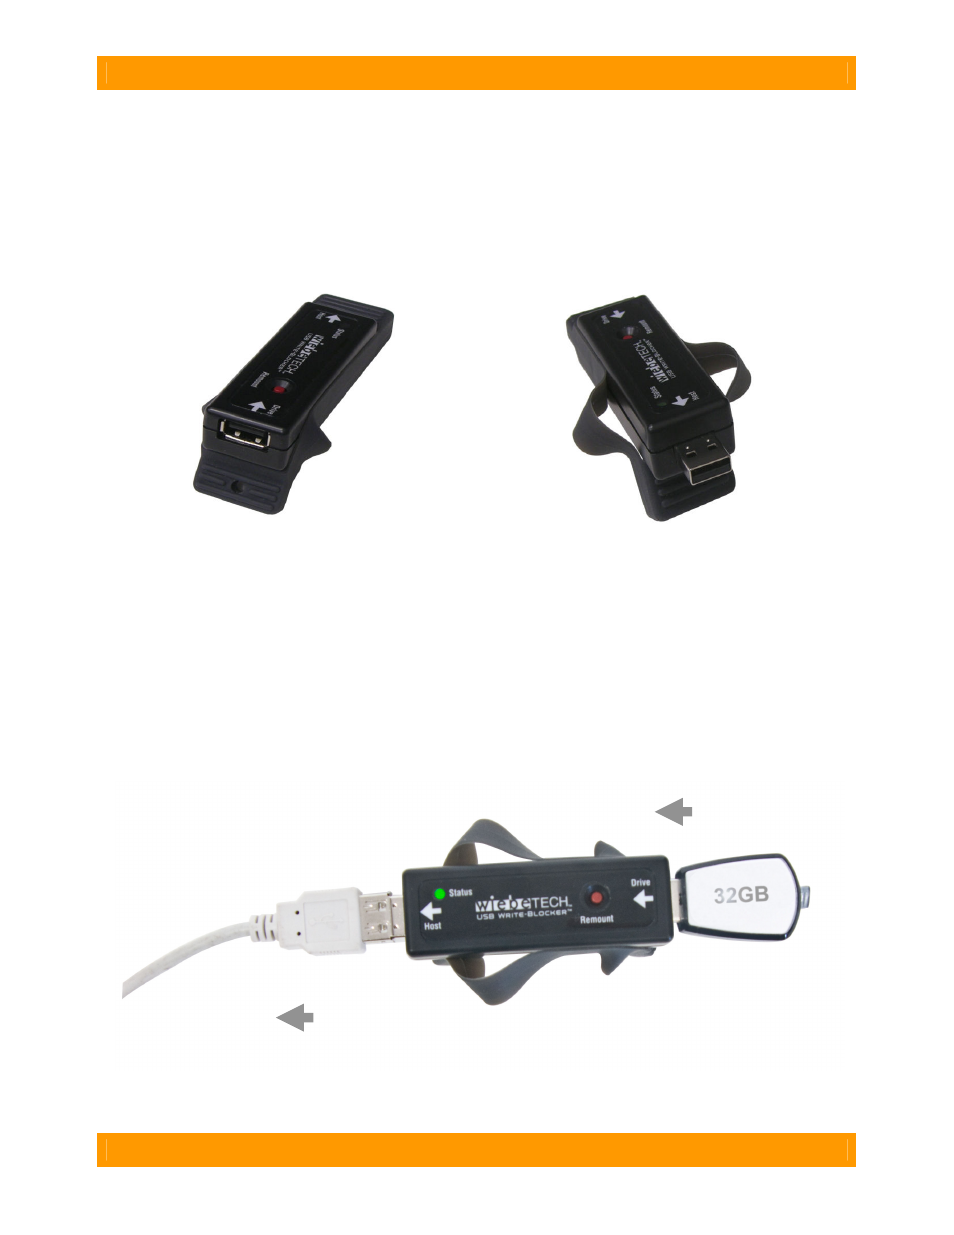
USB WriteBlocker is equipped with a USB Type A receptacle for attaching your hard drive, flash media or
drive enclosure.
USB WriteBlocker has a USB Type A plug for attaching to your computer.
2.2 Accessing a Drive/Device with USB WriteBlocker
Start by connecting your device under capture into the “Drive” side of USB WriteBlocker. After that, USB
WriteBlocker’s “Host” side can be attached directly to a computer’s USB Type A port or the USB
extension cable packaged with USB WriteBlocker can be used for a little more length. If your device
under capture has an on/off switch then turn the unit on. USB WriteBlocker is bus-powered by the USB
port from the computer so there is no need for an on/off switch. However, there is a “Remount” button for
a few instances where USB WriteBlocker might not be recognized by the computer. If that is ever the
case, unplug USB WriteBlocker and cycle power to the device under capture drive/device. After power
has been cycled then plug the USB WriteBlocker back in and press the “Remount” button. The below
picture depicts the connection process.
to computer
from target