Caution – Nexen TL 10 - 15 801570 User Manual
Page 16
13
FORM NO. L-21185-B-1209
FIGURE 18
19
21
21
5
CAUTION
Working with spring loaded or tension
loaded fasteners and devices can cause
injury. Wear safety glasses and take the
appropriate safety precautions.
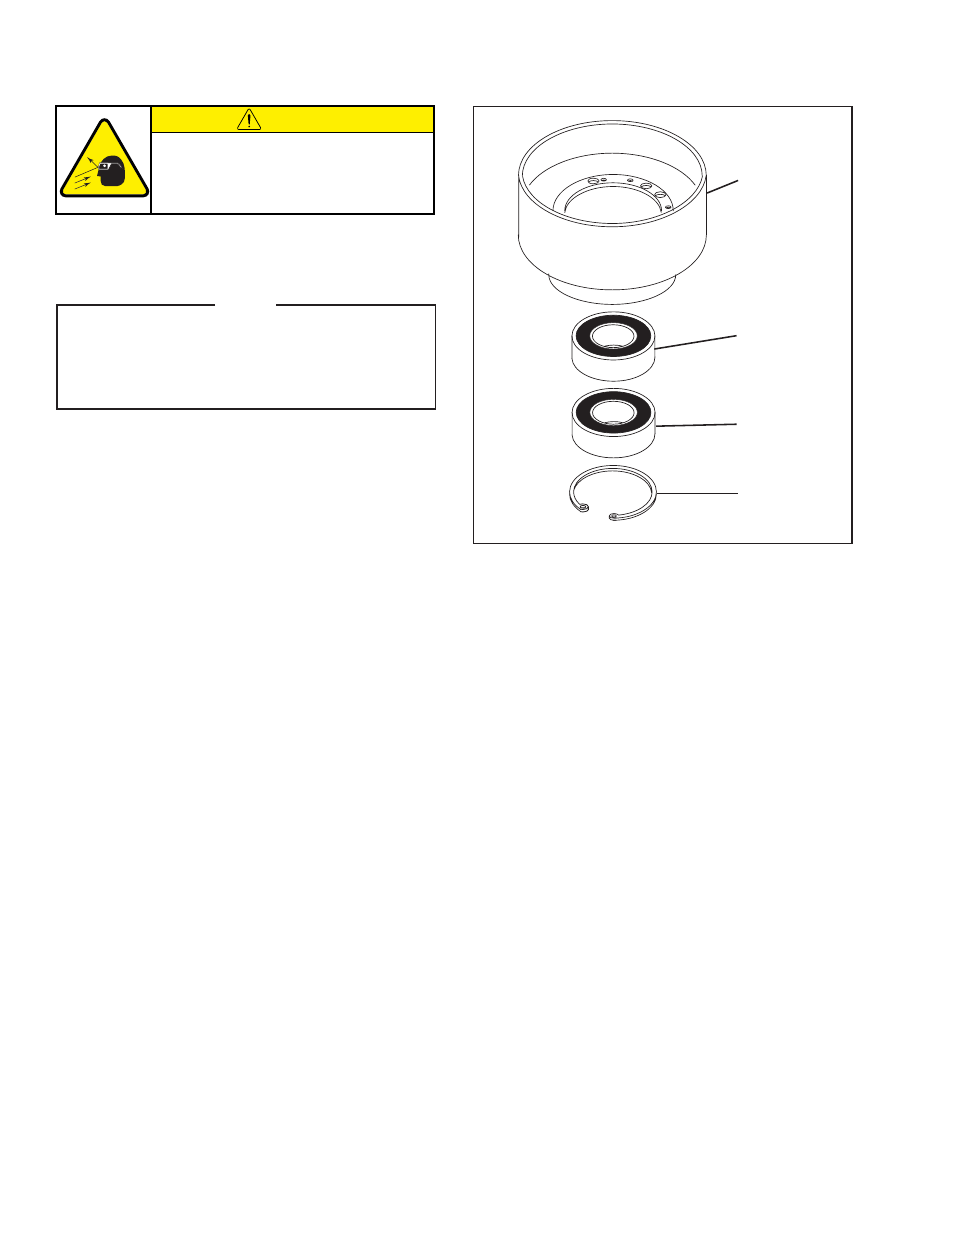
REFER TO FIGURE 18.
1. Remove the Retaining Ring (Item 5) from the Drive
Flange (Item 19).
NOTE
The Drive Flange Assembly consists of: machine
screws, ball seat, balls, and Drive Flange. If any
of these items show signs of wear or damage,
the entire Drive Flange Assembly (Item 19)
must be replaced.
2. Fully support the Drive Flange Assembly (Item 19)
and press the Ball Bearings (Item 21) out of Drive
Flange Assembly.
NOTE: Do not reuse old Ball Bearings. Applying
force to the inner race to remove ball bearings
held by the outer race causes damage to ball
bearings.
3. Clean the bearing bore of the Drive Flange Assembly
(Item 19) with fresh solvent, making sure all old
Loctite
®
residue is removed.
4. Apply an adequate amount of Loctite
®
680 to evenly
coat the outer race of the new Ball Bearings (Item
21) and press the new Ball Bearings into the Drive
Flange Assembly (Item 19).
5. Reinstall Retaining Ring (Item 5).
DRIVE FLANGE BALL BEARINGS