Woodhaven 5432: HD Panel Master User Manual
Page 4
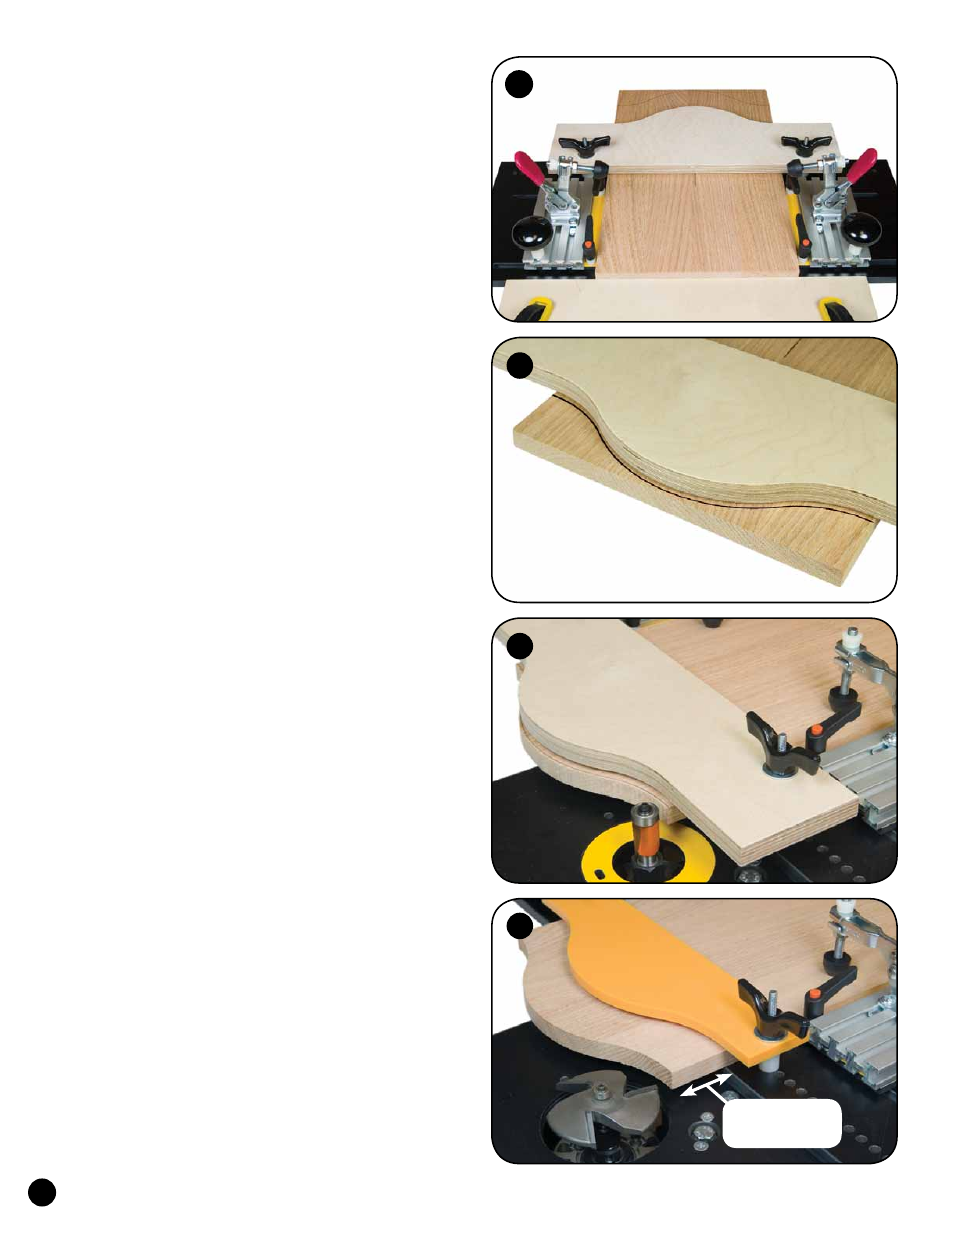
USING THE HD PANEL MASTER
Mark a centerline on your panel and cut one end square.
Insert the panel between the template and the base of the HD
Panel Master. Lay the Panel Master on a bench, clamp a 3/4"
thick piece of scrap to your bench and butt the back edge of the
HD Panel Master and the square end of the panel up against
it. This serves to square the fences/panel on the base. Slide
the fences up against each side of the panel, center the panel
to the template and tighten the fence knobs. See fig. 9.
Place the panel in the Panel Master at the desired
finished length. Trace the outline of the template
on the panel, remove the panel and cut it to shape,
staying 1/8" or less from the line. See fig. 10
FLUSH TRIM PANEL
Clamp the panel in the HD Panel Master, hold the
handles and flush trim the panel to shape using a flush
trim cutter on your router or shaper. See fig. 11.
Next operation is cutting the raised panel, and you can use
the HD Panel Master for that too. Install the cutter and adjust
the height, taking into account the 1/2" thickness of the base.
You may want to set up an extra machine so you can switch
between flush trimming and panel raising operations quickly.
FOR ROUTER PANEL RAISING
The door template (you can use either Standard or
HD Door Templates) can be removed (not mandatory) as the
bearing will follow the panel, not the template. It's important
that the panel project past the edge of the base approximately
1-3/4" so there is no risk of the router bit striking the base.
This is the automatic position of the panel if using the larger
HD Door Templates, but not the smaller Standard Door
Templates. Make sure you have at least 3/4" of the bit
shank in the router. If extra bit height is needed, you may
need to use a router lift or collet extension. See fig. 12.
FOR SHAPER PANEL RAISING
DO NOT use Standard Door Templates with a shaper!!
If possible (depends on raised panel cutter & bearing set up),
keep the HD Door Template on the HD Panel Master for the
raised panel cut. The templates are extra long so the bearing
can make contact with the template before the cutter makes
contact with the panel, allowing the template to act as a starting
pin. Make sure the template is in line with the raised panel
cutter bearing. Clamp the panel in the HD Panel Master with
the toggle clamps, hold the the handles and cut the raised panel
using the raised panel cutter on your shaper. See cover image.
©Copyright WOODHAVEN INC. 12/21/06
(800) 344-6657 or WWW.WOODHAVEN.COM
11
10
3
9
12
Adjust fences so panel center lines
up with template center
Square cut end of panel
3/4" Scrap clamped to bench
Draw line for rough cut
HD Door Template
Standard Door
Template
Approximately
1-3/4"