Woodhaven 6000: Horizontal Router Table User Manual
Page 4
To
MF
58
P
M
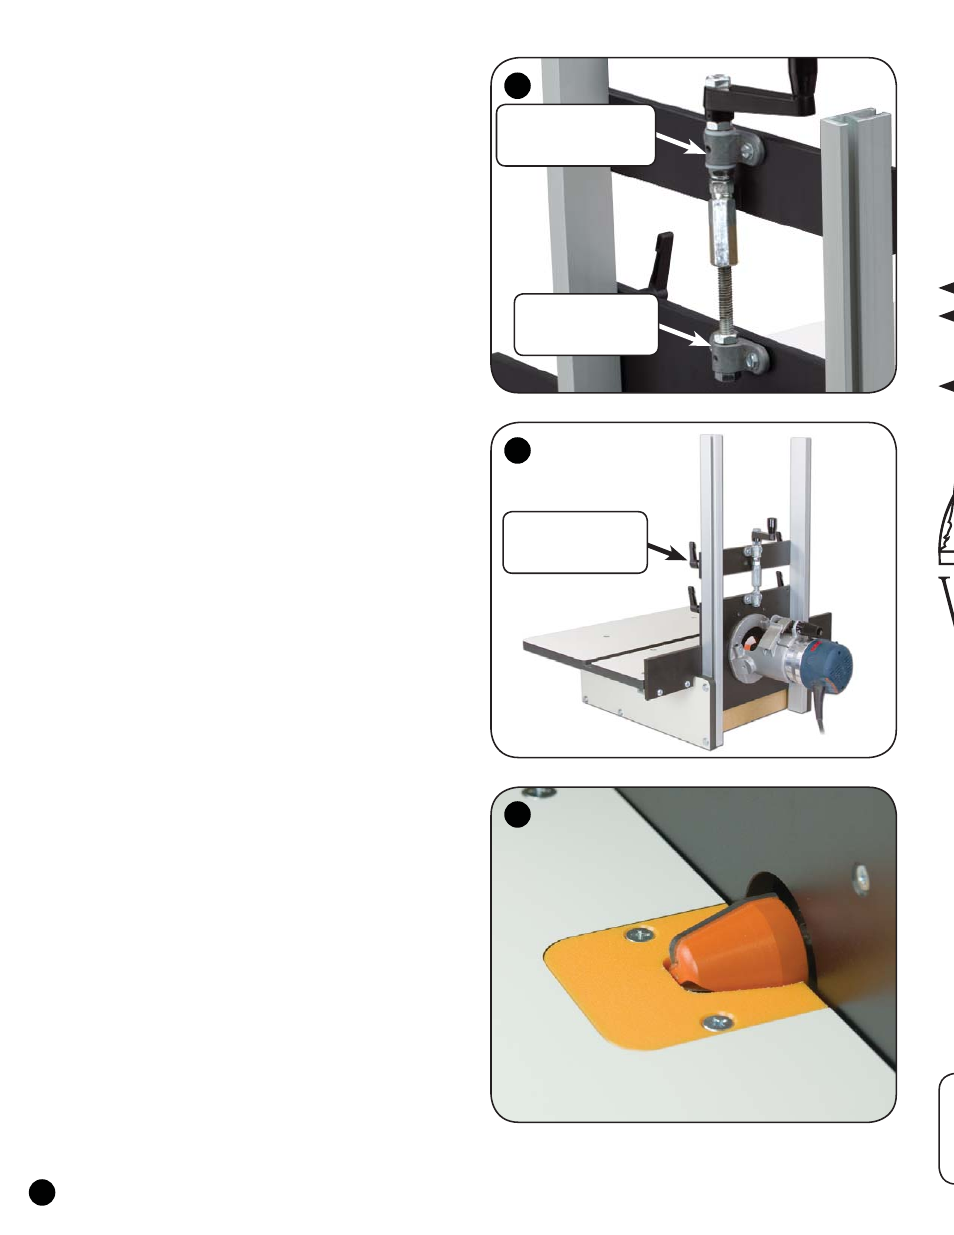
INSTALL CRANK HANDLE & ROUTER
Get the crank handle (6000C). There are two assemblies
to this part - one has a crank & nut, the other has a bolt
and both have a mounting bracket with two holes. Attach
the bolt assembly to the back top of the router plate with
two 1/2" screws (5770B) thru the two holes in its mounting
bracket, but leave them loose for now. See fig. 10 & 11.
Install the crank assembly on the back of the crank
support (6000B - the side with the machined ends)
using two 1/2" screws (5770B) thru the two holes in its
mounting bracket, but leave them loose for now. From
the front of the support, insert a washer (WS002) on each
stud of the ratchet handle (5859), insert the stud thru the
hole at each end and start an oval nut (5760B - smooth
side first) on the end of the studs. See fig. 10 &11.
Slide the support/oval nuts onto the 24" tracks until
the nut of the crank lines up with the bolt on the plate.
Turn the crank to screw the nut onto the bolt approximately
1", then tighten the ratchet handles on the crank support
and the four 1/2" screws (5770B). See fig 10 & 11.
ATTACH ROUTER & GUARD
Mount your router on the router plate. Insert the two
thumb screws (5503) thru the slots of the Guard (224) and
into the threaded holes in the router plate. See Cover.
MOUNT ZERO-CLEARANCE INSERT
Mount a zero-clearance insert (6000N) in the recessed
opening in the table using the two 3/4" screws (MF010). An
extra insert is provided and extras may be ordered. See fig. 12.
USING THE HORIZONTAL ROUTER TABLE
The crank provides 1-3/8" of fine bit height adjustment.
By loosening the two ratchet handles on the crank support,
you can move the entire router plate/crank support assembly
up or down for a great range of coarse adjustment.
Make sure the two handles on the router plate are
loosened and the two handles on the crank support are tight
before attempting to turn the crank. Make sure you tighten
the router plate handles after all height adjustments.
Clamp or bolt the horizontal table to a workbench before
using. The horizontal table can be used for mortising, edge
routing, vertical panel bits, cutting tenons, etc. For safety, we
recommend the bit be kept under the work/table during use.
For mortising, we recommend our optional 6010 or 6011
Mortising Table. For additional safety and routing consistency
we recommend using the 6000HD Hold-All Kit we include.
©Copyright WOODHAVEN INC. 12/14/10
(800) 344-6657 or WWW.WOODHAVEN.COM
3
10
11
12
Attach crank assembly
to 6000B Crank
Support w/1/2” screws.
Attach bolt assembly
to Router Plate
w/1/2” screws.
Attach 6000B Crank
Support to 24” tracks
w/ratchet handles.