Installing a drive into the drive carrier, Inserting a drive into the chassis – StorCase Technology 4-Bay Desktop SCSI Ultra320 User Manual
Page 18
10
Installation
StorCase Technology, Inc.
InfoStation 4-Bay User's Guide - Rev. C01
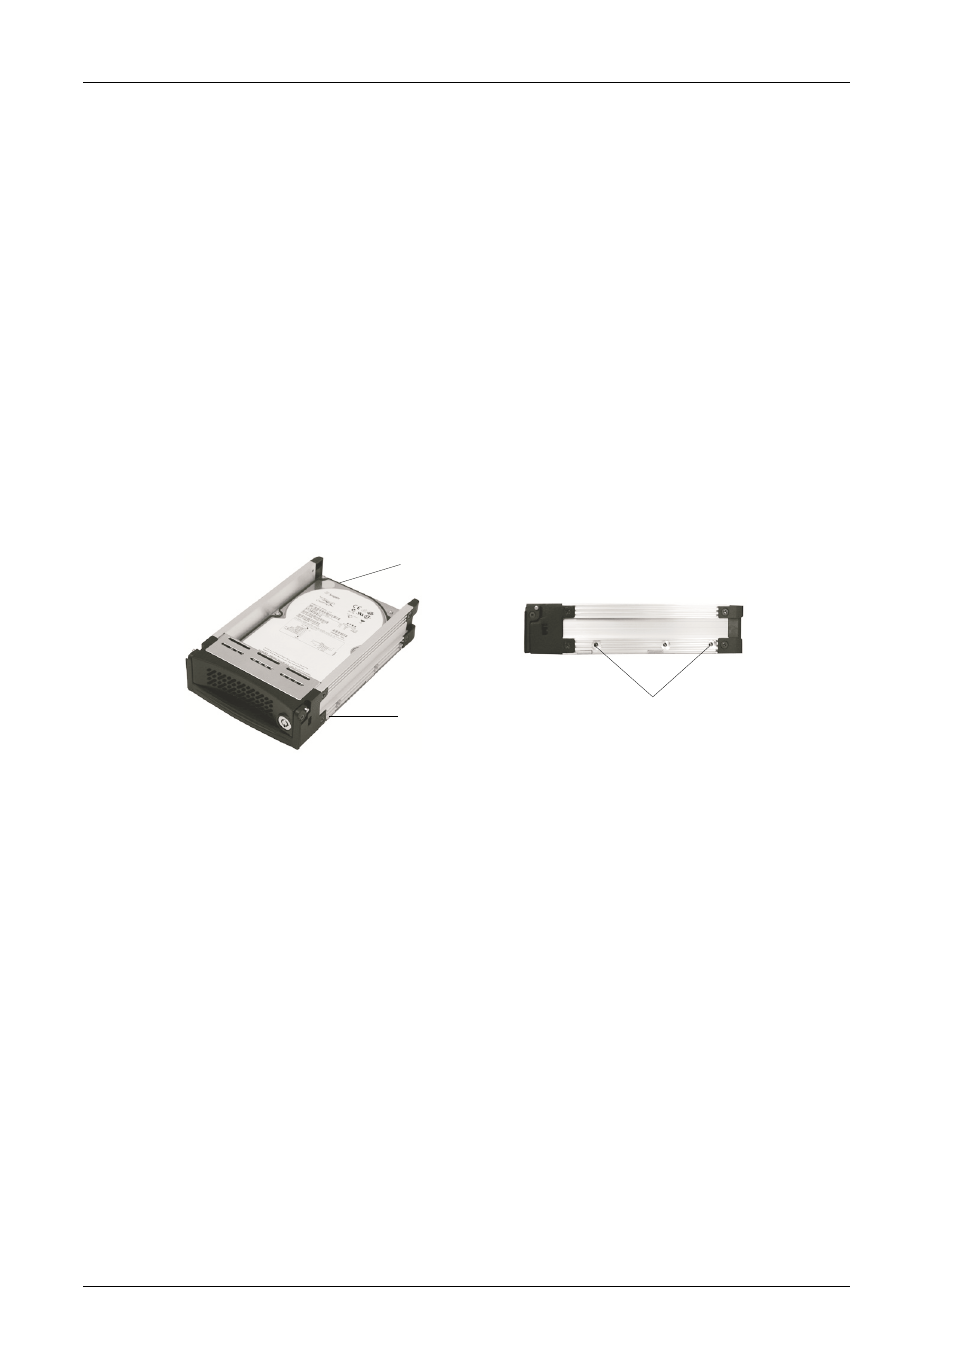
Figure 6: Drive Installation
Drive
Carrier
Ultra320
SCA Drive
(Not Included)
IFS4_1
#6-32 Phillips
Pan Hd. Screw
(2 on each side)
Installing a Drive into the Drive Carrier
NOTES:
Before installing the drive into the carrier, the ID jumpers and spin-up option
jumper on the disk drive must be removed. This is required so that the InfoStation
itself can set the drive SCSI ID and spin-up option.
A #2 Phillips screwdriver will be required for this procedure.
1.
Install the drive(s) into the drive carrier(s). Drive(s) must be side-mounted into the
drive carrier(s) using #6-32 Phillips Pan Hd. screws (Figure 6).
2.
After the drive(s) have been installed in to the drive carrier(s), carefully insert the
carrier(s) back into the chassis (refer to section "Inserting a Drive into the Chassis"
for further information).
Inserting a Drive into the Chassis
NOTES:
A new drive can be inserted into an empty bay at anytime. However, the drive
will not be ready for access until the following procedure is followed.
The key lock is only to prevent unauthorized removal or installation of the drive
carrier. Locking the key lock is not required for drive carrier operation.
1.
Press and hold the Insert/Remove button (Figure 5) in until the Drive Ready LED
starts to flash (approximately 3 seconds).
2.
Drive is ready to be accessed when the Drive Ready LED glows instead of flashes.