Installing the drive into the carrier – StorCase Technology DE110 User Manual
Page 19
12
Installation
StorCase Technology, Inc.
Encrypted DE110 User's Guide - Rev. A01
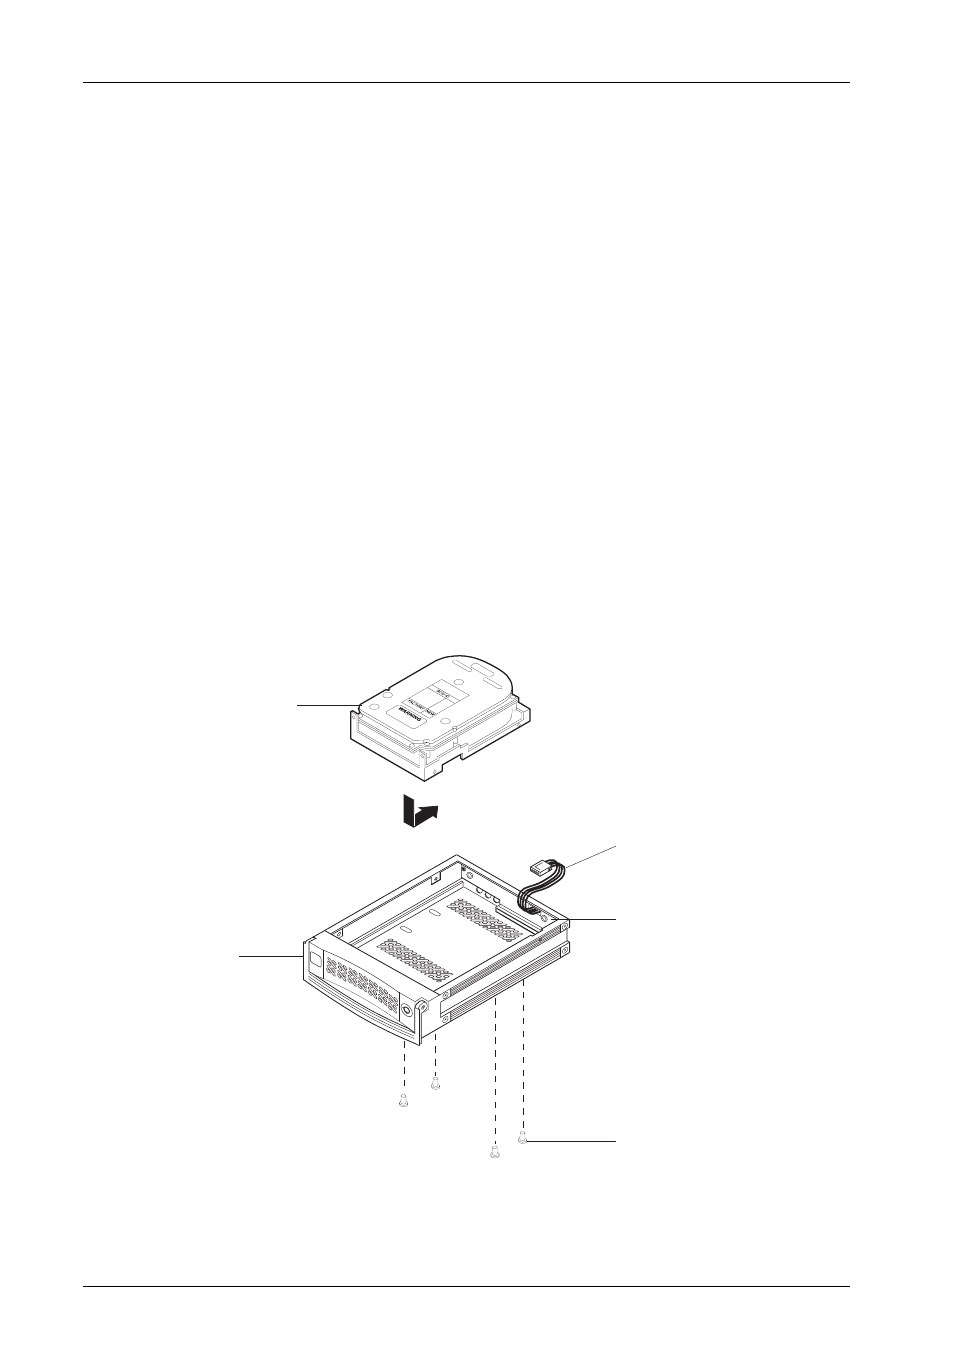
Figure 7: Drive Installation Assembly
Installing the Drive into the Carrier
1.
Attach the DC power cable (from the Drive Carrier Board) to the drive (Figure 6).
2.
Carefully insert the drive into the carrier. Slide the drive towards the Drive Carrier
Board, so that the I/O connector on the drive mates with the connector on the Drive
Carrier Board (Figure 7). Make sure that the DC power cable is not pinched.
Turn the drive/carrier assembly over.
3.
Fasten the drive into place with four (4) #6-32 Phillips F.H. screws (Figure 6). Some
drives may require minor adjustment before securing into carrier with screws.
4.
Install the provided drive cover (Figure 8A).
NOTE:
Security key can be stored in slot located on the drive carrier cover
(Figure 8B) for easy access.
Drive
(Not Included)
Drive Carrier
Board
DC Power
Cable
#6-32 Phillips
Flat Hd. Screw
(4 each)
Drive
Carrier
0835