Installation – StorCase Technology DE100i-A66 User Manual
Page 15
8
Installation
StorCase Technology Inc.
DE100i-A66 User's Guide - Rev. A00
Installation
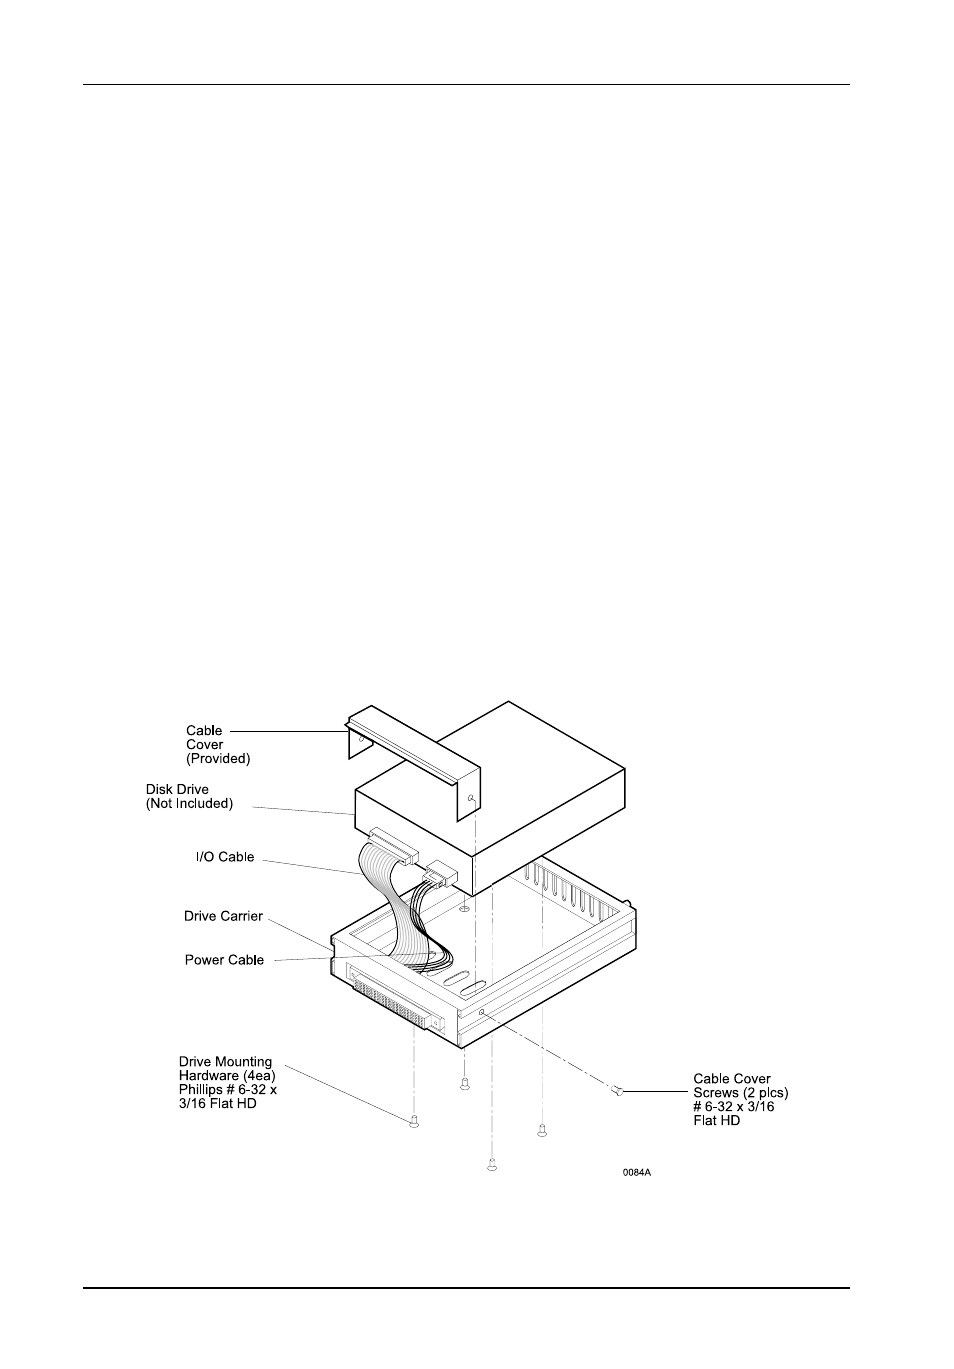
1.
Attach the I/O cable on the drive carrier circuit board to the drive. Refer to Figure
7 for an illustration of the installation process.
2.
Attach the power cable on the drive carrier circuit board to the drive. Carefully
insert the drive into the drive carrier at an angle, cable-end first. Make sure
none of the cables are pinched. Lower the front of the drive carefully into
place. Fasten the drive into the carrier with the four (4) screws provided as
shown in Figure 7.
3.
Install the provided cable cover.
Figure 7: Drive Installation Assembly
Drive Activity Indicator Connector (J5)
Jumper removed (factory default) disables drive activity indicator (Figure 4).
Jumper installed enables drive activity indicator.
NOTE:
If two (2) drives are installed (with J5 enabled on both drives), both drive activity
indicators will flash simultaneously, even if only one drive is being accessed.