Fly high with hitec, Powering on your model, Ready 2go version hitec 2go version – HITEC Sky Scout (2GO) User Manual
Page 8
8
Fly high with Hitec
Section Four: Final Assembly and Adjustments
The next steps will guide you through the process of making the final adjustments to your model’s control surfaces. Before you can make the
adjustments you must power up your model according to the instructions of the version you purchased.
Your Lite 4 transmitter is linked to the Minima 6S receiver that is installed in your model at the factory. In the event you need to re-link your transmitter
follow the instructions in the Hitec 2Go section.
1. Install the fully charged power battery into the nose of the Sky Scout pushing it in as far forward as possible. (Page 9, Fig. 1)
2. Turn on the transmitter and set the throttle stick to the lowest limit. Connect the flight battery to HM18A ESC installed in the plane. If it is
connected correctly, the ESC will beep once or twice and automatically recognize the throttle.
Note: If the ESC does not beep, check to make sure the throttle is in the down (off) position. To reset the ESC unplug the battery for 5
seconds before trying it again.
3. Wiggle the Rudder and Elevator sticks to make sure everything is operating properly. Once you have verified they are working set the trims to
their neutral positions.
4. Proceed to
Step 2 Final adjustments
Before powering on your model you must link/bind the Minima 6S receiver to your Hitec AFHSS transmitter as detailed below. Your Hitec radio or Spec-
tra module requires AFHSS firmware update 3.01 to use the Minima 6S. If you don’t currently have this version installed, you can upgrade the firmware
using the HPP-22 interface.
2.
4G
Hz
6
C
ha
nn
el
Ai
rc
ra
ft
R
ec
eiv
er
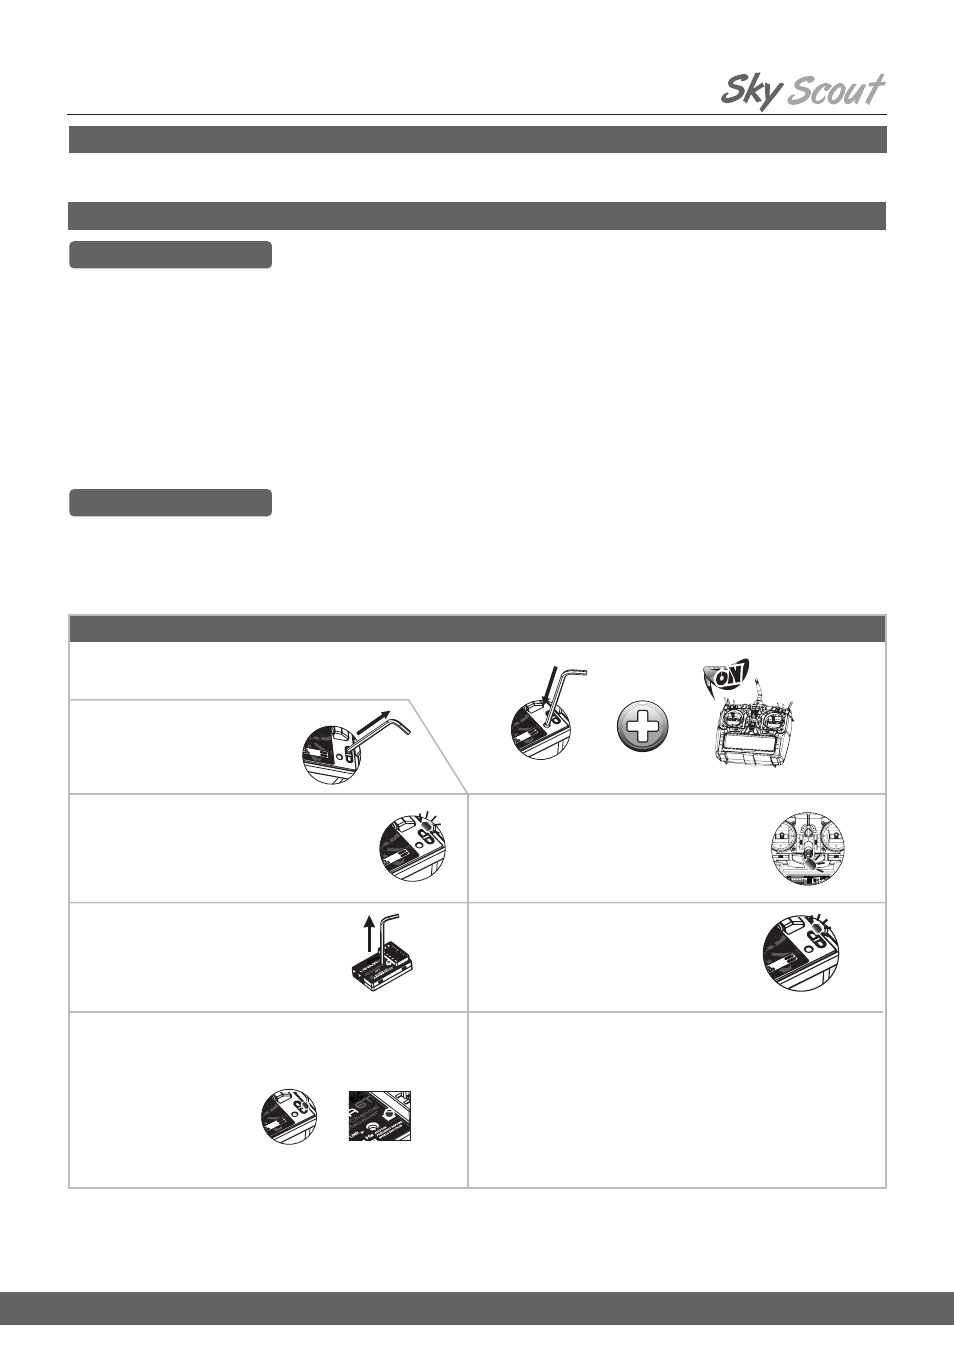
On the transmitter or module press and hold the link
button while turning on the transmitter.
Release the link button.
Press and hold the link button on
the Minima 6S receiver and connect
the flight battery to HM18A ESC
installed in the plane.
Hitec 2.4GHz Transmitters & Modules
Confirm the Blue LED is blinking. If Red
LED is blinking, press the link button for 2
sec., until the LED changes to Blue.
When the link is completed, the Blue LED on
the module or transmitter will blink. On the Lite
4 transmitter the Red LED will blink slowly.
C
ha
nn
el
Re
ce
ive
r
Lite 4 Transmitter
The Red power LED will blink when the Lite
4 Transmitter is ready to bind.
When the Blue LED is illuminated
release the link button. The Blue LED
will blink while finding the transmitter
signal. When linked the Blue LED on
receiver glows steady
Binding Process for the Hitec Minima 6S Receiver (Included in R2Go & H2Go Versions)
1. Install the fully charged power battery into the nose of the Sky Scout pushing it in as far forward as possible. (Page 9, Fig. 1)
Unplug the power battery then turn off the transmitter. Then
turn the transmitter back on and plug the battery back in.
The Red LED on the Transmitter and the Blue LED on
the receiver will glow steady indicating the receiver and
transmitter are bound. Additionally the ESC will beep once
or twice and automatically recognize the throttle.
Note: If the ESC does not beep, check to make sure the
throttle is in the down (off) position. To reset the ESC
unplug the battery for 5 seconds before trying it again.
Powering On Your Model
Ready 2Go Version
Hitec 2Go Version
2.
3.
4A.
4B.
5.
6.
7.
8.
9. Wiggle the Rudder and Elevator sticks to make sure everything is operating properly. Once you have verified they are working set the
trims to their neutral positions.
10. Proceed to
Step 2 Final adjustments
Link
V-TAIL
OFF
ELEVON
CH1C H2 CH3C H4
REV
NOR
2.4GHz 4 Channel Aircraft Radio