Fly high with hitec – HITEC Sky Scout (2GO) User Manual
Page 21
21
Fly high with Hitec
Wing and Tail Plane Repairs
The following instructions will help guide you through a major wing and / or tail plane repair. The parts required for this are 57002, 57003, 57005 and
57006. You can use a combination of new or salvaged pieces to accomplish this repair. You will also need medium body CA glue and a CA adhesive
activator along with some simple tools.
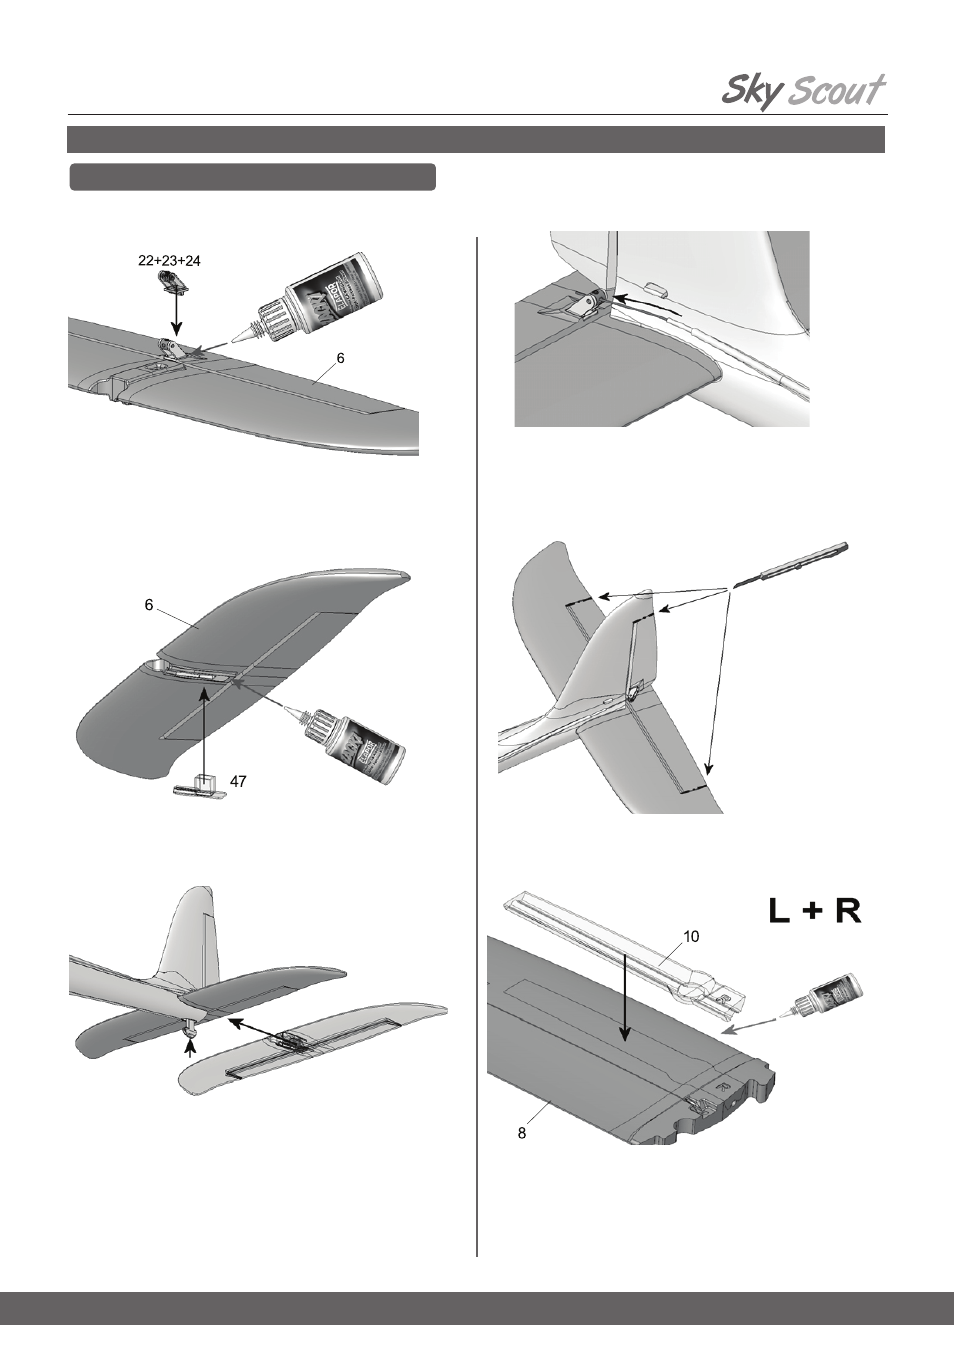
23. Attaching the horns to the Elevator
Spray activator on the joint surface (the underside) of the horns. Apply CA
Glue to the horn recess in the elevator. Leave the fluid to air-dry for a few
seconds, and then press the horns into its recess.
24. Installing the tailplane frame
To guarantee a secure seating, the tailplane frame
47 must be glued in
the recess of the tailplane
6.
25. Attaching the tailplane
First withdraw the tailplane slider
48 slightly, then insert the tailplane 6 and
push the slider back in as far as it will go to secure the tailplane.
Do not glue it! The tailplane should be left detachable for safe, convenient
transport. To remove the tailplane, press the tailplane clips
44 together with
two fingers, and at the same time pull the tailplane slider
48 down; the
tailplane can now be removed.
26. Connecting the elevator
Slip the inner pushrod for the elevator through the hole in the swivel barrel
23, and check the servo neutral position once more before tightening the
allen-head grubscrew
24.
We recommend that you apply a drop of medium-strength thread-lock
fluid to the grubscrew to prevent it working loose over time.
Section Seven: Repair and Maintenance of Your Model
27. Releasing the control surfaces
Use a sharp razor knife to remove the foam at the lateral ends of the con-
trol surfaces, cutting along the moulded-in end channels only. Repeatedly
move the control surfaces to and fro in order to loosen the integral hinges
and render them free moving.
Do not separate the control surfaces!
28. Installing the wing joiner channel cover
Carefully glue the wing joiner channel covers
9 and 10 in the wing panels
7 and 8. Take particular care to avoid glue running onto the surfaces
which will later make contact with the wing joiner
50. Check that the wing
joiner
50 is a snug fit in the wings, but only when you are absolutely con-
fident that there is no active adhesive inside the channel. If you neglect
this, you could find that the model is glued together permanently.