Fly high with hitec – HITEC Sky Scout (2GO) User Manual
Page 7
7
Fly high with Hitec
2
Section Three:
Quick Assembly Guide – (R2GO, H2GO, P2GO)
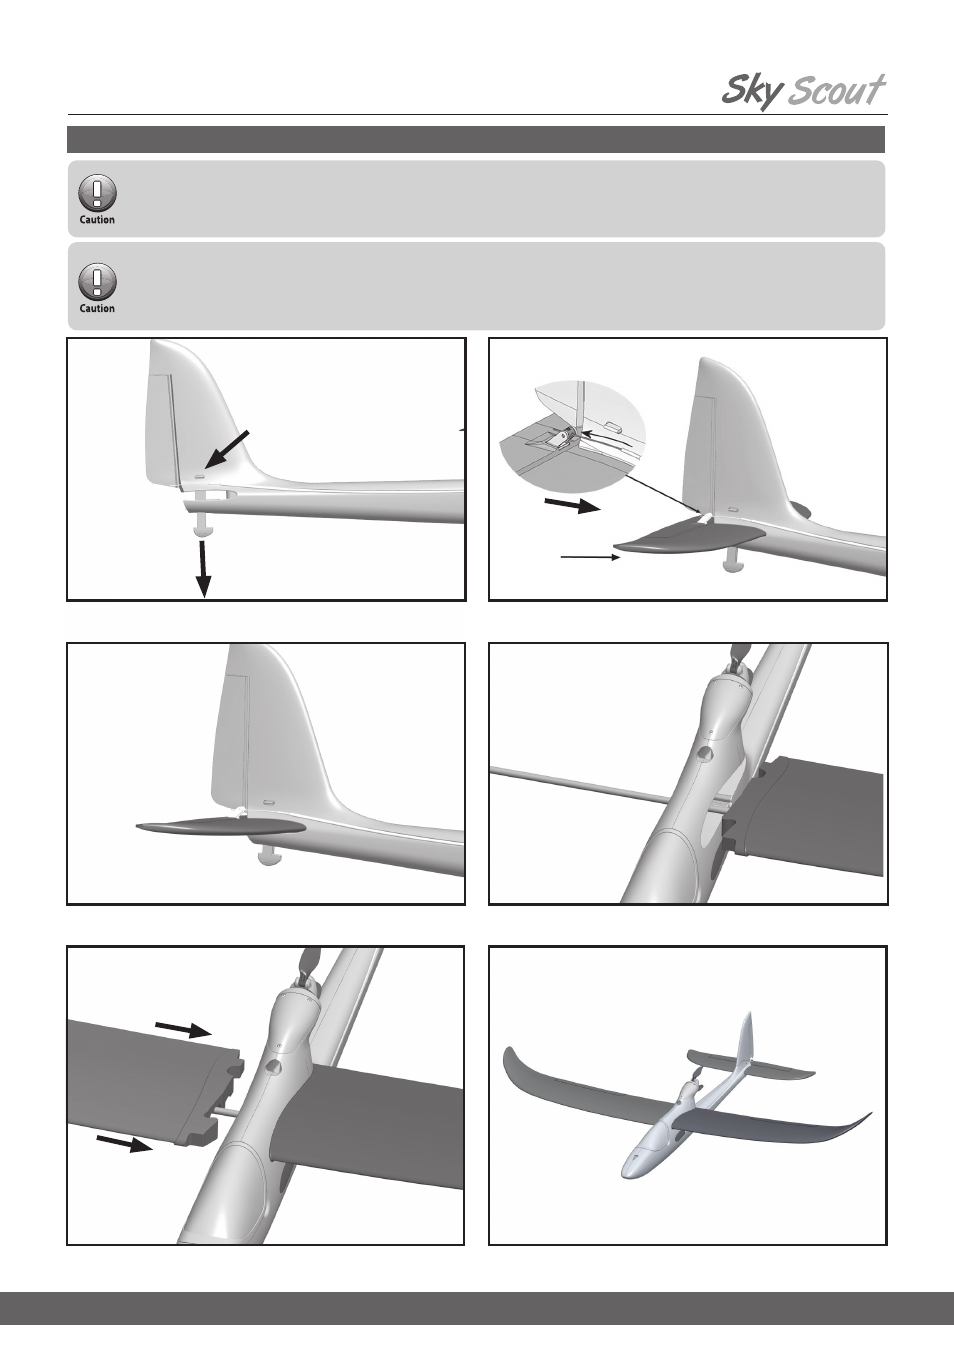
Insert the Tailplane Clip to affix the Tailplane to the fuselage. Make sure
the clip latches into place and that the Tailplane is securely set in place.
Slide the other wing over the joiner and into the fuselage to connect with
the first panel.
You now have completed the basic assembly of your model.
Insert the Wing Joiner into one of the wing panels and insert them into the
fuselage.
Carefully slide the Tailplane into the fuselage slot while at the same time
making sure the Elevator Push rod slides through the swivel barrel.
3
4
5
6
Cautionary Notes before Assembling the Sky Scout
Keep in mind when assembling and flying the Sky Scout that radio control model airplanes may cause injury or property damage when
improperly flown or mishandled. Always follow the warnings written in the instruction manual. Improper usage could lead to damage
and / or failure of the electronic equipment. Be sure to read this instruction manual in its entirety before assembling and flying this model.
Assembly Instructions
This section will help you prepare your Sky Scout for flight as quickly as possible. Read and follow the following instructions carefully.
Experienced pilots may choose to install the optional ailerons for additional flight performance. While the necessary hardware is included
with your Sky Scout, two additional sub-micro servos, such as the Hitec HS-55, and two servo extensions are required. The mechanical
installation of the servos and aileron controls are detailed in the assembly instructions in section 6, Adding the Optional Ailerons.
The first step is to slide the Tailplane Clip down and out of the way of the
Tailplane slot in the rear of the fuselage as shown.
1
Squeeze both sides to
release tailplane clip