Fly high with hitec – HITEC Sky Scout (2GO) User Manual
Page 22
22
Fly high with Hitec
Section Seven: Repair and Maintenance of Your Model
29. Installing the wings
Slide the wing joiner
50 into one of the wing panels as shown in the
illustration, then fit the joiner through the fuselage. Before the wing makes
contact with the fuselage, connect the aileron servo lead to the extension
lead already installed in the fuselage.
Connect the plug and socket, then push the wing fully into place; the cable
will now form itself into a loop in the space designed for it.
Fit the other wing panel onto the joiner, and connect the aileron servo
lead to the extension lead already installed in the fuselage, as described
previously.
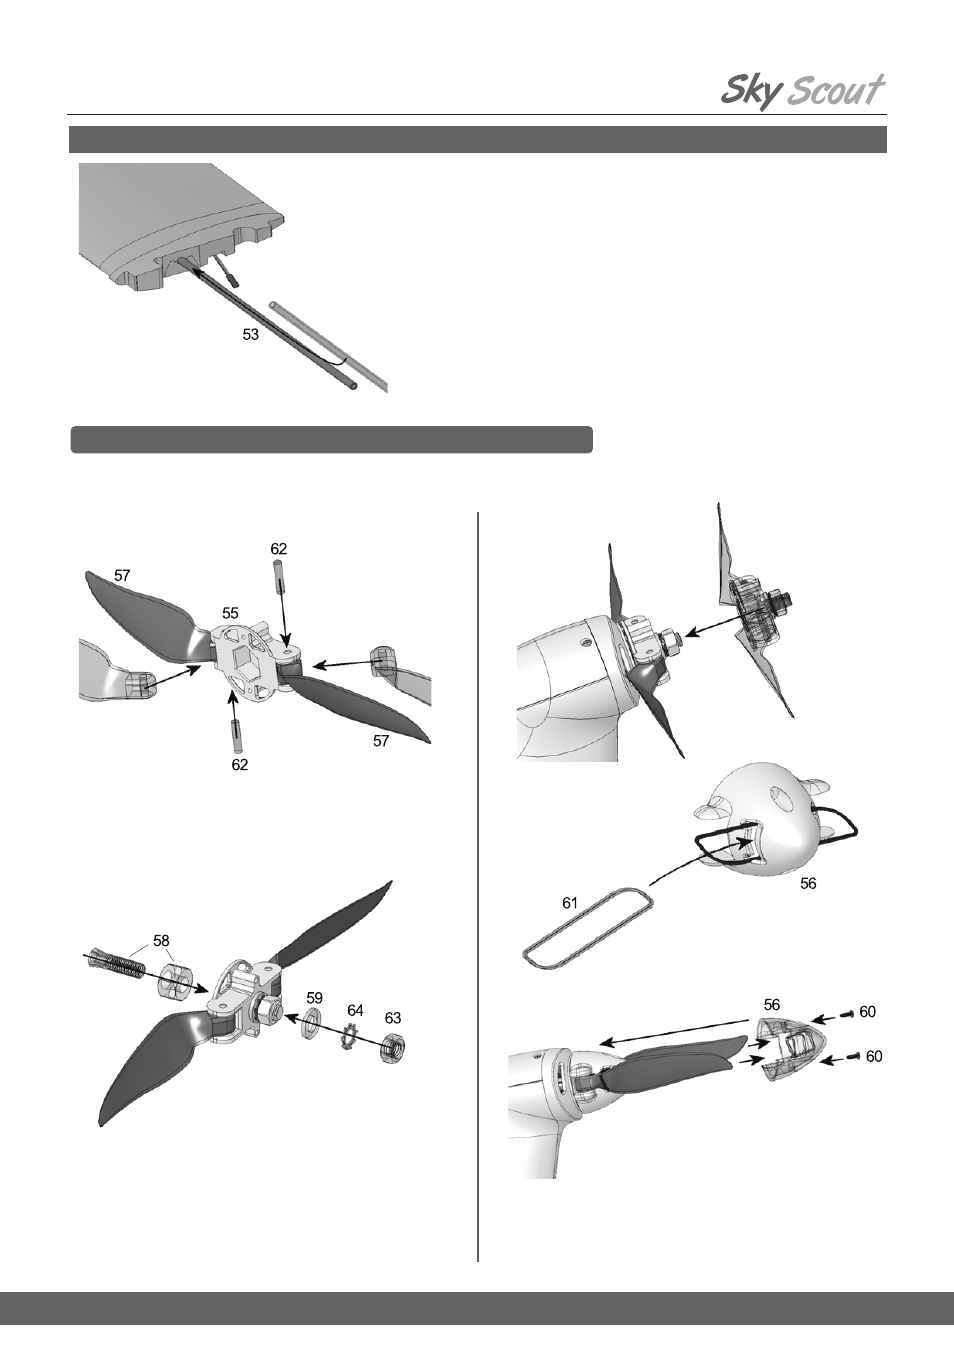
Repair and Maintenance of the Propeller, Hub and Spinner Assembly
30. Assembling the propeller
Attach the propeller blades
57 to the propeller boss 55 using
the two dowel pins
62.
Slip the tapered collet through the driver
58 and place this assembly in
the propeller boss
55. The washer 59 and the shakeproof washer 64 are
fitted from the other side.
Screw the M6 nut
63 on the taper collet 58. Fit the taper collet 58 on the
motor shaft and tighten the nut firmly before fitting the spinner.
Fold the propeller blades
57 back, and pass them through the ends of the
O-ring
61 which project from the sides of the spinner.
Take care to avoid the sharp edges of the propeller blades causing dam-
age to the O-ring
61. Fix the spinner to the propeller boss 55 using the
two pan-head self-tapping screws
60.
Fit the O-ring
61 through the spinner cone 56.
The propeller on the Sky Scout was designed to give you trouble free performance. Occasionally you may need to replace the blades and or rubber
O-ring due to crash damage. The following information will help you service the propeller, hub and spinner assembly. The parts shown are 57009 and
57010.