System startup, System startup -6 – Eurocom X5 User Manual
Page 38
1 - 6 System Startup
Quick Start Guide
1
System Startup
1. Remove all packing materials, and place the computer on a stable surface.
2. Securely attach any peripherals you want to use with the notebook (e.g. keyboard and mouse) to their ports.
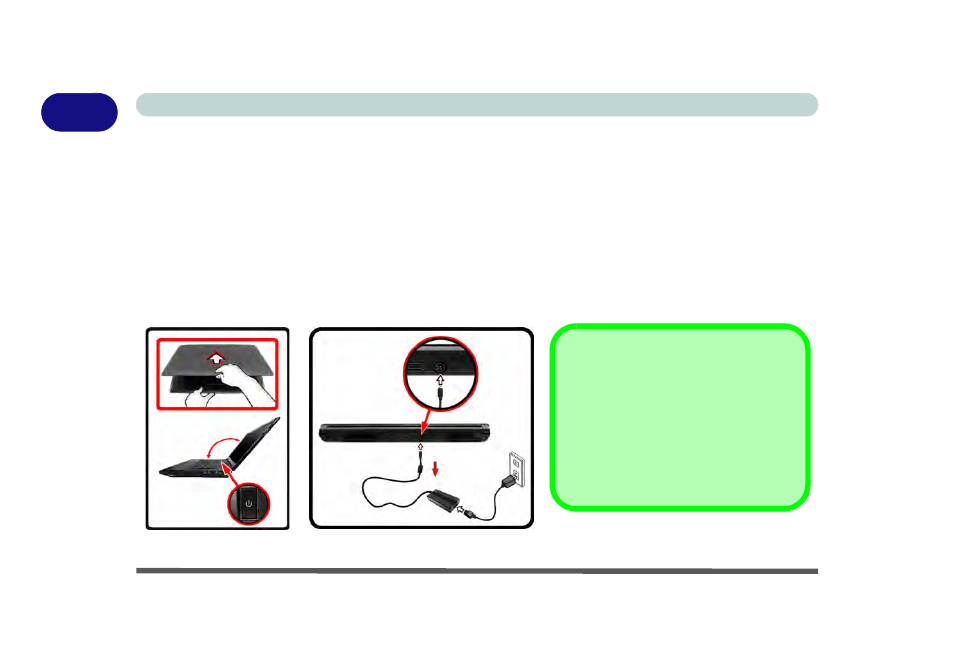
3. Attach the AC/DC adapter to the DC-In jack at the rear of the computer, then plug the AC power cord into an
outlet, and connect the AC power cord to the AC/DC adapter.
4. Use one hand to raise the lid/LCD to a comfortable viewing angle (it is preferable not to exceed 135 degrees); use
the other hand (as illustrated in
below) to support the base of the computer (Note: Never lift the
computer by the lid/LCD).
5. Raise the lid/LCD to a comfortable viewing angle, and press the power button on the top left of the computer for
about 2 - 3 seconds to turn the computer “on” (note that the power LED on the front of the computer will turn
from orange to green when the computer powers on).
Figure 1 - 1 - Computer with AC/DC Adapter Plugged-In/Opening the Lid/LCD
Shutdown
Note that you should always shut your com-
puter down by choosing the Shut Down
command from the Power item in Settings
in the Charms Bar (use the Windows
Logo Key + C key combination to access
the Charms Bar) in Windows 8. This will
help prevent hard disk or system problems.
135
°