Radio shack corporation, Advanced troubleshooting (continued) – Elenco Electronics 202 User Manual
Page 9
Advanced Troubleshooting (continued)
(Adult supervision recommended)
11.
Adjustable resistor (RV):
Build project #204 but use the 1K
Ω
resistor (R2) in place of the photoresistor (RP). Turn on the slide
switch (S1), the resistor control can turn the LED (D1) on and off.
12.
100
μF (C4) and 470μF capacitor (C5):
Build project #49, then
press and release the press switch (S2). The LED (D1) should
go off slowly. Replace the 470
μF with the 100μF and the LED
is only lit for about 4 seconds now.
13.
100K
Ω resistor (R5) and 0.02μF (C1), 0.1μF (C2), and 10μF
(C3) capacitors:
Build project #163, but replace the 100K
Ω
resistor with the photoresistor (RP) and cover it. You will hear
a whining or clicking sound unless the 0.02
μF capacitor is bad.
Now place the 100K
Ω resistor back in the circuit, you hear a
whining sound unless the 100K
Ω is bad. Replace the 0.02μF
with the 0.1
μF, the sound should be different (lower frequency)
or the 0.1
μF is bad. Replace the 0.1μF with the 10μF, the
circuit will “click” about once a second unless the 10
μF is bad.
14.
Variable Capacitor (CV):
Build project #169 and place it near
an AM radio, tune the radio and the capacitor to verify you hear
the music on your radio.
15.
High Frequency IC (U5):
Build project #224 and adjust the
variable capacitor (CV) until you hear a radio station.
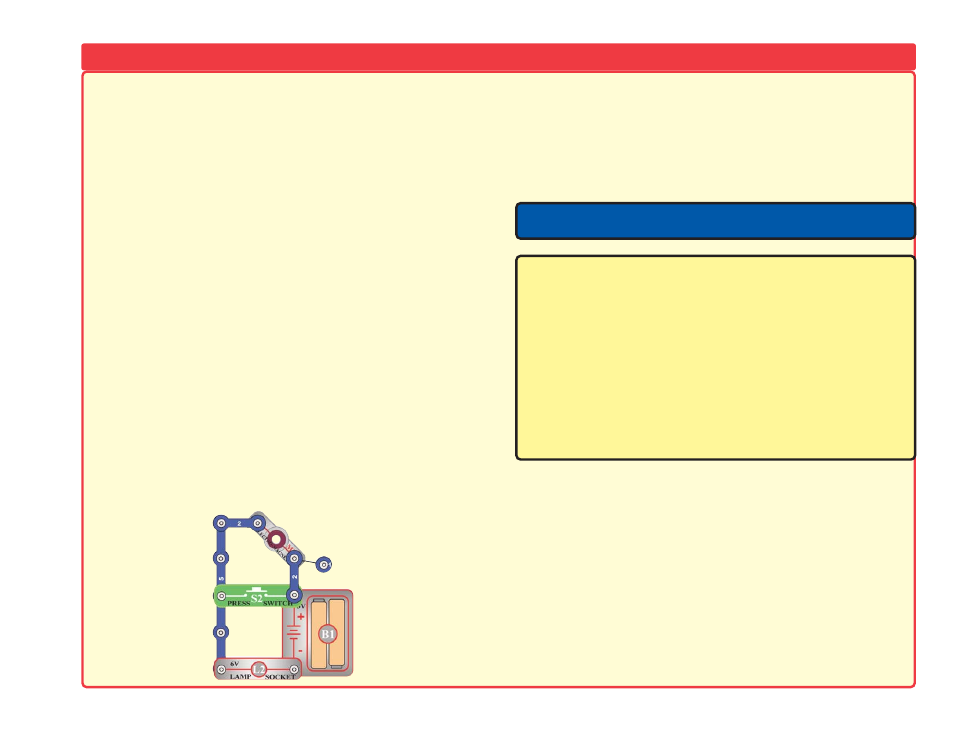
16.
Electromagnet (M3):
Build the mini-circuit shown here. Lamp
(L2) must be dim, and must get brighter when you press the press
switch (S2).
Note: If you have RS-303, there are additional tests in your other
project manual.
For more information, contact:
Radio Shack Corporation
Fort Worth, TX 76102
Call us at
1-800-THE-SHACK
or visit us online at
www.radioshack.com
-8-