Step 3: developing a client application, Xmpp chat client example – Echelon SmartServer XMPP Client User Manual
Page 20
12
Using SmartServer XMPP
Step 3: Developing a Client Application
You can develop a client application that communicates with one or more SmartServers using XMPP.
You can build, send, and receive XMPP packets from your application, or you can use an XMPP client
library to accelerate your development (for a list of client libraries, go to the XMPP Standards
Foundation Web site at
The SmartServer team uses Smack
which is also used in Apache projects. Other XMPP client
libraries should also work.
To demonstrate the SmartServer XMPP solution, this section describes how to configure the Pidgin
XMPP chat client, that we will later connect to the SmartServer via XMPP. In addition, this section
includes an example that shows how a client application can communicate with the SmartServer via
SOAP over XMPP.
XMPP Chat Client Example
To download, install, and configure Pidgin follow these steps:
1.
Go to the Pidgin Web site at
.
2.
Download and install the latest version of Pidgin.
3.
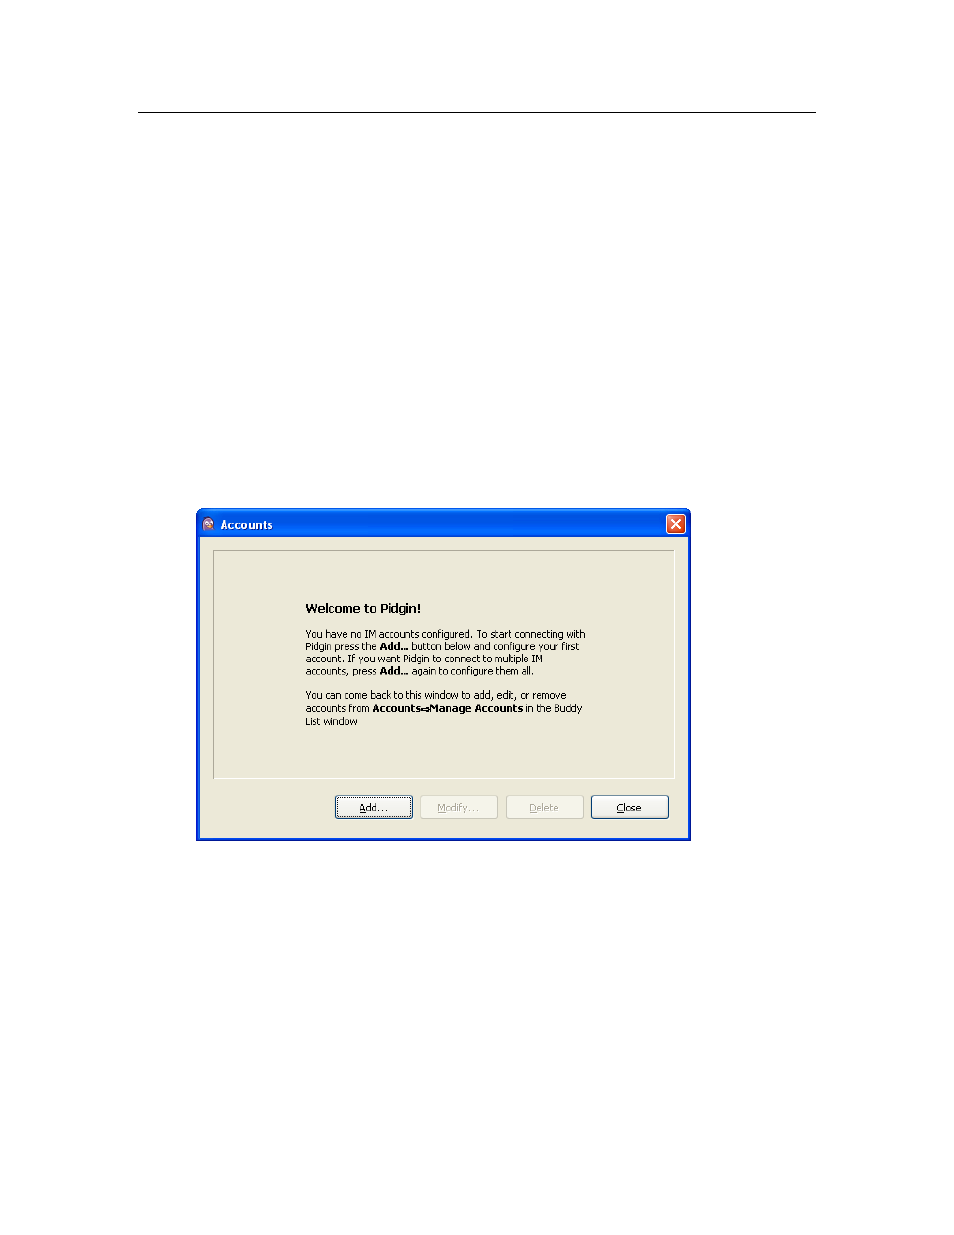
Start Pidgin. To do this, click Start, point to Programs, and then click Pidgin. The Accounts
dialog opens.
4.
Click Add. The Add Account dialog opens.
5.
Add an account to Pidgin following these steps:
a.
In the Protocol box, select XMPP.
b.
In the Username box, enter “pidgin” or some other descriptive name.
c.
In the Domain box, enter the ejabberd server domain that you specified in step 2b in the Step
1: Configuring an XMPP Server section. By default, this is the name of your computer.
d.
In the Resource box, enter “pidgin” or some other descriptive value that will be appended to
the IM messages.
e.
In the Password box, enter a password for the user name specified in step b.