7 storage settings – 3xLOGIC VISIX Camera User Manual
Page 63
User Manual|
VISIX Network Camera
10225 Westmoor Drive, Suite 300, Westminster, CO 80021 | www.3xlogic.com | (877) 3XLOGIC
63
7 Storage Settings
Before
you
start:
To
configure
record
settings,
please
make
sure
that
you
have
the
network
storage
device
within
the
network
or the SD card inserted in your camera.
7.1 Configuring NAS Settings
Before
you
start:
The
network
disk
should
be
available
within
the
network
and
properly
configured
to
store
the
recorded
files,
log files, etc.
Steps:
1) Add the network disk
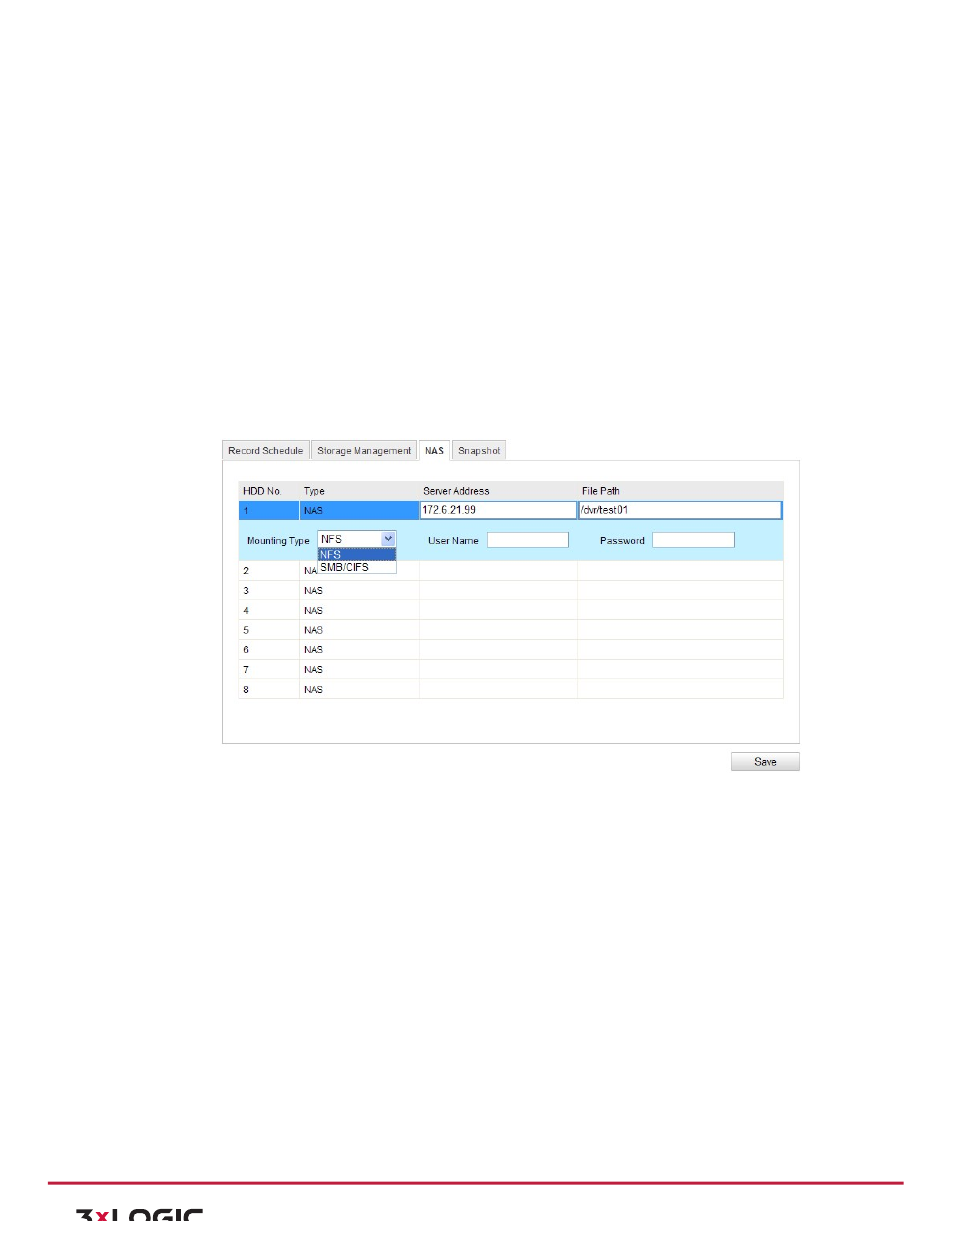
a. Enter the NAS (Network-‐Attached Storage) Settings interface:
Configuration > Advanced Configuration > Storage > NAS
Figure 7-‐1
Add Network Disk
b. Enter
the
IP
address
of
the
network
disk,
and
enter
the
file
path.
c. Select
the
mounting
type.
NFS
and
SMB/CIFS
are
selectable.
And
you
can
set
the
user
name and password to guarantee the security if SMB/CIFS is selected.
Note:
Please refer to the User Manual of NAS for creating the file path.
d. Click Save to add the network disk.
2) Initialize the added network disk.
a. Enter the HDD Settings interface (Advanced Configuration > Storage > Storage
Management),
in
which
you
can
view
the
capacity,
free
space,
status,
type
and
property
of
the
disk.