Installation instructions – Bryant 463AAC012BA User Manual
Page 9
Attention! The text in this document has been recognized automatically. To view the original document, you can use the "Original mode".
Installation Instructions
c
4. Assembly of the upper & lower channels to
e cabinet
A; " L" Shaped Top Channel: Install the T'i shaped top
channel to the cabinet as shown in
{Fig 6) using (4]i
1/4" screws
B “li" shaped Bottom Channel: Install the "U" shaded
bottom channel to the cabinet as shown In
(Fig 6)
using (4) 1/4” screws
1/4" Screw
"LTStiaped Chanrtel
Position (smaHer,
space to front)
5. Assembly of the side shutters
irtains) to the cabinet
Slide the shutters into the top and bottom
channels as shown in
{Fig. 7) The shutters are
identified {on each frame) as "left" or "right"
Attach the shutters to the cabinet using (4)
1/4" screws on each side
6. Installation of Mounting Brackets and First
sealing strip.
(Model
463AAC010BA and 463AAC012BA)
NOTE: Windows come in a
variety of different styles Therefore, it may be
necessary to modify or improve your particular
installation
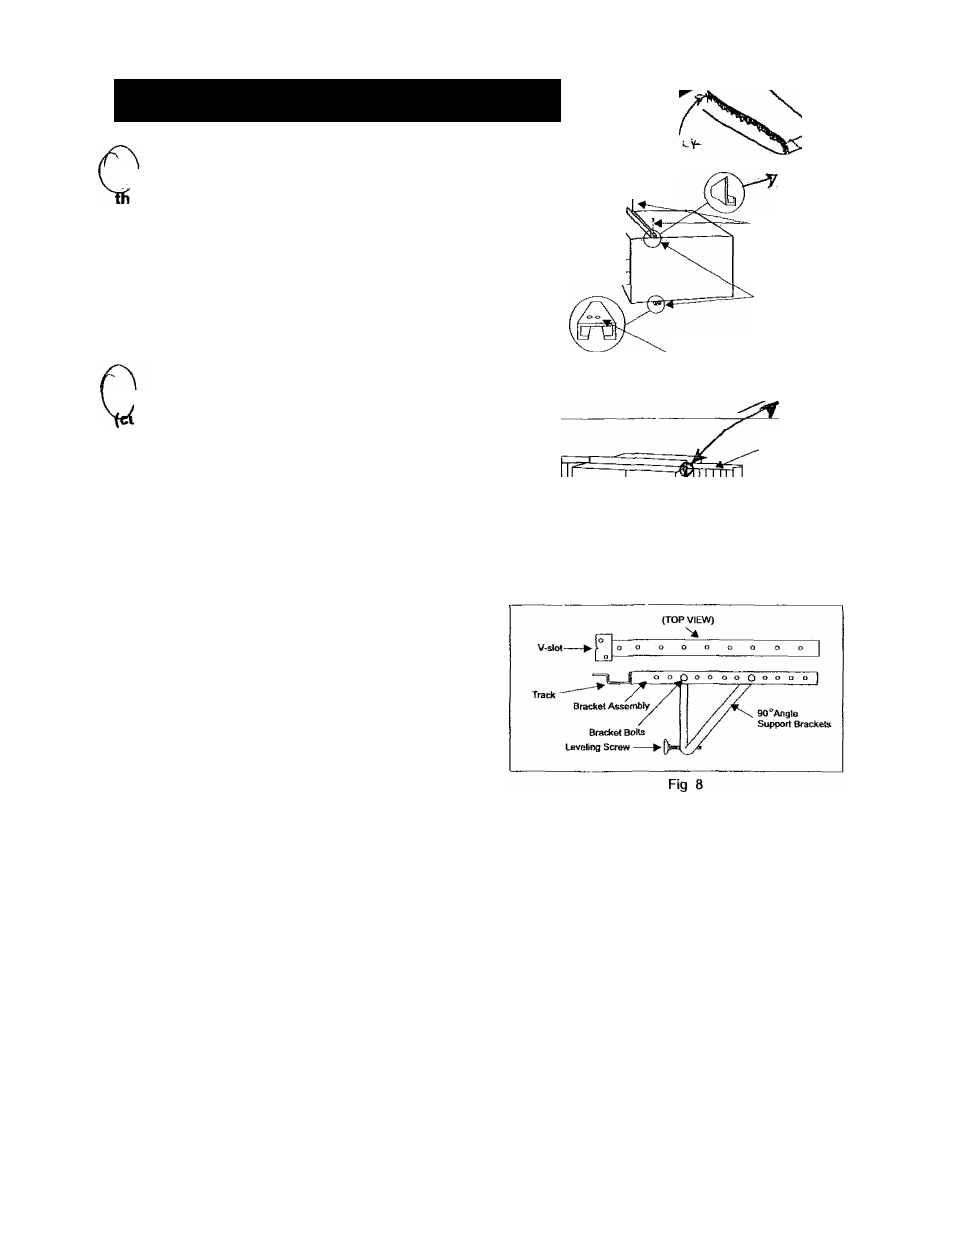
A Attach the bracket assembly to 90°angle support
brackets
{Fig 8) using (2) 1 1/2" bolts
(provided) per bracket Secure with the (2)
1/4" lock washers and (2) 1/4'*nuts. DO NOT
immediately tighten these bolts as it may be
necessary to adjust the depth of the bracket
assembly, depending on the depth of your window sill,
see
(Fig 9} Install the two leveling screws into the
90“support brackets Test the bracket assembly in the
window before cabinet installation If the leveling screws
are distanced too far away from the wall to provide
stability, it may be necessary for you to shim this area
with a solid piece of wood
See (Fig 10)
\
Fig
6
Shutter Frame
^
1/4* screw
- Right Shutter
Fig 7
(2) 3/4" screws per bracket
-------- ^
t
3/16' Maximum
Bracket Assembly
Levelting Screw
— Outer Wall Construction
Fig 9
(?
8