Please seek assistance for this procedure, Installation instructions – Bryant 463AAC012BA User Manual
Page 8
Attention! The text in this document has been recognized automatically. To view the original document, you can use the "Original mode".
Installation Instructions
2. Preparation to Rempye the
Air Conditioner Slide-Out Chassis
(M
o
6
b
\ 463AAC01 OB A)
A Remove the air inlet grille by sliding the grille
to the left
(Fig 1)
B Remove the air filter
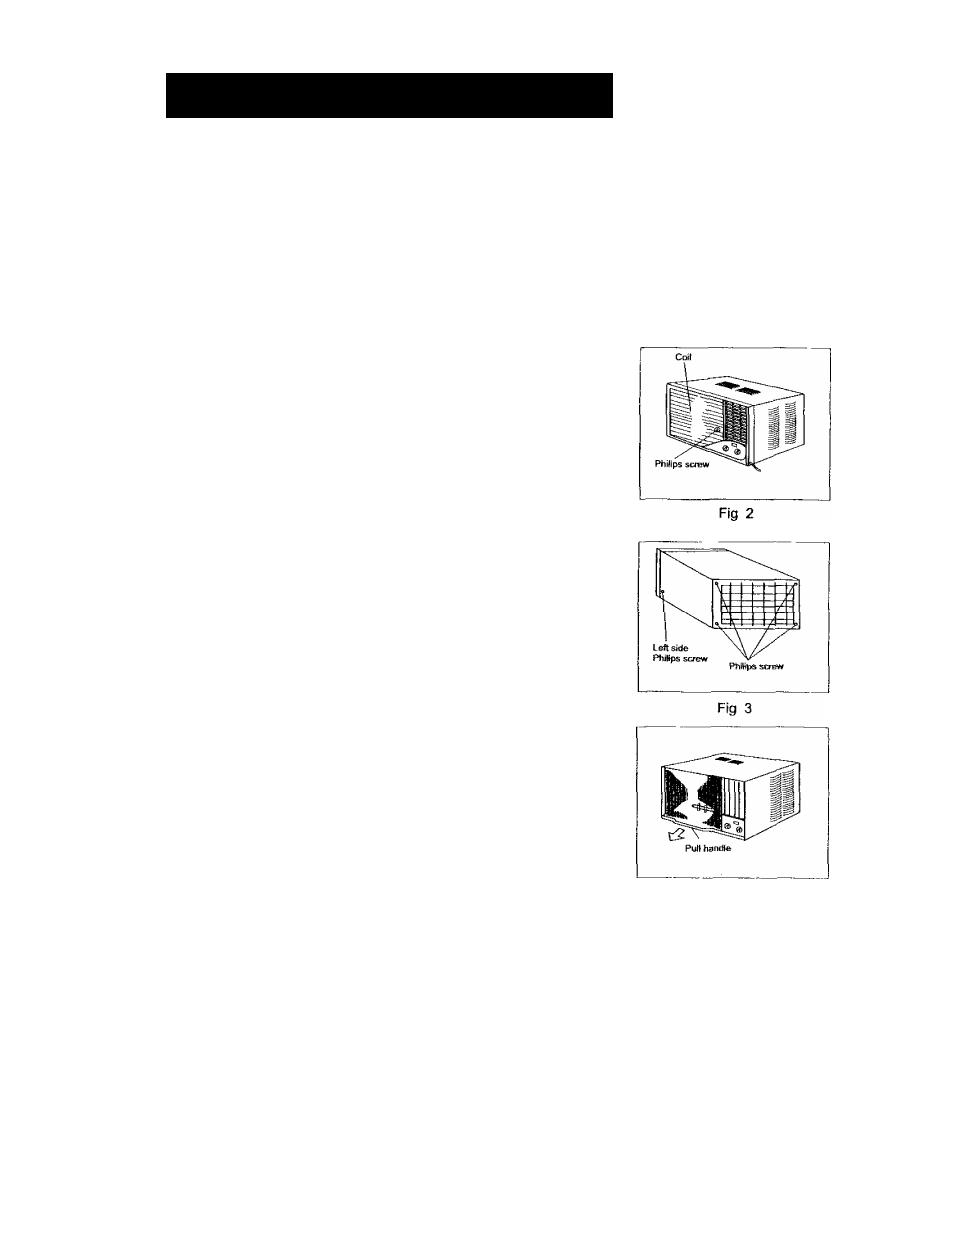
C Remove the Philips screw located next to the
air outlet
{Fig 2)
D Remove the front panel by grasping both sides
simultaneously and pulling
E Remove total of 6 Philips screws securing the
slide-out chassis There are (2) on each side
and (4) on the back of the cabinet
{Fig 3)
F Grasp the putt handle at the front of the
slide-out chassis and carefully slide the air
conditioner out of the cabinet
[Fig 4)
3 Preparation to Remove the
Air Conditioner Slide-Out Chassis
(Model 463AAC012BA)
A Remove total of 4 Philips screws securing
the chassis to the cabinet There are (2)
screws on each side The set of screws closest to the
front of the unit secure the front panel to the
cabinet The set of screws closest to the rear of
the unit secure the cabinet to the chassis
{Fig 5)
B Remove the front panel assembly from the
cabinet by gently pulling it
C Grasp the pui! handle at the front of the
slide-out chassis and carefully slide the
air conditioner out of the cabinet
{Fig 4)
NOTE Screws must be reinstalled upon
completion of the window installation to secure
the slide-out chassis.
Please seek assistance for this procedure
Fig 1
Fig 4
Right side
Philflps strews
Fig 5
- 7