Caution – Bolens 140-990A User Manual
Page 26
Attention! The text in this document has been recognized automatically. To view the original document, you can use the "Original mode".
Attaching the Rotary Tiller to the Tractor
Before attaching your rotary tiller to your trac
tor, be sure the rear wheels on the tractor are
all the way into the minimum wheel width.
Remove the draw bar assembly from the three
point hitch of your tractor by removing the two
cotter hairpins.
Adjust the tractor pull rods to 32V2" long. See
figure 43.
2
.
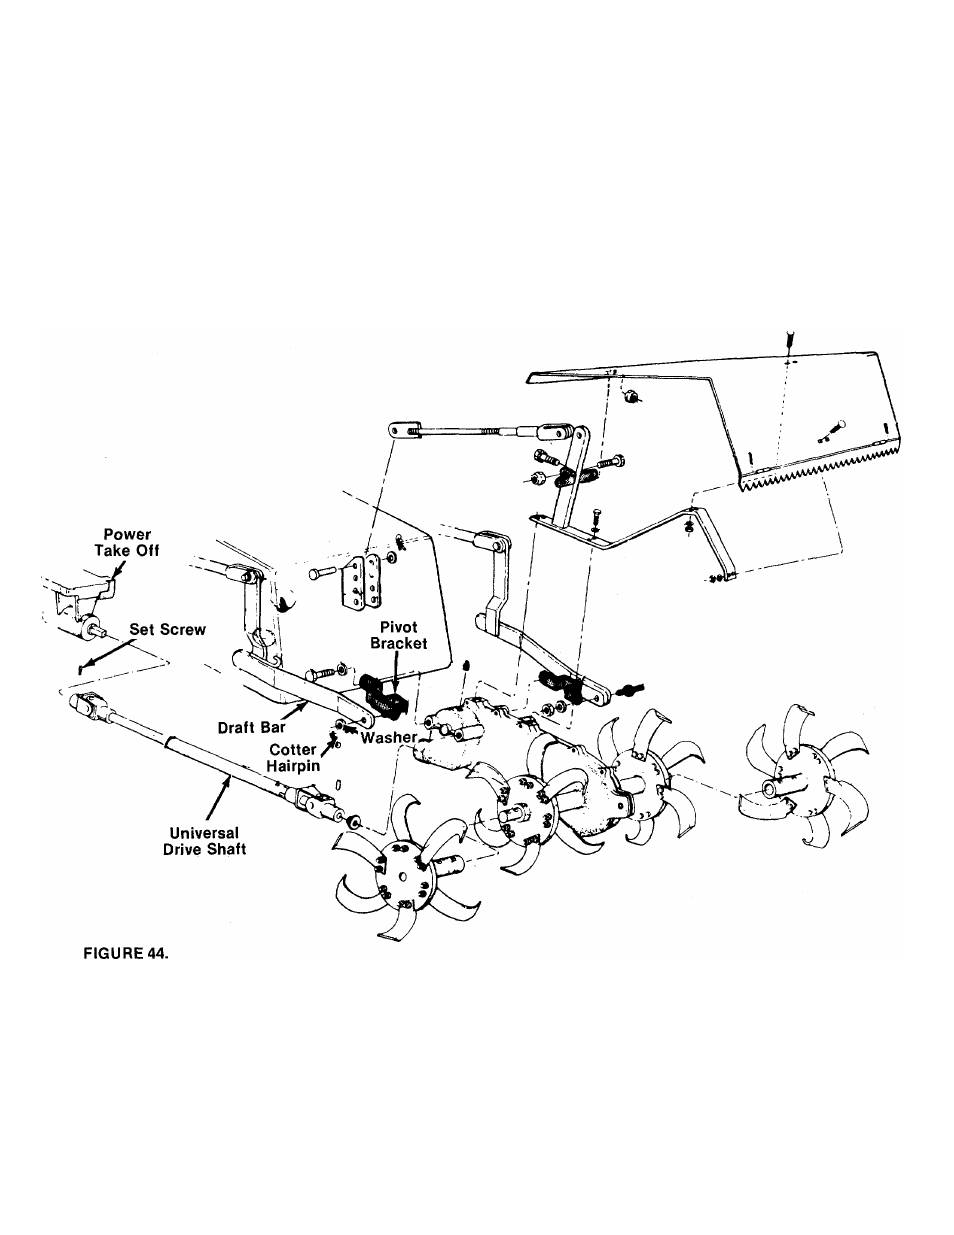
4. Place the rotary tiller behind the tractor in the
approximate position shown in figure 44.
5. Attach the universal drive shaft to the tractor
power take off. Tighten set screw. See figure
40.
6. Start the tractor engine and, using the
hydraulic lift lever, lower the draft bars until
they line up with the pivot brackets. Attach
with washers and cotter hairpins.
7. Be sure the mounting bracket on the rear trac
tor frame is mounted in the two lower holes.
8. Remove the tool tray on the rear of the tractor.
9. Adjust the clevis screw assembly to 12V4"
and attach the clevis end to the mast on the
tiller.
10. Attach the other end of the clevis screw
assembly in the second hole from the top of
the mounting bracket.
A
CAUTION
Before operating your tiller, slowly
raise the tiller with the hydraulic lift.
The universal drive shaft must NOT
touch the transaxle gear case or any
other part of the tractor. If it does,
adjust your pull rods and clevis
screw assembly until it clears.
26