Selecting the programmed equalization curve, Setting a new equalization curve manually, 1 press geq, followed by enter within 4 seconds – Aiwa NSX-A888 User Manual
Page 13: To cancel the selected mode, 3 press enter to let “geq high” show, Using the headphones, Sound adjustment during recording, Rock
Attention! The text in this document has been recognized automatically. To view the original document, you can use the "Original mode".
SELECTING THE PROGRAMMED
EQUALIZATION CURVE
This unit provides the following 5 different programmed
equalization curves.
ROCK:
Powerful sound emphasizing treble and bass
POP:
More presence in the vocals and midrange
LATIN:
Accented higher frequencies for latin music.
CLASSIC:
Enriched sound with heavy bass and fine treble.
JAZZ:
Accented lower frequencies for jazz-type music
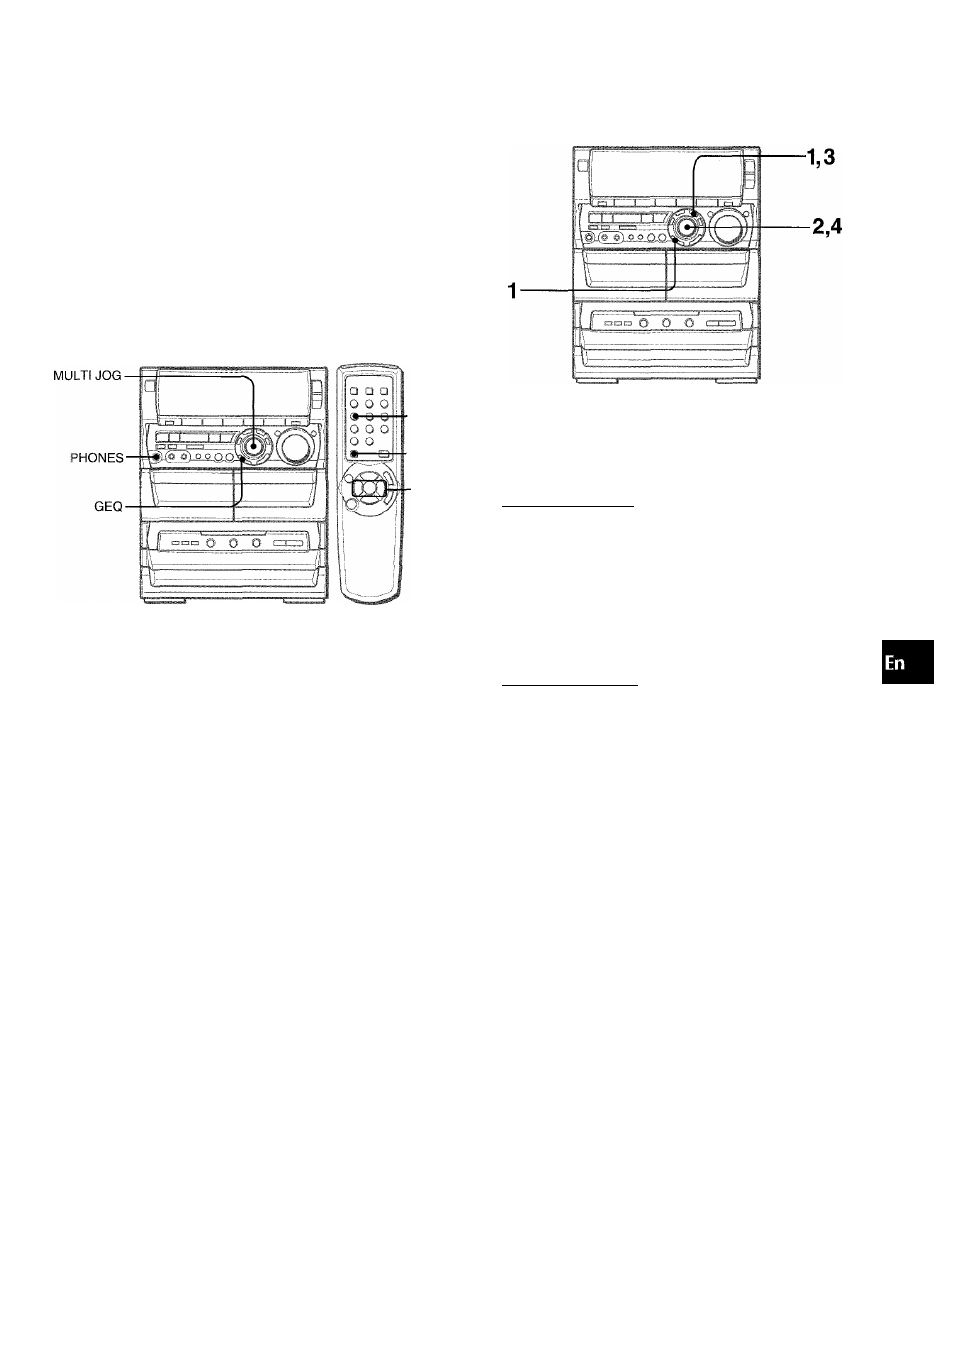
■GEQ
-SHIFT
SETTING A NEW EQUALIZATION CURVE
MANUALLY
The equalization curve can be customized to suit your preference.
1 Press GEQ, followed by ENTER within 4 seconds.
The display will be switched to read “GEQ LOW.”
2 Within 4 seconds, turn MULTi JOG to adjust the
levei of the iowest frequency.
Q
Z
3
o
(A
Press GEQ, and turn MULTI JOG to select one of the
programmed equalization curves within 4 seconds.
':
ROCK
“GRAPHIC EQUALIZER” appears and the GEQ mode is
displayed cyclically as follows.
R9CK POP LATIN ^ CLASSIC JAZZ -
'............... Programmed mode -............. '
► M5 --- ► M4 --- ► M3 ---- ► M2 ---- ► M1
'--------- Manual mode ------------ '
To display the current GEQ mode
Press
GEQ.
The current mode is displayed for 4 seconds.
To cancel the selected mode
Press
GEQ
twice.
“GEQ OFF” appears and “GRAPHIC EQUALIZER” disappears.
To select with the remote control
Press
GEQ
while pressing
SHIFT,
and within 4 seconds press
-♦«(or ►► repeatedly. The GEQ mode is displayed cyclically
as above.
3 Press ENTER to let “GEQ HIGH” show.
The highest level frequency indicator flashes for 4 seconds.
4 Within 4 seconds, turn MULTI JOG to adjust the
level of the highest frequency.
feK'ji
illiiiiil!
ipiiillgp
¡■li
The frequency level indicators between the lowest and the
highest are adjusted accordingly.
Using the headphones
Connect headphones to the
PHONES
jack with a standard stereo
plug
(06.3
mm,
'/4
inch).
No sound is output from the speakers while the headphones are
plugged in.
Sound adjustment during recording
The VOLUME control has no effect on recording. It only sets the
level feeding the speakers and headphones. Remember, however,
recording takes on the BEAT, AUTO SPICE/FILL IN, SPICE A/B
functions, as well as on the BBE function.
ENGLISH
13