Caution – Bolens 2182 User Manual
Page 23
Attention! The text in this document has been recognized automatically. To view the original document, you can use the "Original mode".
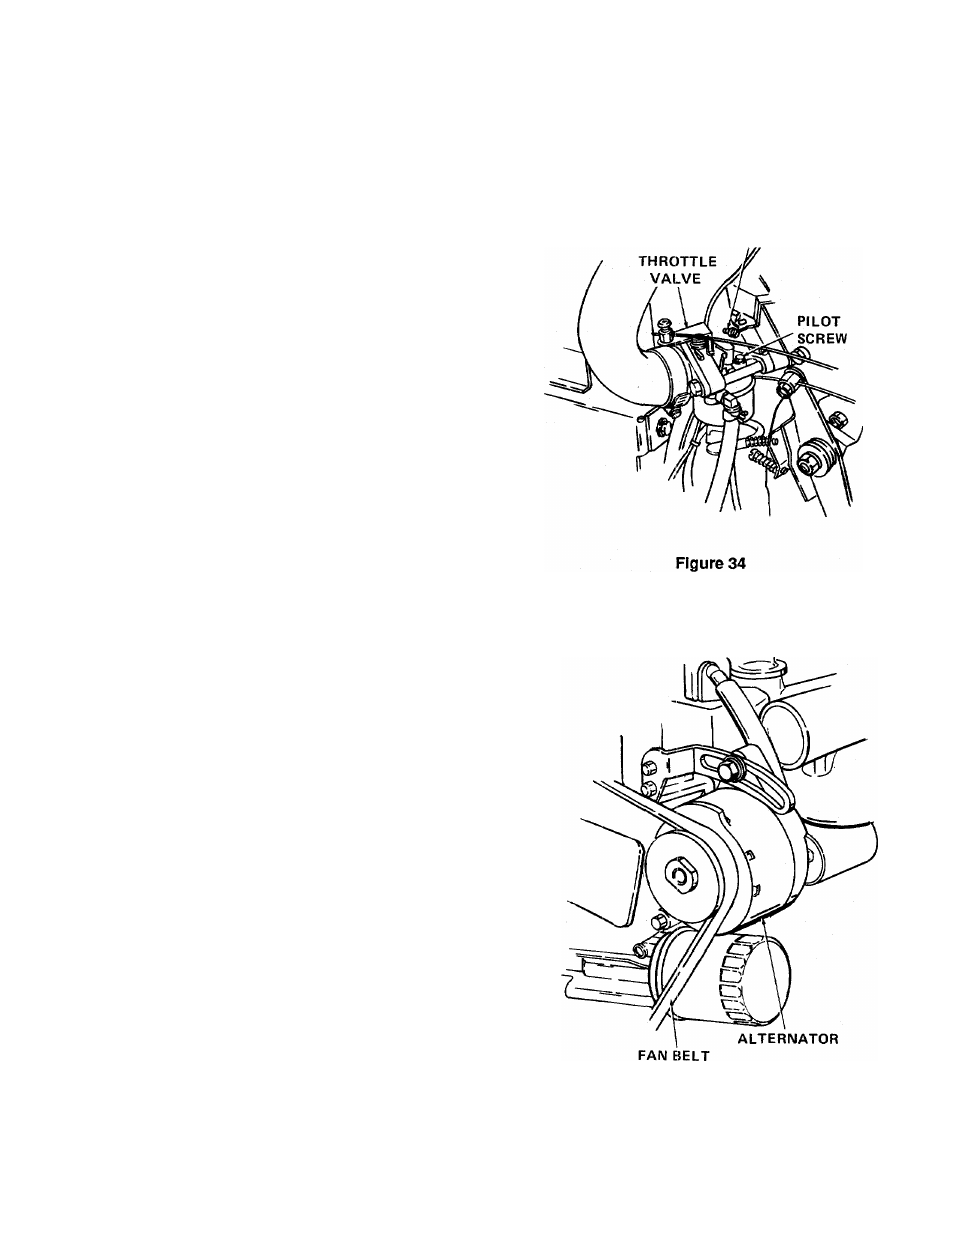
The carburetor is adjusted at the factory and under
normal operating conditions it will not require readjust
ing. However, if the engine does not operate properly,
what may appear to be a faulty carburetor adjustment
is in many cases a clogged air filter. This possibility
should be ruled out before attempting to readjust car
buretor. Refer to "MAINTENANCE" section in this
manual.
To prevent possible damage to the carburetor pilot
screw and throttle stopper adjusting screw, be very
careful when carburetor adjustments are made.
Improper adjustment of the carburetor may result in
engine damage.
FUEL SYSTEM
CHECKING AND ADJUSTMENT
Adjusting Carburetor (Idling)
1. Warm up the engine at a medium speed for 20 to
2
.
30 minutes, and then stop the engine.
Tighten the pilot screw of the carburetor com
pletely, and then loosen it by 1 to 1.5 turns. (See
Figure 34.)
A
CAUTION
3.
4.
5.
Do not tighten the pilot screw too much. The
taper may become stepped.
Start the engine, set the throttle control lever to
the lowest speed position, and then adjust the
engine speed with the throttle stopper adjust
ing screw of the carburetor in such a way the
engine maintains a lowest speed. (Adjust the
engine to the lowest speed but fast enough to
keep it running.)
Tighten or loosen the pilot screw to adjust the
engine to the highest speed. (The speed drops
when the screw is turned too much in either direc
tion.)
Screw in the throttle stopper adjusting screw
with the screw tip touching the throttle valve, until
the speed reaches approximately 1200 r.p.m.
FAN BELT
Fan Belt Tension and Damage
An improperly adjusted fan belt can cause engine
overheating. Push on the fan belt at the middle with a
finger, and check that it deflects about 0.4 in. (10 mm)
[at a load of 22.1 lb. (10 kg)]. Also check the belt for
cracks or tears.
Tension Adjustment
Loosen the two bolts holding the alternator, and adjust
until proper tension is obtained. Be sure to retighten
the nuts and bolts after adjustment. (See Figure 35.)
THROTTLE STOPPER
ADJUSTING SCREW
Figure 35
23