NordicTrack NTL14010.0 User Manual
Page 31
Attention! The text in this document has been recognized automatically. To view the original document, you can use the "Original mode".
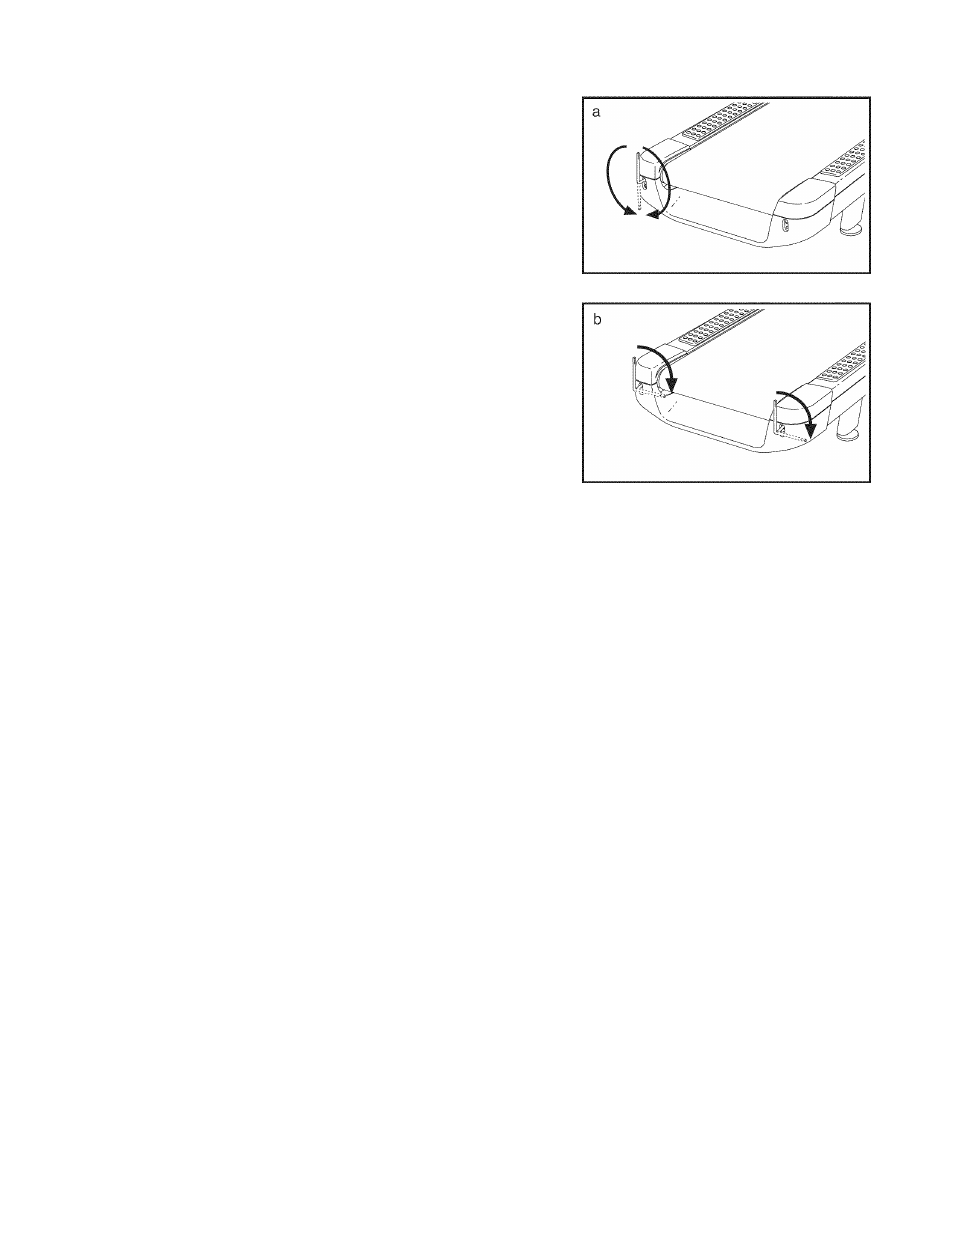
PROBLEM: The walking belt is off-center or slips when walked on
SOLUTION: a. If the walking belt is off-center, first remove the
key and UNPLUG THE POWER CORD. If the
walking belt has shifted to the left, use the hex
key to turn the left idler roller bolt clockwise 1/2 of
a turn; if the walking belt has shifted to the
right, turn the left idler roller bolt counterclockwise
1/2 of a turn. Be careful not to overtighten the
walking belt. Then, plug in the power cord, insert
the key, and run the treadmill for a few minutes.
Repeat until the walking belt is centered.
b. If the walking belt slips when walked on, first re
move the key and UNPLUG THE POWER CORD.
Using the hex key, turn both idler roller bolts clock
wise, 1 /4 of a turn. When the walking belt is cor
rectly tightened, you should be able to lift each
edge of the walking belt 2 to 3 in. (5 to 7 cm) off
the walking platform. Be careful to keep the walk
ing belt centered. Then, plug in the power cord, in
sert the key, and carefully walk on the treadmill for
a few minutes. Repeat until the walking belt is
properly tightened.
PROBLEM: The iFit Live mode does not function correctly
SOLUTION: a. If the iFit Live mode is not functioning correctly, make sure that the treadmill has the most current
firmware available (see step 8 on page 26).
PROBLEM: The treadmill will not connect to the wireless network
SOLUTION: a. Perform a network test (see step 6 on page 26).
b. Make sure the wireless settings on your console are correct (see step 2 on page 23).
c. Make sure the settings for your wireless network are correct.
d. If you still have questions, see the front cover of this manual.
PROBLEM: The buttons on the screen do not work correctly
SOLUTION: a. If the screen is not properly calibrated, it will be difficult to touch the correct buttons on the screen.
To calibrate the screen, see step 5 on page 25.
31